Time Behind the Camera

I like to say and I do believe, “There’s no better place to be than behind the viewfinder!”

If you enjoy photography, I think you will agree at least to on some level. Just to be able to spend time with my camera trying to capture the beauty of God’s wonderful and amazing creation is a pure joy for me. It is also one that I try real hard never to take for granted. I enjoy each and every moment I spend with my camera and the wildlife around me.

This week, try to find more time to spend behind your camera. Besides the thrill of being in the best place in all the world, you will also learn how to better use your camera and get better at the craft of photography. There is no doubt that spending more and more time behind the camera is helpful.

I will be behind my camera tomorrow. Will you?

Muddy Elk Antlers

The fall rut is always an exciting time filled with lots of action. This bull is lying down, but you can clearly see the signs of this exciting season just by looking at his antlers — they are coated with mud!

Bulls get themselves into a frenzy time after time during the mating season. Hormones are running rampant and the action can be almost non-stop at times. Even when things slow down you will hear the call of the bugle or see signs of the rut in a variety of ways.

I know the fall rut is a long way away, but I was going back through some archived photos for a project I’m working on and found this one. It was slightly cropped but nothing much else was done to this photograph. I do believe in getting things right in the camera to cut down on post-production time, which saves a lot of time and energy!

This is a great week for me as some neat photo opportunities are opening up for me. Spending time behind the viewfinder is not only the best place in the world to be, but it also helps to keep the photo passion going! Are you spending time behind your camera?

My book “How I Photograph the Pennsylvania Elk” is now available as an ebook!

How I Photograph the Pennsylvania Elk is a book I wrote to share my methods of how I photograph the beautiful Pennsylvania Elk. I don’t pretend to be an expert on the subject; I just wanted to share with others what works for me. I am blessed to have incredible mentors who shared with me and now I am sharing my photography passion in return.

Over the past 22 years I have spent time walking through the hills of Elk County near Benezette, PA. I own some property up on Winslow Hill and thoroughly enjoy every minute I get to spend up there! My photo passion has increased greatly over the last four years and some of my photographs appeared in a few newspapers and the Pennsylvania Game News. I also have postcards, matted prints, photo buttons, and printed copies of my book available for sale at the Elk Country Visitor Center.

Wildlife photography is like nothing else in the world to me and I can’t wait to be out in nature trying to capture the beauty of God’s incredible creation! In this book I share some of my favorite methods of finding the elk. Then I share some techniques to make quality photographs. I also go through the seasons of the elk and talk about how to brave the elements when photographing them. Photo equipment is mentioned, too. My favorite chapter is “Don’t Just Shoot the Bull,” and encourages the photographer to aim the camera toward the cows, calves, and spikes, too!

The new eBook version can be uploaded to an iPad, and iPhone, or your computer.

Check it out here: How I Photograph the Pennsylvania Elk

Photo Tip Tuesday – Move Your Feet

Photographers often hear the old adage, “move your feet” when the subject of getting closer to the subject emerges. This is not what I’m talking about today. When I say, “move your feet,” I’m talking about working the background of you image and moving left or right to get the best possible background for your photograph.

In this first time, you can see that the subject is clearly the base runner trying to get back to first base from a pick-off attempt by the pitcher. The baseball is in the image, which helps evoke the action of this shot. But there is a problem with the background — it’s distracting with the fans in the background. If I had taken just a few steps to the right, I could have eliminated this distracting background. Moving my feet would have helped to make this photograph better.

In this next image I was in a good position to eliminate the distracting background. It was actually worse — an electrical unit with a fence around it! But I was in a much better position and thereby eliminated the distracting background.

The next time you look through your viewfinder, stop for a moment. Look carefully at the background. Then move your feet to the left or to the right to get rid of any distracting backgrounds. Remember, move your feet!


Broken Beak

I am sure many birds show the wear and tear of daily living, but this Cardinal caught my attention with what looks to me like a bit of a broken beak!

We’ve been watching a pair of cardinals coming to our feeder over the past month and we enjoy seeing these red beauties. Their color is bright and brilliant!

But look at his beak. Doesn’t it look to be broken on his left side? At the very least it is well-worn from breaking open a lot of seeds.

Here’s another perspective. Look at that beak!

Winning Interviews

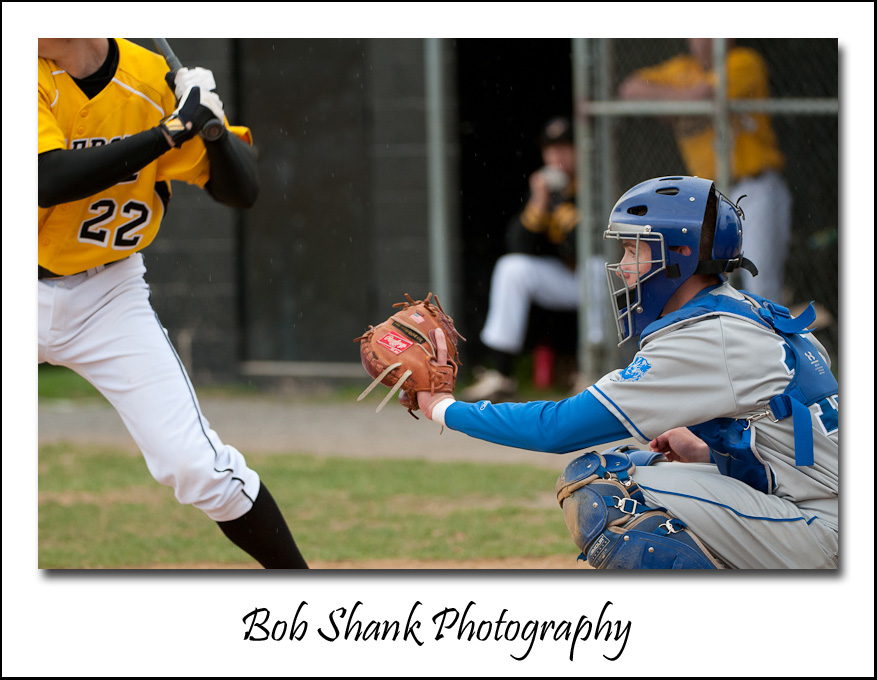
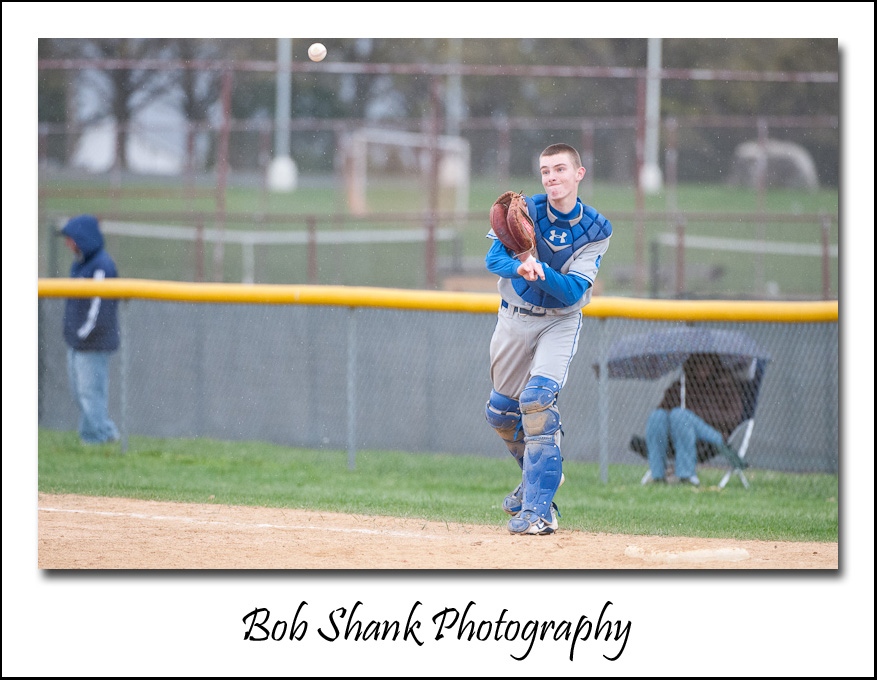
Pleasant Valley’s baseball team played a barn-burner against East Stroudsburg South this afternoon!

The game went back and forth until after 7 innings when the game was tied. Two extra innings were played and the score again went back and forth. It was an incredibly exciting game with lots of hits, two home runs, and much excitement!

In the end, PV came up to bat in the bottom of the ninth down by one run. They rallied to tie the score and then, with bases loaded, James Shank smoked a ball down toward third base. The fielder could not handle the hard hit and the winning run crossed home plate.

After the game was over, two Pleasant Valley players were interviewed by the local new station: Adrian Concepcion and James Shank. Victory is sweet any time, but that much sweeter when you share it with good teammates and when they try to make you laugh during an interview!

Photo Tip Tuesday – Camera Repairs


Last week my Nikon D300 camera body went down. The shutter release would flip the mirror out of the way but it wouldn’t always drop back into its proper position. To say it was frustrating is the understatement of the day! I tried shooing one baseball game but it was a disaster and I spent more time trying to figure out what was going on than shooting the game. Total bummer!

I took the camera body to my local camera shop and they said it would have to be sent into Nikon, which would take 4-6 weeks minimum. Since this is pretty much an every-day camera, I did not like this option. Fortunately, my brother who is in the photography business, too, recommended a camera repair shop. He said he had good experiences with them and their turnaround on repairs was quick. This seemed to be just what I was looking for!

I quick email to Perfect Image and they sent back a repair quote almost immediately. Nice. I took the camera to Perfect Image last Friday, which for me was a two-hour drive. Perfect Image is in Lancaster and they do ship, but I wanted my camera back quickly and didn’t want to wait for shipping. Wes, at Perfect Image, told me knew exactly what the problem was with my camera body and that he would get the repair done within the week. Nice again!

Well, in the early afternoon on Monday my cell phone rang. I saw the 717 area code and thought, “No way.” But sure enough, it was Wes and he said my repair was completed. I paused and then said, “Wait! Is today April 1st?” thinking this might be an April Fool’s joke! Wes assured me that no, it was April 2nd and that the repair was indeed completed. Unbelievable!

I drove down today to pick up my camera body and then visited my mom who lives nearby.

If you ever need any camera or lens repairs, do yourself a favor and consider Perfect Image. They are fast and very friendly. I highly recommend them and will be taking all my repair work to them in the future. And tell them you heard about them from my blog. I won’t get any kickbacks, but it is nice to know where their referrals are coming from. Check out their website and get free repair estimates at: http://www.perfectimagerepair.com/

Think about it: 4-6 weeks minimum verses a little over 24 business hours. There’s no comparison in my opinion!  And that’s today’s photo tip.

Fun with Collages

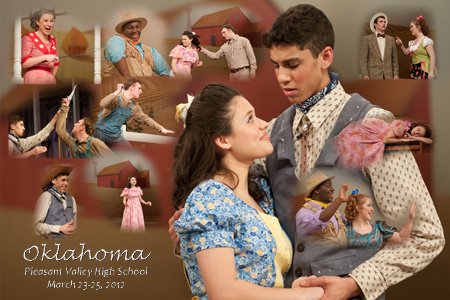
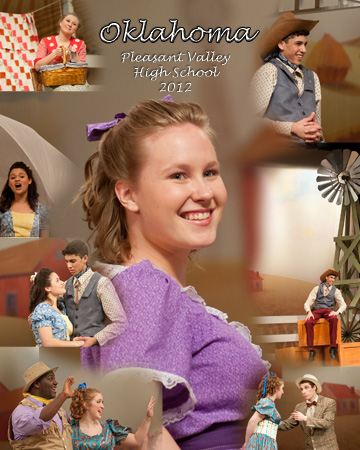
Yes, I confess; I am really having fun creating photo collages these days!

A combination of events contributed to this. One contributing factor is the photo shoots I’ve been fortunate to photograph this week. Pleasant Valley High School’s performance of Oklahoma and the baseball games are just two quick examples. Then, my brother, shared some tips on how to better create photo collages.

All this is helping the creative side of my photography interests and I have to say I am thoroughly enjoying this new-found challenge!

What do you think of this photo collage?

Adding Multiple Keywords in Adobe Lightroom


Do you ever have the need to add multiple keywords to the same photos? I do. For example, after a high school baseball game I want to enter the players jersey number and their full name to their photographs. I find it better to do it now because at the end of the season I make collages for the seniors. All I  have to do then is search for the player name and jersey number and I am good to go!

Through some trial and error, I found a great way to enter these specific keywords to all the photos after a game. This might not make much sense to those of you who don’t use Lightroom, but I am guessing that similar procedures can be used with most software applications.

Here is how I enter multiple keywords after a photo shoot.

Step #1
I apply universal keywords when importing the photos for the first time into Lightroom. “Team name”, “Opponent”, “Away” or “Home”, and “Baseball” are all keywords that get entered into photograph as it is being imported.

Step #2
I create a collection of the keepers from the game. This prevents me from having to enter keywords into photos that I will never use. Time is precious, so saving time is essential!

Step #3
I created a filter that checks each photo for the keywords I am about to enter. This filter is pretty big because it looks for each jersey number and player name on the entire team. I initially created this filter to check to see if any photos from a game were left keywordless. But now I found another great feature by using this filter. I apply the filter just before I add keywords, so when I add keywords to a photo it “disappears” from the screen because it no longer matches that filter. So, as I add keywords, only those without the appropriate keywords are left on my screen. This is pretty slick in my opinion and helps me tremendously!

Step #4
I use the Painter Tool in the Grid view to add my keywords. I click on the Painter Tool and then enter the player’s jersey number, then a comma, and then the player’s name. Then I go through the grid of photos and paint on the photo that matches these keywords. As I do, they “disappear” because they no longer match the filter I selected.

Step #5
I skip over photos with multiple players in them because more than one jersey number and player name will be applied to these photos. I use the Painter Tool again if there are a good number of photos with the same two players in them, or I simply add the appropriate keywords to the remaining photos one-by-one.

When I’m all done, there are not photos left on the screen because they’ve been filtered out and I know that each photograph has been keyworded to my specifications.

It works wonderfully for me!

Capturing the Event Photographically

Our daughter, Lydia, performed in Oklahoma at Pleasant Valley High School this weekend. The musical was fantastic and extremely well done!

Photographing theater is a definite challenge but one that I do enjoy. I attempt to capture the facial expressions and the passion of the actors. The lighting presents one of the biggest challenges both because of the lack of light and the requirement to shoot without flash. But I am learning to work with the light available in the different venues. An f-stop of f/2.8 does help, so my preferred lens is the 70-200mm. This provides enough reach to create images of the actors that are full frame or thereabouts.

Now capturing the action with my camera is only part of the equation. What do I do with these photographs? Well, lately, I’ve been honing my skills in Photoshop to create collages. These custom collages try to capture the story and emotion of the musical. The collage here is my first attempt to capture Oklahoma from Friday’s performance.

What do you think of this collage? Does it tell a story? Does it capture the action of the musical?