Getting closer to the subject is the name of the game in wildlife photography. Yes, sometimes we do want to include the surrounding environment and habitat that wildlife call their home, but getting closer will help a lot in separating an animal from a busy background. Also, there’s nothing worse than taking a photo and then sharing it with someone who asks, “what’s that spot over there?” Your reply, “Oh, that’s the bull elk I wanted you to see.” That little spot just doesn’t do any justice to your photography.
So, how do you get closer to your subject?
First, buying telephoto lenses is an important priority for any budding wildlife photographer. Long glass helps us get closer while maintaining a safe distance from the animals we are photographing. In fact, some National Parks even have a minimum viewing distance that requires longer lenses if we are going to fill the frame with our subject at this safe distance. 300mm is probably the shortest option for a good wildlife photography lens, but I have used the 70-200mm with a 1.4x teleconverter with larger mammals like the elk here in Pennsylvania. Yes, long glass is important and very helpful, but it is not the end all solution every time, especially with smaller subjects.

This brings us to the main topic of this photo tip-how to physically get closer to our subjects. You might assume that stalking or sneaking up on a subject will work. Sometimes yes and sometimes no; but typically no. Animals live longer lives because they are wary of danger, especially human danger. Big racks don’t get big by animals being careless.
Rather than sneaking up on them, I try to be as calm and unassuming as possible. I take my first photos from a distance if I haven’t photographed this species before just to get an image of this new subject. Then I see if the animal “accepts” me. What I mean by this is noting whether the animal goes back to its routine behavior of grazing or whatever. If not, I don’t move. I look in the opposite direction, remaining as calm as possible and pretending that I don’t care that the animal is even there. Usually, the animal realizes there is no imminent danger and does accept me as a non-threatening photographer rather than a hunter. Of course, this is much easier where hunting is not allowed, which makes Wildlife Refuges and National Parks prime locations for wildlife photography.
I did grow up in the farmlands of Lancaster County and was groomed to be a hunter at the age of twelve. I still hunt white-tailed deer and black bear, but I spend much more time out in the woods with my Nikon camera gear. The skills I learned from hunting are sometimes helpful, such as locating sign of animals and observing their behavior and patterns. With camera in hand, I don’t want my subject to think I am hunting it. I want the animal to realize I won’t hurt it and just want to photograph it. Sometimes talking calmly to an animal can help, too.

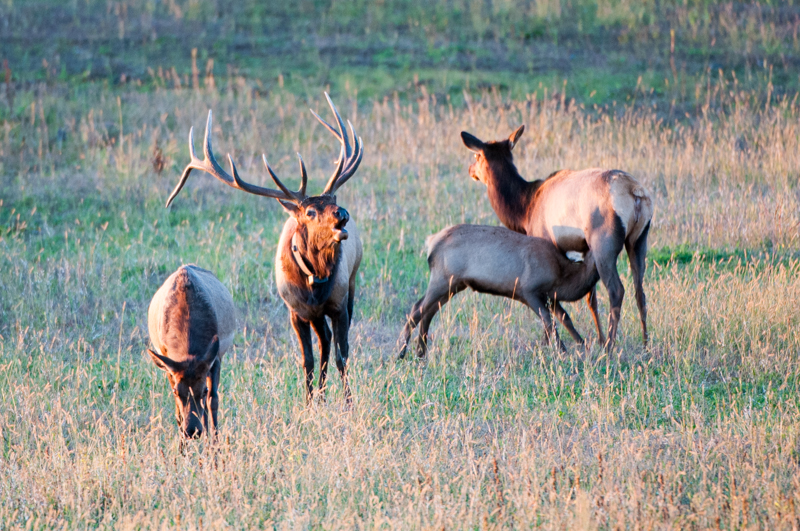
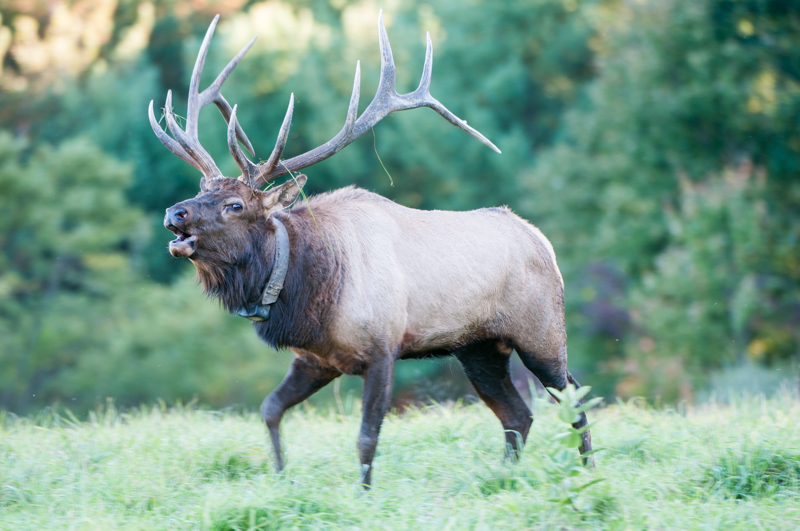
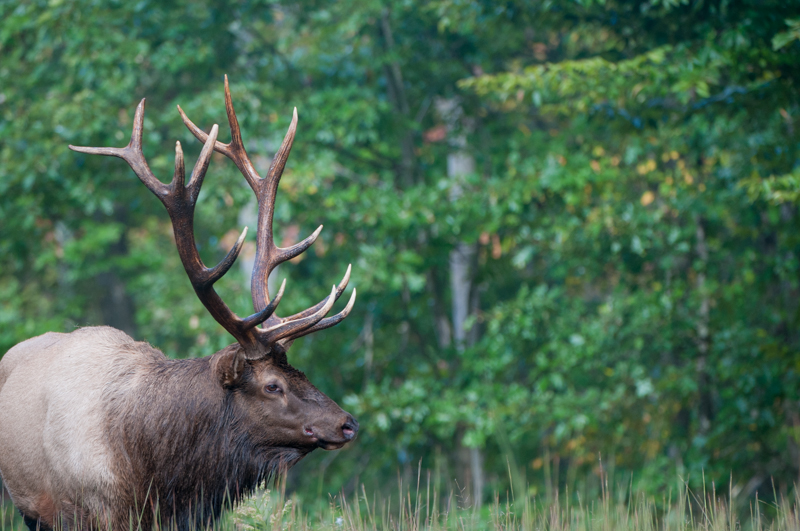
Another highly successful method I employ is to situate myself in a place to where the animal is headed and will eventually walk through as it meanders on its way. This is exactly the method we used with this Bull you see in these four photographs. I happened to see him not far off the road and I could see he was heading in a specific direction. I reasoned that he was going to eventually come by a specific location, so we moved to that location and waited for him to arrive. This was relatively easy because we could see him in the open some of the time, but this method works well even when you cannot see the subject if you know the well-traveled trails and habits of the animal you are photographing.
Still another method I have used this past year is to use a portable blind. My son and I got closer to wild white-tailed deer in Elk County using this method. We both got into the blind well before sunset and just waited. Again, we knew this particular field was often frequented by deer in the evening. We picked our favorite location on this field, set up the blind, and waited. Sure enough, eight deer came out into the field and we had the chance to observe them up close and personal.
This is the goal-getting closer to our subjects. It is not always easy but it is well worth the effort! Oh yeah, one more tip on this subject-patience is key. By nature, I am not the most patient person in the world, but I can sit or stand at a spot for a very, very long period of time waiting to capture wildlife photographs. Most people take a few photos and move on. Don’t. Take your time and “work” the subject. Observe and photograph what the animal is doing. Try to capture facial expressions and body movements. Think about what close-up photographs might work with this subject. Focus your attention on separate parts of the animal’s body and create some art. Is there a tail wagging to chase away a flea? Are there long eyelashes on the eye of this animal? What are the position of the legs and feet? Will they be in a more photographic position if you wait for the animal to move five more feet? What about the background; could you wait for the animal to move in front of a better and more attractive background? Wait, watch, observe, and photograph!
With these tips you should be able to get closer.

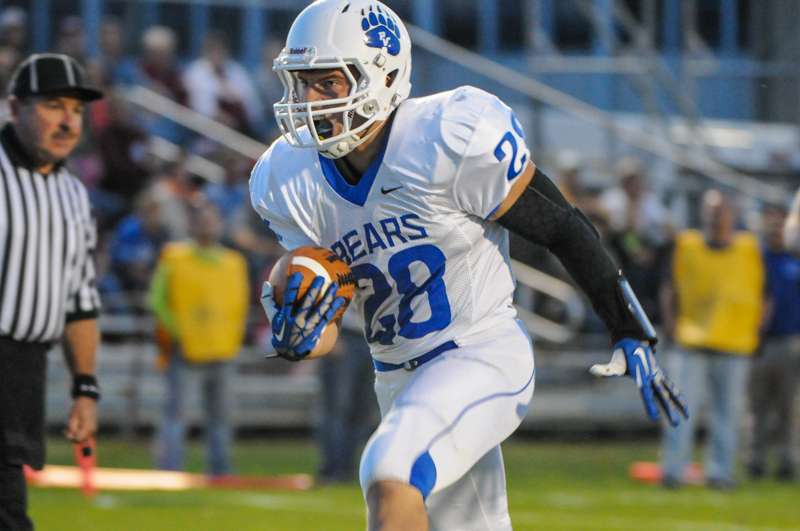 This photograph of running back, Austyn Borre, was taken at a Friday night football game when the Bears traveled to Lehighton to take on the Indians. He is obviously running with the ball and his eyes are focused upfield. However, there is at least one distracting element in this photo–yep, the referee. His body is cut off weirdly and having him in the photograph really doesn’t add any good quality.
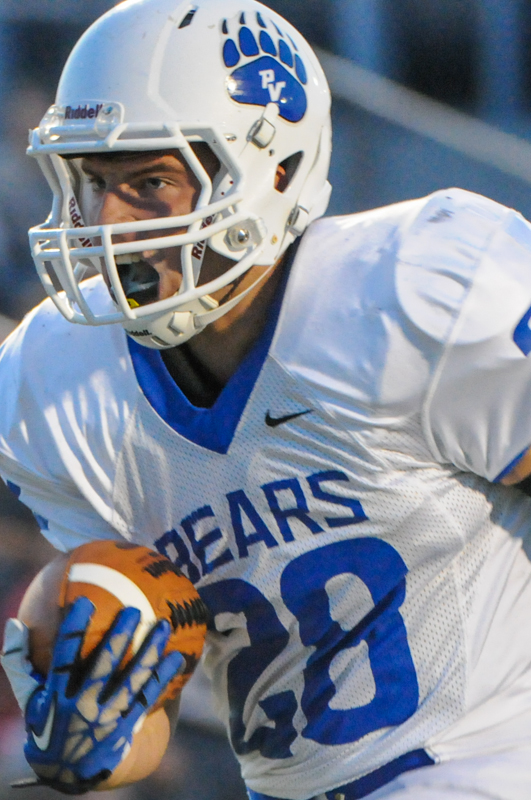 Notice I switched the crop to a vertical format instead of landscape. This much tighter crop was needed to avoid cutting off limbs at improper places. The rule of thumb here is to never cut off a persons limb at a joint, like an elbow, write, shoulder, knee, or hip.