Wet Elk – Don’t be Afraid of the Rain!

I traveled to the beautiful mountains of Elk County after making sure that Hurricane Sandy didn’t do any damage around our home. My departure was only delayed a day and a half due to the hurricane. The forecast didn’t look promising, but I ventured out anyway. I was blessed with one of the best elk photography trips and I didn’t mind getting a little wet. Elk were everywhere, I’m assuming since the worst of the storm already passed. The conditions were excellent for wet elk photography!

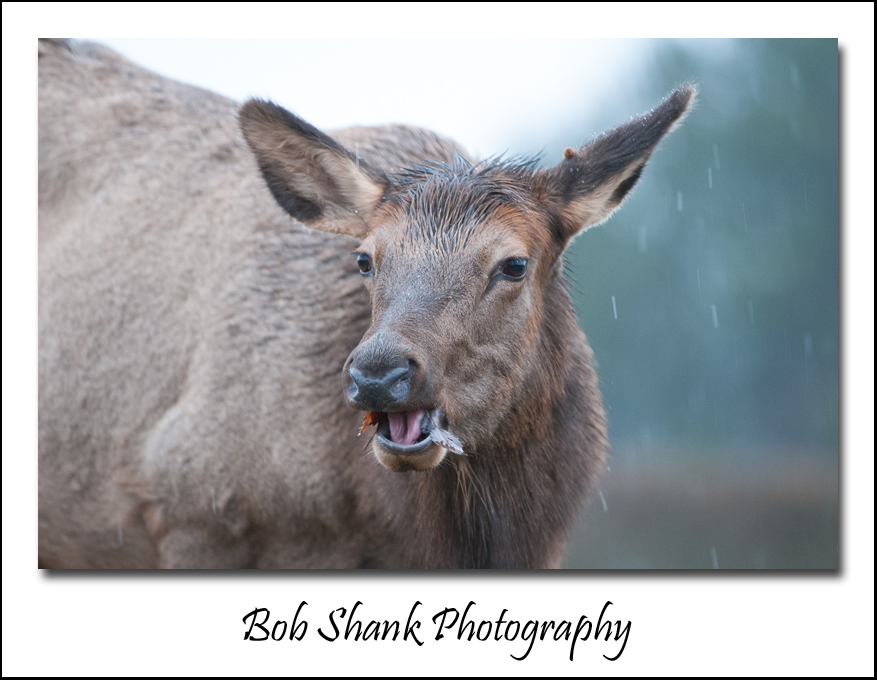
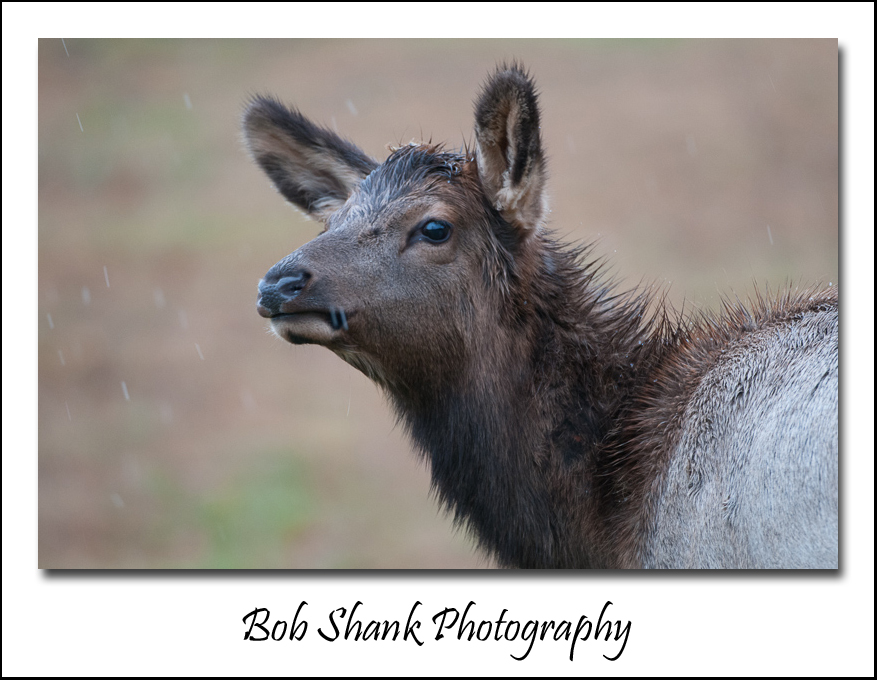
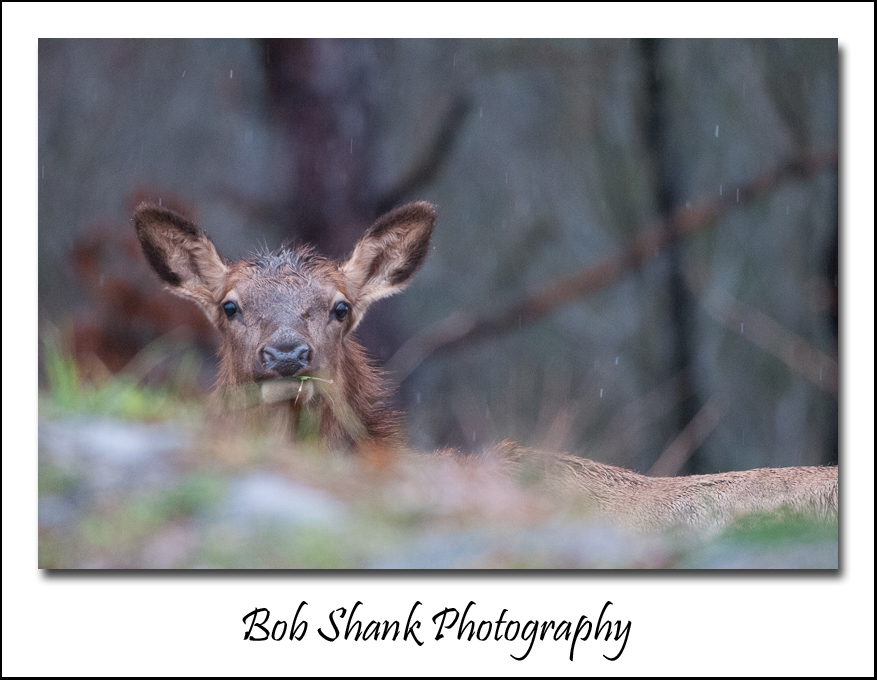
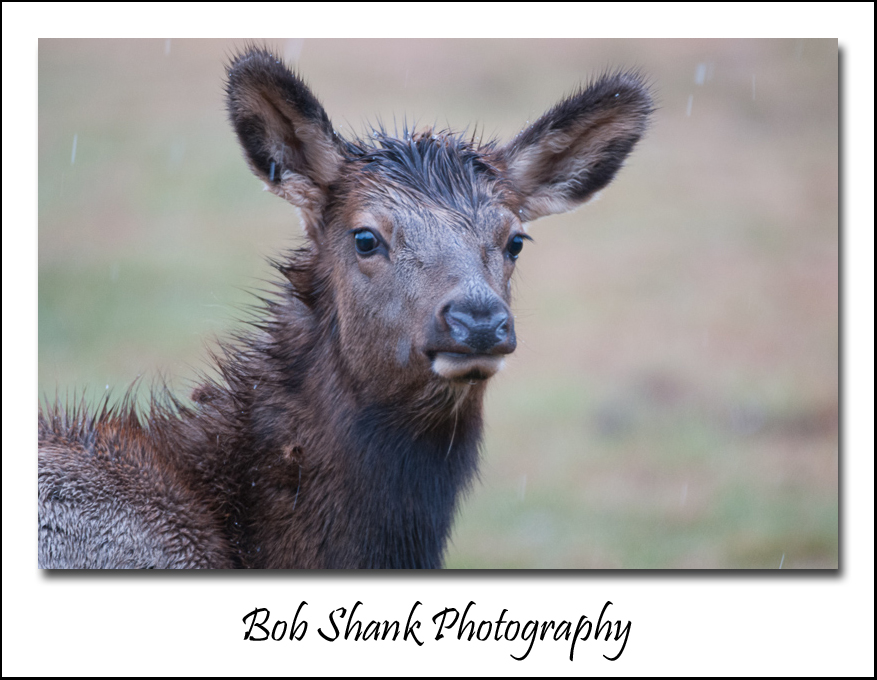
You can see some of the rain drops in most of these photographs when you click on and enlarge the photographs. I think it makes a cool effect. I also like the detail of the wet fur that comes out in these photographs. Many photographers prefer fair or sunny weather. Snow and rain can potentially damage our electronic camera gear, too, so many wildlife photographers simply don’t venture out into the wild on rainy or snowy days. I think this is a big mistake. The Nikon gear that I own is weather sealed. The manufacturer says so, but I’ve also tested this out in some severe conditions on my own. Recently, I had to walk about a mile in a heavy rain with my tripod, camera, and lens riding over my shoulder. Everything was soaked when I got back to camp! I dabbed the excess water off my gear with a towel and then allowed it to all dry out slowly. The result was some interesting and different photographs and gear that was ready and workable without any damage.

This photo (above) is a case in point of what I’m talking about with the wet weather wildlife. Just look at the detail in the forehead of this cow? You can also see the raindrops come down alongside her. And the fact that she has a mouthful of nature-food adds some action to this photograph. Rainy weather does require wide open apertures and oftentimes higher ISOs. Some photos will be unusable, but the effort is definitely worth it to me!

Don’t let a little rain hinder your spirit. Grab your camera gear and get out there anyway! Wear good, warm rain gear and you’ll be able to stay out longer. After all, the wildlife do not seem to mind the wet weather and they present perfect subjects if you take the time and energy to be out there with them!

Awesome Light!

Last week I had about an hour left of daylight and decided to take advantage of it. I was not sure if I would even see any wildlife since I was heading back out so late into the evening, but I thought I had nothing to lose so I went for it. And did it ever pay off!

Light is required in photography or else we will not be able to create an image. “Photo” is light, so “photography” is the study of light. We all know how to properly expose for an image. This is one of the basic standards in our toolkit as photographers. However, there are certain types of light that can make an image stand out above all the rest. Utilizing the light in this way will help us advance as wildlife photographers.

Moose Peterson is the one who I am learning this from. I read his book, “Captured,” which explains how to use light in great depth. I also enjoy reading Moose’s quarterly magazine, “BT Journal.” Hearing Moose explain his perspective on light and then seeing his images are enough to whet the appetite of any striving wildlife photographer, of which I am one. So I am paying attention to this teaching and trying to incorporate it into more of my wildlife photos.

I remember learning from Lennie Rue III, and Len Rue, Jr. in a workshop that capturing the highlight in an animals eye is very helpful in making a photograph. The viewer’s eye is first drawn to the brightest and lightest part of a photo. So if you catch the highlight in the eye it makes the animal almost come to life in the photo. This requires noting where the sun is shining and in which direction.

Fortunately, on this particular evening, I saw rays of sunlight being cast into the field in wide streaks. Once I saw this awesome light, I moved into the right location to take advantage of these light rays.


Noticing the light and getting into proper position is only part of the battle in capturing the light in photographs. The next step is to set up the camera correctly to replicate digitally what we are seeing with our eyes. I was shooting in Aperture Priority and had -1/3 exposure compensation dialed in but it wasn’t quite enough. Another half-stop made the elk pop a bit more and helped highlight some of the detail in the elk hides. This adjustment also helped to downplay the background slightly.

All-in-all I really like the results I got on this short hour of remaining daylight. Watch the light around you and especially on your subjects. Every once in a while the light will be awesome!

Amazing Encounter in Elk Country Pennsylvania – Part 2

So the elk were on full alert and now I was, too!

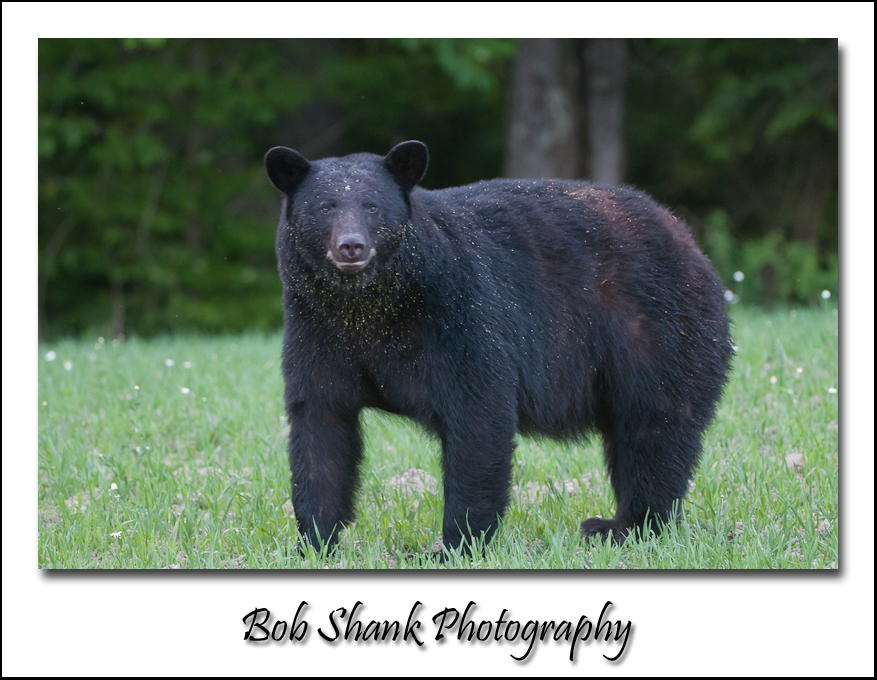
A black bear was coming my way–directly toward me!

 
Call me stupid, but I thought it was pretty neat that this bear was walking straight toward me. I remember another day when I had Lydia  and James with me in my favorite field near our camp. We were enjoying my most favorite spot when a black bear came out of the woods below us and was headed straight in our direction. Little Lydia looked at me and asked, “Daddy, shouldn’t we be afraid?” “No,” I replied, “black bears are more scared of us than we are of them.” About that time a four-wheeler came up the dirt road, illegally I might add, and scared off the bear and that was that.
This time, I was alone in the middle of a field, with a black bear coming straight toward me but much, much closer! Still, I thought it was cool. After all, isn’t this a wildlife photographer’s dream come true to see and photograph a black bear in the wild up close like this? I even talked to the bear, as I do with most of the wildlife I photograph. I wasn’t sure it heard me though because it kept coming in my direction.
Just look at those claws! This was most certainly a dream come true for me. I’ve seen several black bears in my day and even photographed one fairly close before. But that one had an ear tag and was on a dumpster, literally. That will be a story for another blog post on another day. This bear was just coming through the field and it appeared to have already ravaged a tree or something with the telltale signs of white tree splinters all over its fur and even on its head. This bear simply seemed to be out for an evening stroll. However, he was coming closer and closer and straight at me!
Then it turned broadside to me and I thought okay, this is good. I’ll keep clicking off photographs of this special encounter. Just look at this bear, I thought to myself. It’s beautiful!
On another evening in this same field, my son, James, and I saw a sow and three little cubs. That was quite a sight and an awesome father/son moment, too!
Then all of a sudden I noticed my flash card was full. So I had to make the switch to put in a new, fresh card. I’ve done this countless times before and it’s really no big deal. Even with a black bear standing in the field with me, I was reloading pretty calmly when the bear started coming toward me again–closer and closer! Now, I will readily admit, my heart began to beat a little faster and my mind went into full gear. I suddenly realized that at this distance and my with my location in the middle of that field, I was a sitting duck with no escape plan! Dumb! Would this now be a fatal mistake?
This was now turning into a serious dilemma so I did what any seasoned wildlife photography would do–I yelled! Yep, I yelled, not quite at the top of my lungs but loud enough that this time the bear heard me. I think I scared the bear at least as half as much as I was scared, and it turned around on a dime and began to run back in the direction it came.
 The bear trotted off directly away from me and I kept clicking photos. It was a beautiful and amazing sight. It then turned to follow the edge of the field and was headed in a direction where I figured it was going to cross the road ahead of me. So I quickly moved down the road to get into a better position to click a few more photos. By now my fear had subsided and I knew I was safe. The bear was just about to cross the road when it looked back at me as if to say, “Goodbye.”
 Then the bear trotted across the road.
 Just look at those rear paw pads. Aren’t they beautiful?
The show wasn’t over yet. Not at all. The bear then went to a tree, seemed to study it carefully and then looked in my direction again.
Then it stood up on its hind legs and rubbed its back against the tree. I think it was indicating in no uncertain terms that this was his territory and not mine! I just wish I was on the other side of that tree to see his face when he did this!
Then he trotted off into the woods to cross the stream below. The elk were looking on, a bit more relaxed now, but still attentively.
And with that, the amazing encounter was over. Wow! What an incredible experience!
In hindsight, I believe I did the right thing when I yelled at the bear in the moment I was exchanging the flash card in my camera. I didn’t want the bear to stumble right up on me and be completely surprised or things could have gotten much more serious. Also, please note that I had a 200-400mm lens on my camera and I was maxed out most of the time at 400mm during this encounter. I in no way want to encourage any of you readers to try to get so close to a wild animal. Having and using the right equipment is a must for wildlife photography. As a matter of fact, I saved up for 3 1/2 years for this big lens and it is paying off in tremendous ways already. I would never have stayed in my position with a shorter lens. My experience with the wild animals of Pennsylvania and the information I learned from studying them, matched with paying close attention to the experiences of others, helped me make mostly good decisions in this encounter. In fact, I might have panicked a little too soon when I yelled because in reality it wasn’t really all that close to me. The zoom lens just makes it look that way. Nevertheless, respect for these wild animals is prudent and must be followed at all times.
I took a few more photos of the elk who remained in the field, but as the light was beginning to wane, I placed the tripod over my shoulder and walked back out of the field with a huge smile on my face. This is what the Pennsylvania Wilds have to offer for those who are patient and lucky enough to experience an amazing encounter like this. I was blessed to see and photograph a Pennsylvania Black Bear! What an amazing encounter in Elk Country Pennsylvania!
My book “How I Photograph the Pennsylvania Elk” is now available as an ebook!

How I Photograph the Pennsylvania Elk is a book I wrote to share my methods of how I photograph the beautiful Pennsylvania Elk. I don’t pretend to be an expert on the subject; I just wanted to share with others what works for me. I am blessed to have incredible mentors who shared with me and now I am sharing my photography passion in return.

Over the past 22 years I have spent time walking through the hills of Elk County near Benezette, PA. I own some property up on Winslow Hill and thoroughly enjoy every minute I get to spend up there! My photo passion has increased greatly over the last four years and some of my photographs appeared in a few newspapers and the Pennsylvania Game News. I also have postcards, matted prints, photo buttons, and printed copies of my book available for sale at the Elk Country Visitor Center.

Wildlife photography is like nothing else in the world to me and I can’t wait to be out in nature trying to capture the beauty of God’s incredible creation! In this book I share some of my favorite methods of finding the elk. Then I share some techniques to make quality photographs. I also go through the seasons of the elk and talk about how to brave the elements when photographing them. Photo equipment is mentioned, too. My favorite chapter is “Don’t Just Shoot the Bull,” and encourages the photographer to aim the camera toward the cows, calves, and spikes, too!

The new eBook version can be uploaded to an iPad, and iPhone, or your computer.

Check it out here: How I Photograph the Pennsylvania Elk

Porcupine

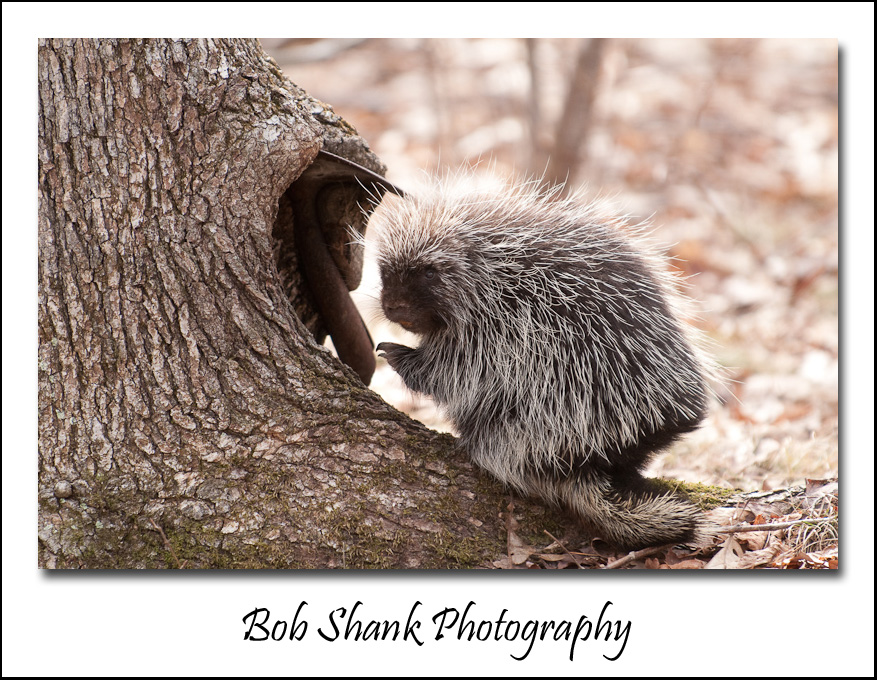
My son and I came across this porcupine several years ago. I don’t know what it is about this prickly animals, but I like them!

This particular image is not one of my all-time favorites, but it was good enough to make into iStockPhoto and it has sold several times. I guess that proves I don’t always have the best eye for such things. We actually photographed this porky for quite a while until he grew tired of all the attention and climbed up a tree. It was lots of fun to chronicle this sighting with our cameras. We had plenty to talk about for several days after this encounter!

If you look closely, you will see that the hole in this tree was created by a shovel head that is the back side of this tree. This created a nice place of protection for the porcupine.

These creatures might be prickly but I think they are cute!

Sunlit Cow Elk

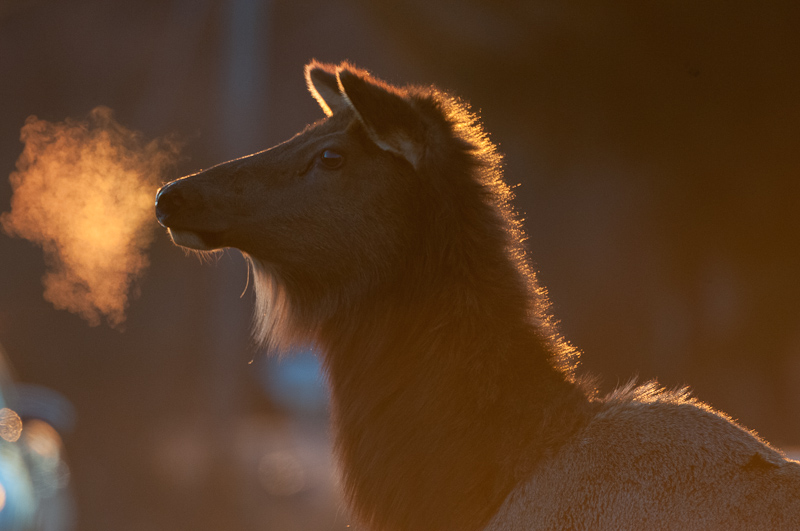
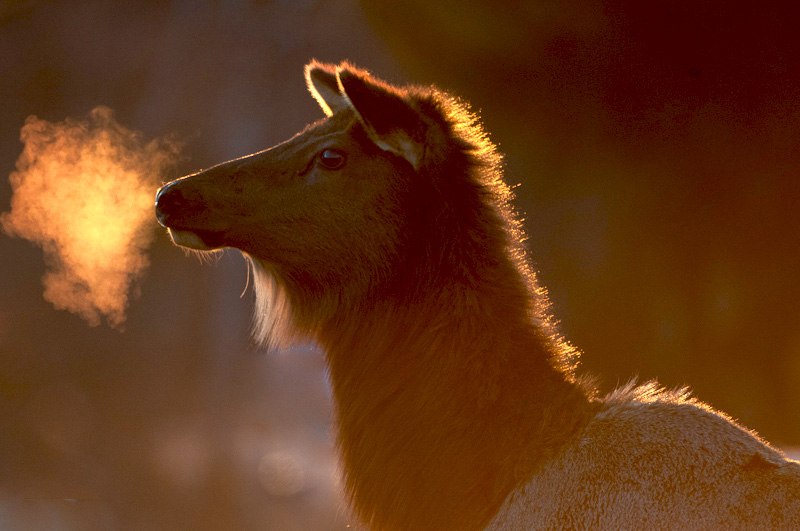
On a recent photo excursion to Elk County, Pennsylvania to photograph the elk, I captured an interesting photo of a cow. The setting sun was behind this cow so a silhouette was in my thinking. However, the warm sun rays provided enough light to illuminate the visible breath coming out of this elk’s mouth. It was a chilly evening and the condensation of this cow’s breath was visible in the light.

When I returned home, I knew I wanted to use this photograph if at all possible. But the problems were many-fold. There was some nasty sun glare from the sunlight hitting the lens. I thought maybe I could do a little touch-up in Photoshop and was hoping to be able to salvage this photograph in some usable form. I am not sure I succeeded quite yet. However, I thought I would share both a before photo and an after photo to let you see what I’ve accomplished so far. I still have a ways to go.

Do you think this photograph is usable or am I wasting my time?

Before: 


After:

Photo Tip Tuesday – Getting Closer

Getting closer to the subject is the name of the game in wildlife photography. Yes, sometimes we do want to include the surrounding environment and habitat that wildlife call their home, but getting closer will help a lot in separating an animal from a busy background. Also, there’s nothing worse than taking a photo and then sharing it with someone who asks, “what’s that spot over there?” Your reply, “Oh, that’s the bull elk I wanted you to see.” That little spot just doesn’t do any justice to your photography.

So, how do you get closer to your subject?

First, buying telephoto lenses is an important priority for any budding wildlife photographer. Long glass helps us get closer while maintaining a safe distance from the animals we are photographing. In fact, some National Parks even have a minimum viewing distance that requires longer lenses if we are going to fill the frame with our subject at this safe distance. 300mm is probably the shortest option for a good wildlife photography lens, but I have used the 70-200mm with a 1.4x teleconverter with larger mammals like the elk here in Pennsylvania. Yes, long glass is important and very helpful, but it is not the end all solution every time, especially with smaller subjects.

This brings us to the main topic of this photo tip-how to physically get closer to our subjects. You might assume that stalking or sneaking up on a subject will work. Sometimes yes and sometimes no; but typically no. Animals live longer lives because they are wary of danger, especially human danger. Big racks don’t get big by animals being careless.

Rather than sneaking up on them, I try to be as calm and unassuming as possible. I take my first photos from a distance if I haven’t photographed this species before just to get an image of this new subject. Then I see if the animal “accepts” me. What I mean by this is noting whether the animal goes back to its routine behavior of grazing or whatever. If not, I don’t move. I look in the opposite direction, remaining as calm as possible and pretending that I don’t care that the animal is even there. Usually, the animal realizes there is no imminent danger and does accept me as a non-threatening photographer rather than a hunter. Of course, this is much easier where hunting is not allowed, which makes Wildlife Refuges and National Parks prime locations for wildlife photography.

I did grow up in the farmlands of Lancaster County and was groomed to be a hunter at the age of twelve. I still hunt white-tailed deer and black bear, but I spend much more time out in the woods with my Nikon camera gear. The skills I learned from hunting are sometimes helpful, such as locating sign of animals and observing their behavior and patterns. With camera in hand, I don’t want my subject to think I am hunting it. I want the animal to realize I won’t hurt it and just want to photograph it. Sometimes talking calmly to an animal can help, too.

Another highly successful method I employ is to situate myself in a place to where the animal is headed and will eventually walk through as it meanders on its way. This is exactly the method we used with this Bull you see in these four photographs. I happened to see him not far off the road and I could see he was heading in a specific direction. I reasoned that he was going to eventually come by a specific location, so we moved to that location and waited for him to arrive. This was relatively easy because we could see him in the open some of the time, but this method works well even when you cannot see the subject if  you know the well-traveled trails and habits of the animal you are photographing.

Still another method I have used this past year is to use a portable blind. My son and I got closer to wild white-tailed deer in Elk County using this method. We both got into the blind well before sunset and just waited. Again, we knew this particular field was often frequented by deer in the evening. We picked our favorite location on this field, set up the blind, and waited. Sure enough, eight deer came out into the field and we had the chance to observe them up close and personal.

This is the goal-getting closer to our subjects. It is not always easy but it is well worth the effort! Oh yeah, one more tip on this subject-patience is key. By nature, I am not the most patient person in the world, but I can sit or stand at a spot for a very, very long period of time waiting to capture wildlife photographs. Most people take a few photos and move on. Don’t. Take your time and “work” the subject. Observe and photograph what the animal is doing. Try to capture facial expressions and body movements. Think about what close-up photographs might work with this subject. Focus your attention on separate parts of the animal’s body and create some art. Is there a tail wagging to chase away a flea? Are there long eyelashes on the eye of this animal? What are the position of the legs and feet? Will they be in a more photographic position if you wait for the animal to move five more feet? What about the background; could you wait for the animal to move in front of a better and more attractive background? Wait, watch, observe, and photograph!

With these tips you should be able to get closer.

Bugling in an Unusual Pose

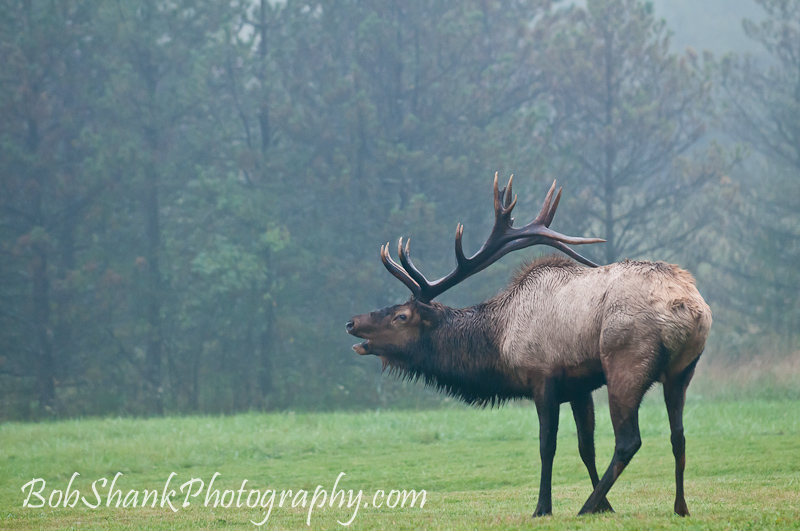
This bull is bugling in the fall rut as many bulls do, but I was struck by his somewhat unusual pose in this photograph.

His back legs are spread out slightly, which created an interesting angle in his left rear leg. The bugling posture is typical, with antlers tilted backward. I am not sure exactly what it is about this photograph that I like, but I do like it. Do you?

Capturing the Fight

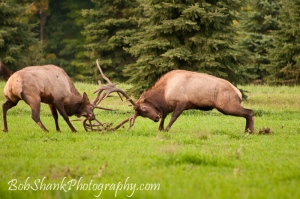
Capturing a classic battle like this with a camera often is frustrating to me. I never seem to be at the right place at the right time. Or the light is fading too quickly, or the fog is too thick for a good photograph. These fight scenes seem to be elusive to me, which can be very frustrating at times.

This photo captures some of the energy in this fight. It all started, as usual, with much posturing from each bull. This is typical and I could just tell that these two bulls were going to go at it. Then, in an instant, they ran toward each other and crashed their antlers together with an ear-piercing jolt! This is what the fall elk rut is all about!

I like the way these two bulls are working hard to dominate the other. I also really like the dirt flying in the air, both between their antlers and behind the right bull’s hind feet. This helps to portray the massive power and energy present in a real honest-to-goodness fight between two mature bulls. Many elk viewers think they are witnessing a fight when in reality they are simply witnessing what is called sparring, which is much tamer and mild compared to a full-blown fight. A lot of us think these fights last longer than they actually do, too. I went back and looked at the metadata from my photographs to determine the starting and ending time of this fight. It only lasted 2 minutes and 20 seconds. This might not seem long to us, but I’m guessing it seems like an eternity for these two bulls!

The one problem with photographing this bull-fight was that we were losing light in a hurry. I had to bump up the ISO to 800 on my D300. I am finding that I do get some decent photographs with this setting and the noise is at a reasonable level, which is good. Then use the noise reduction feature in Lightroom to clean it up. The newer cameras and software have come a long way in recent years in dealing with noise. I found out this week that I can get usable photographs even at an ISO setting of 1600.

This was the only real fight I witnessed this and it was a powerful one. I hope my photographs do a reasonably decent job of portraying the fierce energy present in these fights between two bulls. It sure is something to see!


My Wildlife Portfolio

The elk rut is on and the feeling of fall is in the air!

I will soon be heading to the mountains to photograph the majestic elk of Pennsylvania and I can’t wait! This is definitely my most favorite time of year! So, in an effort to remain patient while still getting excited about being out in the wild with my camera, I decided to update my wildlife portfolio. I also submitted a few of my photographs to a couple of magazines. I wanted to make sure my portfolio was up to date for them as well.

I always debate with myself on the best way to present photographs in an online portfolio. I like the images to be seen right away, but not everyone can use the flash technology of some galleries. Thumbnails can be clicked and enlarged, but they don’t have the pop of seeing an image in a larger size. The other problem is the time it sometimes takes to load a group of images. I also like to be able to use the right arrow on my keypad to move through a series of photos, but sometimes this option is not available. As you can see, finding a way to best present a portfolio consists of many options!

I am sharing two links to two different versions of my wildlife portfolio here. If you have the time, please check them out, compare them, and see which one you think is better. Then let me know. I am looking for input here because I’m not really sure which is the best way to present my portfolio online. Thanks!

Wildlife Portfolio version 1

Wildlife Portfolio version 2