The Importance of Backups

Don’t do what I do… do what I say! I know, I sound like a dad here. But it’s true. I like being out at a game on location rather than behind a computer. The problem is all the photos I previously captured are sitting right there on a hard drive. The problem? Hard drives fail. Sooner or later it’s gonna happen. It happened to me last week. I prefer to be out shooting a game but my backup strategy was not sufficient.

Thankfully, I have a Drobo, which is an array of four hard drives, so when the one failed I just had to replace it with a new one. That was what I thought until I did this and another drive in the array started to show a red light, too! My first reaction was sheer panic, thinking my whole array and over 450,000 photos were now in serious risk of being lost. Holy cow!

A reset of  the Drobo was called for and resolved the quirky issue. However, it sure made me think long and hard about the quality of my backup procedures. I am still thinking about it and am making definite actions to be sure my backup protocol is as foolproof as possible. Losing photos is not something I want to experience. Yep, I am sitting behind a computer now. It is not my favorite place to be but it is important for my backup plan to be successful.

Here is what I am implementing in my backup strategy. First, as I have in the past, I upload photos from my cameras to my MacBook Pro and a SanDisk external SSD. Then, when I get back to the office, I will copy the folder of photos onto two external drives that are mirrored to one another. Then I will copy the photos to my Drobo. This will provide three backups, which is highly recommended. I then reformat the SanDisk SSD to reuse. As time moves forward and the mirrored drives become full, I will move one of them offsite in case of fire or theft.

My file naming procedure is different from most photographers I talk to who just use the year and date for their shoots. I prefer an abbreviation as a prefix and the date in this format: YYMMDD. So a football folder looks like this: FB171104 and a Women’s Soccer like this: WS171104. Then each photo is a sequenced number behind the same filename scheme. My reasoning for this is that I can locate all the folders and photos from the same sport at a quick glance. I do not remember what I did on a specific date let alone which sport was being played that day. The date is important but not the most important to me. This file naming sequence has worked for me for over a decade.

My 16TB Drobo will soon be maxed out. I am preparing for this by getting ready to purchase a 24TB G-Tech Raid. My Drobo has worked well, but it is not the fastest drive to work with in my opinion. I am pleased with its redundancy but am willing to try something new and better. The G-tech seems like the next step for me.

Are you backing up adequately? Can you find the files you need when you need them? Are they safe and secure?
Winter Projects

Winter is hanging on with ferocity here in the Poconos of northeast Pennsylvania. The sun is shinning nicely today but we were in single digits last night and there is still a lot of snow around!

This makes me think of all the photo projects I should be doing while the weather is cold. One, for example, is tidying up my external hard drives. I originally used two different external hard drives to store my digital photographs. Then I bought a Drobo since it redundantly backs everything up and is so easy to use. The Drobo is just plug and play–plug a new or bigger hard drive in and start storing and backing up photos. It’s sweet!

The problem was that my external drives now contain many duplicate files as well as some new photos that need to be migrated over to the Drobo. I did this on my first external drive to be able to back up my broken laptop and restore on my new laptop. That was a 500 GB drive. Now I have a 1 TB drive to work through. I started last night and it is slow going. This is definitely a winter project!

I hope to be done fairly soon so I can gain some much needed space on my one drive and then use the other exclusively for backing up my new MacBook Pro. There is always something to do!

End of Year Madness!

Well, we are just about ready to say goodbye to 2010 and hello to 2011. Can you believe it?

Looking back over the past year, I have assembled some great photographic memories. Some are recorded for posterity in digital format, some of which you can see on my website. Other memories are etched in my mind and consists of terrific shots missed or great people I’ve met over the past year. 2010 has been a photographic blast for me!

In this end-of-season madness, I find myself doing some things that are important. I just upgraded my old wireless network router to a 300Mbps N Gigabit router. The main problem I was having on my network were IP address conflicts and slow speeds. I hope the new router will rectify these annoying problems. Upgrading equipment is important. I still have about 500 GB of empty space on my Drobo, so  an additional hard drive is on the short order list. I am still working on the Photoshop CS5 learning curve, which is pretty steep and will take me some time but will be well worth the effort.

All photo print orders have been fulfilled and it was a good year for me. I continue to learn the ins and outs of the photo business, which is exhilarating for me. Sometimes I stumble and fall, but most people are patient and a complete pleasure to work with. I am learning to streamline the process and am now able to offer more product services than a year ago.

And, of course, I continue to take time behind the viewfinder–my most favorite place to be these days, especially outdoors on a wildlife or sports shoot. Moments spent with the camera are “precious and few” to quote an old song.

I am excited to discover what the New Year will reveal for me photographically. I am looking forward to new opportunities and new learning!

Yes, 2010 was a great year, but I believe 2011 is going to be even better!


Finding Lost Files

I’ve never had the experience of having my kids getting lost and separated from me. I am sure that is an alarming feeling to say the least. But just this week I did experience that pit in my stomach when I wanted to find one of my favorite photos. It was lost! I searched and searched but could not find that lost file.

Part of my problem is that I have two computers, two external hard drives, and a Drobo. I can easily find all of my recent photos, especially those shot since I purchased my Drobo. Previous photos are harder for me to locate sometimes and this week was a prime example. Which drive could the file be on? Which date was the photo taken?

I typically had named my photo files with a date in this format: “2010-09-09.” Then eventually I added the event or location to the end of the file. For example: “2010-09-09 Elk County.” This naming scheme still caused some problems for me because what if I knew a photo was taken in Elk County but couldn’t remember which date it was taken? This was my exact problem this week. I knew the photo was taken in Elk County, but I could not remember exactly when I took the photo or even which year it was taken. Most recently I changed my naming scheme to the event or location first and then the date like this: “Elk County 2010-09-09.” This naming convention must be used by more and more photographers because Lightroom uses this convention in their latest version 3.0. This protocol makes sense to me because now all my events and locations are grouped together by name and then by date instead of vice versa. Obviously I did not make this name change to all my old photos or I would have found the file I was looking for this week.

I eventually did locate the photo I lost, but it was aggravating. How do you name your photographs? Can  you find exactly what you’re looking for within a few short minutes? I was told a long time ago to pick a naming scheme and stick with it. I guess I haven’t found the best scheme for me yet. I am still adapting and changing out of necessity. Some day I will be able to not even think about this and it will just be second nature. In the meantime, I will continue searching for the best naming protocol that works best for me.

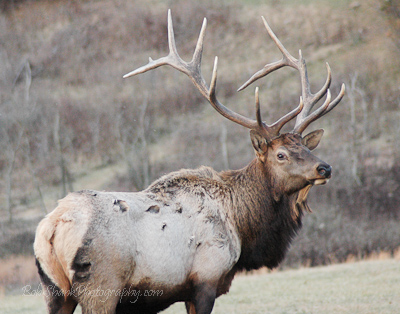
By the way, here is the photo that was missing in action until today.

My Photography Workflow

After writing yesterday’s blog entry, it occurred to me that it might be worthwhile to explain my photography workflow in more detail. We all have our patterns, habits, and preferences. There is no right or wrong way to take our photos from our cameras to the end product, but some methods are easier than others. I do not believe my process is the only way or even the best way; it is just what I currently use after many years of experimentation and some trail and error.

I prefer using Adobe Lightroom for my photo management and editing software. Here is the workflow that I am currently using on every photo shoot.

First, I use a card reader to copy the photos into my laptop when on photo trips or my desktop when I am home. I copy the photos into the DNG format on import. Yes, this takes time, but the file sizes of DNG are smaller and you either have to convert now or do it later. On import I also rename each photo according to this format: date-sequence. So, for example, if I have a photo shoot today, I will create the import format to be 20100821-1, with the last number moving up sequentially for each photo. I will also add any general keywords that apply to all these photos. I have a Drobo so I import the photos directly to that physical drive and place all the photos in a folder named “Photographs.” I will assign a new folder name for the import by using the name of the photo shoot followed by the date. I like using the name of the photo shoot first, which is a change for me. I used to use just the date of the shoot, but that was not descriptive to me, so now I assign a name for each photo shoot to the folder name first. I also set up and use a saved metadata preset to assign copyright information, etc.

Once the photos are sitting in Lightroom, I then go through the photos to find the keepers. My process works like this. I enlarge the photo in the Library Module so I am only seeing one photo at a time. I use the right arrow to move to the next photo. When I come across a photo that I want to mark as a keeper, I press the “P” key to “pick” that photo. I have Lightroom set up to then advance automatically if I do press the “P” key. This feature of advancing to the next photo automatically when the photo is picked helps to move the process forward quickly. To set up the auto advance feature, click on “Photo” on the top menu and click on “Auto Advance.” I can quickly go through my whole shoot just picking the photos I want to mark as my keepers.

Once I go through all my photos I then create a collection just of these keepers. I may want to create a web gallery or slideshow of these photos, so I make the collection now. Then I go through the photos in this newly created collection. I am now looking for what I call the “Best of the Best” photos. These are the ones that make the final cut and ones I will show to clients, colleagues, or friends. These select photos need to be representative of my very best work so I am brutally hard with this part of the process. I will go through each photo again, carefully examining the composition, colors, exposure, lines, and other details. When I come to a photo that makes this final cut I then assign it a star rating. Usually these select photos get either 4 or 5 stars depending how on the strength of the photograph.

Now I will use these “Best of the Best” to post on my blog, use as initial proofs with a client, post to my website, or share in any number of ways. I often post all the photos in the collection if I have done a sports event because everyone likes to see their player in action. But if I am sharing photos in other ways I try to stick with just showing the “Best of the Best” photos from each shoot. Creating the web galleries, even with PayPal features, or creating slideshows are all very easy from within the newly created collection.

Sometimes I use color labels for specific reasons. I use a red label if I know a photo needs editing. The red label reminds me that I still have work to do on this photograph. I also sometimes use green labels to mark photos that I want to use for a photo book. And I use blue labels for photos that I want to use in a web gallery. I recently found a great feature in Lightroom that helps me use these color labels but without seeing the whole frame around the photo in that color. Having a photo surrounded in color can make that photo look different than when it is against a neutral background. So here is what I learned to do. Go to Grid View Options and deselect the “Tint grid cells with label colors” in the Options panel. Now go to the bottom of this same screen and select “Include Color Label.” This results in a small color swatch appearing beside the start ratings at the bottom of each photo in the Grid View instead of having that color surrounding the whole photo. Pretty cool, huh?

If this specific photo shoot was away from home, I will then import the Lightroom Catalog to my desktop computer so I retain all the picks, edits, and other changes I made in the field.

So this is the workflow I am currently using. What do you think? Does it make sense? Is there anything I am missing? How can this process be enhance and improved? What do you do in your workflow process? Please share your thoughts because we always learn more together than we ever learn alone!

Go Ahead, Print Some Photos

Digital photography is great. No more waiting for turn around time with developers or messy chemicals to play with. And you can see what you shot right away on your LCD screen. Shoot away–the only limitation is how many gigabytes of memory available. Another positive difference is that you no longer have to go through shoebox after shoebox to find the photo you are looking for. Yep, digital photography rocks!

And yet, there is still something about a print. No matter its size, a print is something special, something tangible, something unique. When you hold a print in your hands you hold a memory, a moment frozen in time forever. There it is right in front of your eyes. You see it but you still can hardly believe it. Precious time frozen in beauty. Touch it, hold it, stare at it. And if you are the photographer who created this photo that’s even better!

Sadly, far too many prints are in laptops, computers, external hard drives, and Drobos never able to see the light of day. They are stored digitally and even viewed digitally. It is like they are doomed to a digital existence for all of eternity.

No! Even digital photos deserve to be printed. So go ahead, print some of your photos. Hold them in your hands, touch them, stare at them. And then you will realize that there is something mighty precious about a photograph!

Update on My Drobo

My new Drobo has been in active use for over a week now and I am very happy with it. I first heard about the Drobo on TWIP–This Week in Photography, a weekly photo podcast. These guys were raving over the Drobo and I was slowly but surely running out of backup room on my external hard drives. So I saved my money and just purchased my own Drobo.

I spent the past week moving my photographs from the external drives to the Drobo. This would have been an easier chore if I had maintained a consistent folder-naming scheme all along. But alas the end is now clearly in sight and I expect to have the transfers down in a few short hours.

I only have two 1TB hard drives installed in my Drobo and it is already 67% full! I will have to install a third drive into my Drobo in the near future. One nice feature on the DataRobotics website is what they call the Drobulator, which is a virtual calculator which allows you to see how much storage space you will gain with different hard drives. I used this to determine my next cost-effective and best storage space-addition drive will be another 1TB drive.

The Drobo was very easy to set up and install. I just installed the two hard drives into the unit, attached the power cord and the USB cable, and then installed the software. Now the Drobo Dashboard gives me a constant status of space available and other important information from the Drobo. I just watch the lights on the unit, which will turn yellow when it is time to add additional storage. I also receive email messages from Drobo whenever the unit has a message for me. Pretty neat!

I have not always been faithful at backing up my photos so I find the Drobo to be extremely helpful and even vital in my workflow. To maintain proper backups I strongly recommend the Drobo. It works well and is easy to use.

My Drobo & Organizing Photographs

My new desktop computer is up and running with my Drobo attached and running properly to store and backup my photographs. My first step in the process is to back up my photographs by copying them from two external drives to the Drobo. This would not be a hard task if I had adequately managed my photos in the first place. Different folder-naming schemes was the main problem and this is taking time to resolve.

I now see the advantage of sticking to one naming convention!

How do you organize your photographs? What folder naming scheme do you put into practice? Can you find photos from a specific shoot just by the way your folders are organized?

These questions and more are important to answer. I am forced to answer them now and find specific ways to maintain my consistency in naming my folders because I want things well-organized on my Drobo. It will take some more time, but in the end I believe the effort will be well worth it. And next time this should all be much easier!

Backup Strategy

A photographer’s backup strategy is crucial. Without such a strategy we risk losing important photographs that can never be recovered? Sound scary; it should!

I’ve had one hard drive failure many years ago. It was only 20mb in size, believe it or not (I did say it was many years ago!) and it only contained documents that I had backed up to 3.5″ floppy disks. About a year ago, I had another hard drive problem. It did not fail, but it did cause me to lose some files–mainly my email messages, calendar, and some other personal management software. Much of it was backed up, but I did lose all of my email messages. But thankfully, I’ve never lost a photograph, at least not yet.

My previous strategy was to use external hard drives to backup my photographs. As time passed and more and more photographs began to be stored, I purchased a second hard drive. This worked until this year when one of the drives became completely filled. So now I have some photographs that are not being backed up. Yikes!

So, my newest strategy included purchasing a Drobo, but then I also had to upgrade my desktop computer. The new one just arrived today! What timing, too! It is raining cats and dogs outside and while I have many projects to do around the house, this project is a great rainy-day project.

I put the desktop pc together and attached the Drobo. I also made sure to install McAfee on the new pc, too. Then I hooked up my biggest external drive and started copying most of my photographs to the Drobo. The dialog box says that it is copying the photographs, but it is going to take a whopping 14 hours to complete!

I will still have quite a few folders to copy over to my Drobo from my second external drive and then my laptop. It will take time, but I will finally have a solid backup strategy in place once again. The only problem with my strategy is to implement an off-site strategy in case of a fire, tornado, etc. Then I will have a solid backup strategy and will be able to sleep at night.

What is your backup strategy? Is it solid? And are you using it faithfully?