Lenses for Wildlife

PEPE#7 0854


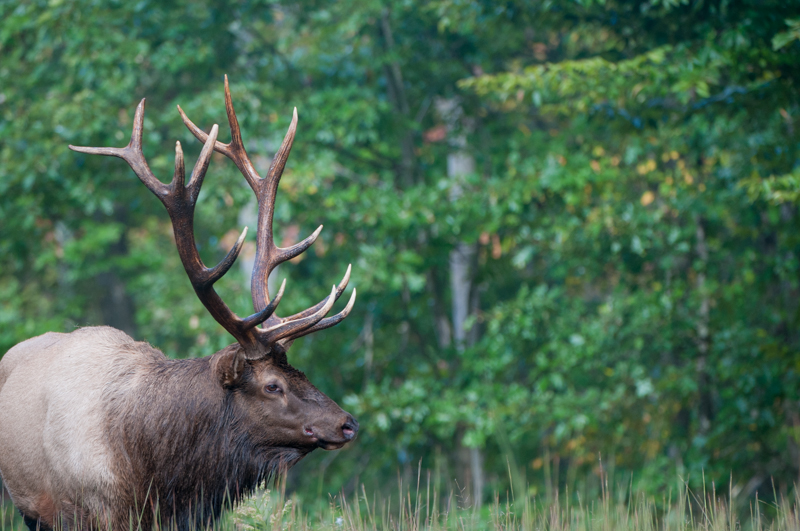
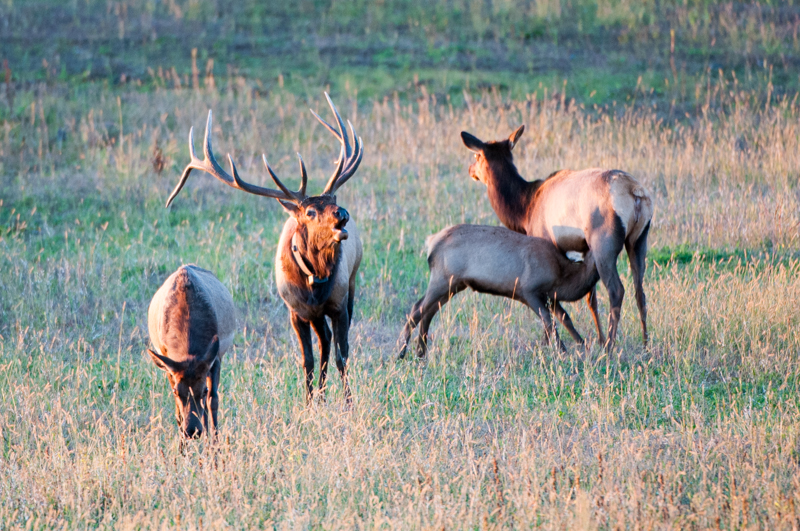
Pennsylvania Elk Photography Experience #7 was a pure blast! We saw elk all over the place and bulls were everywhere! I cannot remember a year where we saw so many different bulls and most of them were in camera range. Many of us are spoiled, owning 200mm, 300mm, and even 400mm lenses. The big boy wildlife photographers even haul a 600mm lens out on the mountain!

I confess that lens envy is rampant in my photo circles. We always want more reach. Bigger lenses allow us to stay at a safe distance from the animals and still fill the frame with the subject we are photographing. The other related problem is lack of light in many lenses. Take, for example, the typical 70-300mm zoom lens that is often the second lens purchased by many photographers, it has reach but at 300mm the f-stop is a whopping f/5.6. That is simply not usable at dawn and dusk when animals are most visible and active. An f-stop of 2.8 is ideal, but many settle for f/4, which is a decent comprise to get the reach but also keep the lens affordable. The Nikon 400mm f/2.8 is $9,000!

PEPE#7 0984

My favorite lens for wildlife and sports photography is the 200-400mm f/4. I really like the zoom capability of this lens, especially for sports and wildlife. It allows me to zoom in and out from my position on the sidelines or on the mountain with the twist of the wrist. Typically I rest my left hand on top of the lens to be able to rotate the zoom mechanism when needed. Just remember, righty tighty, which zooms in closer, at least for the Nikon shooters.

I purchased the book, “How to Photograph Animals in the Wild,” by Lennie Rue III, and Len Rue, Jr. about 11 years ago. I got to meet them both twice–once at my favorite spot on the elk range behind my camp and once in a workshop they co-led here in the Poconos. Anyway, this book contains some of their incredible photographs. As I read the book and studied the photos, I saw a repeating trend: most of the photos were captured with a 200-400mm lens. Well, it then instantly became my dream lens. I saved for 3 1/2 years to purchase the lens and I use it every week. It really is a great lens for sports and wildlife photography, and it has quickly become my go-to lens!

PEPE#7 1756


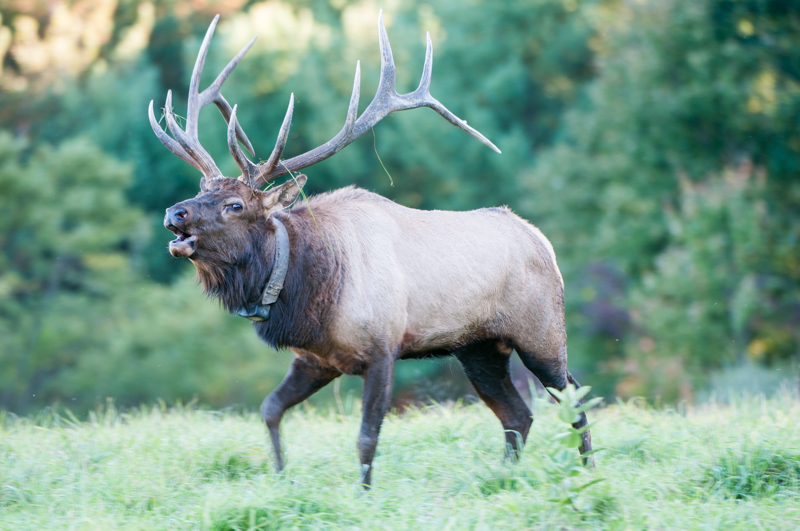
Each of these photographs in today’s blog entry were captured with my 200-400mm f/4 lens. The lens is sharp and clear and it can be coupled with a teleconverter to provide even more reach if there is enough light. I also am now in the habit of carrying a second camera body around my body. This is necessary when photographing football games, so it comes quite naturally to me now. This week I carried the D300 with the 200-400mm f/4 on my tripod and another D300 with the 24-70mm f/2.8 around my body on an R-Strap. I also toted the Think Tank Belt System to carry my 70-200mm f/2.8 lens, my 50mm f/1.4 lens, my 1.4x teleconverter, and other accessories. It is all easy to carry and I am covered from 24mm all the way through 560mm. That’s pretty sweet for wildlife photography!

When we teach our photo classes for the Pennsylvania Elk Photography Experience, we recommend at least 200mm with a teleconverter. This covers out to 280mm and provides good minimal coverage for the large elk. For most other mammals, which are smaller, we recommend 300mm or more. A wildlife photographer can never seem to have enough lens reach!

Another helpful tip is getting close to the wildlife, or preferably, letting the wildlife get close to you. More on this topic next week. For now, just remember that lenses for wildlife might be expensive, but they sure produce consistently clear results. I really, really like my 200-400mm f/4 lens!

Now my next dream lens is the 400mm f/2.8 for football, and the 600mm f/4 for bird photography. It just never ends…

PEPE#7 2515


More Pennsylvania Elk

Yesterday I shared the story of how my son, James, and I encounter a cow elk and were able to photograph it close up.

Today I am posting three more photos of this cow. Yesterday’s photos included much of the vegetation that the cow was actually eating. These photos today try to focus on the cow and highlight her without much distraction. Wildlife photography is difficult for many reasons: long, fast glass is needed and it’s expensive, animals are difficult to find and often don’t stay still very long, the best times for wildlife photography is at sunrise and sunset when light is low, and it is often hard to separate the subject from its camouflaged background. This last difficulty is my subject today.

How does the wildlife photographer separate the wild subject from its background? What tools in our camera can we use to assist in this endeavor?

Wide open f-stops are probably one of my most favorite tools to help accomplish this goal. Shooting wide open blurs the background and allows the viewer’s eye to focus completely on the subject. Large f-stops like f/2.8 are extremely helpful. Yes, they are expensive, but I find them irreplaceable in my wildlife photography. Another tool is the placement of the subject. We all know that backgrounds can literally ruin a photograph. So working with a clean background is very helpful. Setting the subject against a clear blue sky is golden! Or how about using the contrast of goldenrod or queen anne’s lace in a field to place your subject? Of course we do not literally place our subjects, but paying attention to the background can make a subject stand out loud and proud!

What tools do you use to separate your wildlife subjects from their habitat?

Lens Fixed!

I have the Nikon 2.8/f 70-200mm lens and I love it. However, in the past year or so I’ve been having problems with it. The autofocusing mechanism wasn’t working correctly. It worked sometimes but then it wouldn’t–and as you can suspect, it always quit working at the absolute worst time!

The problem was when trying to focus on an object that was near infinity. I found myself using the override focusing ring way too often. In fact, it felt almost like I was using a manual focusing lens. This was okay for some subjects, but elk, deer, and baseball players were often out of focus. I was not a happy photographer!

Part of my dilemma was when to send out the lens for repair. It was under warranty, but I need this lens most of the year. Sports, wedding, nature photography and photo trips all require the ability to have my favorite lens within reach or on my camera body. I finally decided to send it out after my trip to the mountains over the New Year holiday.

The process was very simple. I first consulted the Nikon website to read all the directions and made sure to follow the directions. I sent it out, insuring the package and waited. I was told by others that it could often take well over six weeks to get a repaired lens back. This worried me but I bit the bullet and sent the lens out. Happily, I could see the progress Nikon was making with my lens online. This was very helpful and kept my fears at bay. I could see that my lens arrived to their facility in New York. Then it was being examined. Once the problem was located, I was informed that they were waiting for parts. Finally, it was in for the actual repair and then it was it shipped back to me. The whole process took less than a month.

Now the lens works beautifully. I cannot wait to try it out at a baseball game, but there’s still too much snow on the ground for that to be a possibility right now. So I am hoping to get the mountains soon so I can put the repaired lens through the paces with the elk.

All-in-all, I am very pleased with the repair service Nikon provided me. I was not happy that the lens needed repair, but in the end, it was handled well and quickly. Nikon definitely stands behind their product and now I have a well-functioning lens back on my camera again.

Go Nikon!

50mm f/1.4 Nikon Lens Just Arrived!

I only had to wait two days for my new Nikon Lens to arrive from B&H Photo. I love ordering from them!

The UPS driver delivered my package late this afternoon and I immediately opened the outer box to find the familiar Nikon lens box. This lens is small and compact and I couldn’t wait to try it out. I’ve been reading David Ziser’s book, “Captured By the Light” where he talks about using this lens in detail at weddings. Inspired by his book and knowing that I have a wedding to shoot this coming Saturday, I attached the 50mm lens to my Nikon D70. I plan on using this older camera as my second camera at the wedding so I figured it made sense to try my new lens on this body first.

Well, let me tell you, I was not disappointed! This little baby is sharp and has an attractive bokeh even at f/2.0. My fast lenses had been my Nikon 70-200mm f/2.8 and my Nikon 24-70mm f/2.8. I was eager to try this f/1.4 lens so I started walking about the house and making some photos. Here are a few that I took for you to see. I really like this lens, but what do you think?

New Nikon Lens Ordered

I just ordered a new Nikon lens; it is the 50mm f/1.4 and I cannot wait to receive it!

I have heard a lot of good things about this lens. The best feature of this lens is the ability to make photographs in available light. The fast f/1.4 aperture allows available light to create an image where no other lens will work. I cannot wait to try this lens out! I plan on using it for some wedding applications, portraits, and stock subjects. The reviews tout the usefulness as well as the versatility of this lens.

I know from firsthand experience that Nikon makes great glass. I never have to worry if my equipment is good enough. Nikon flat out makes excellent glass and I won’t buy anything else. I realize there are plenty of other lens manufacturers out there, but I am a devoted Nikon fan and will not apologize for this. Nikon is my preferred choice. I know that Canon and Olympus make excellent products, too, but I will stick with Nikon because I believe no one can beat their product line for what I am doing in my photography.

I expect to receive delivery of my new 50mm f/1.4 mm lens fairly soon and I am getting impatient already!