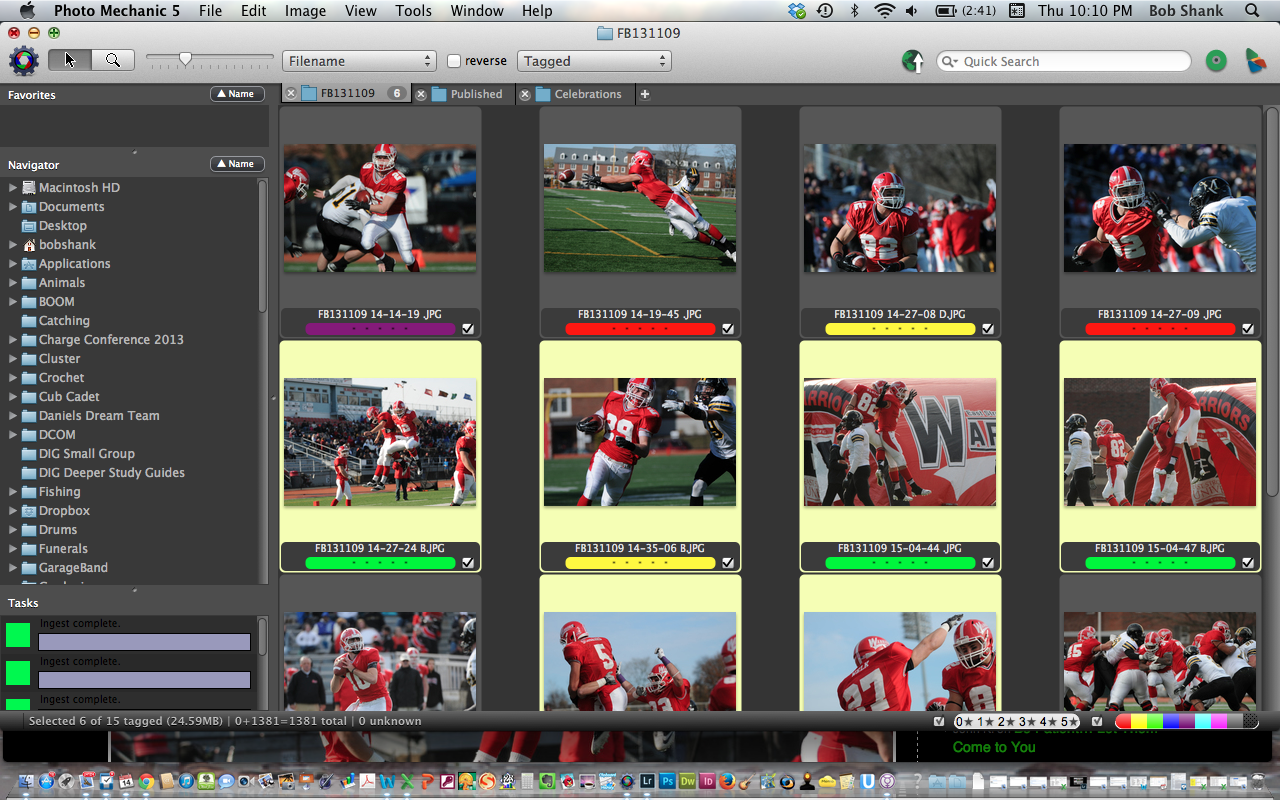
 Over the past three blog posts, I shared why I use Photo Mechanic. So I thought it might be helpful to share how I actually use Photo Mechanic in my workflow.
First, I take the time well before each shoot to do some prep work. I create the rosters for each team in TextEdit. Any text editor will work. The creation of this roster file is easy. I give it a header say: //Pleasant Valley Football Roster 2013 Then I create the shortcuts starting with the team name. The format is the shortcut first, a tab, and then the full name. So it looks like this:
pv Pleasant Valley
p1 Player Name1
p2 Player Name2 …etc.
I save this text file, open Photo Mechanic, go to the menu and select: Edit, Settings, and Set Code Replacements. This brings up a dialog box and all I have to to do is add the new shortcut file I made in TextEdit. I do this for both teams and have my shortcuts ready to go!
The second prep item is to setup the ingest and IPTC information including folder name and filename. I actually use a short folder and filename such as FB131115, which stands for Football and the date of the game with the year, month, and day. Then I add a custom suffix that includes the time each photo was captured. It looks like this: {iptchour24}-{iptcminute}-{iptcsecond} The reason I do this is because I use two cameras during a game. One is on a monopod attached to my 200-400mm lens and the other is over my shoulder with an R-Strap attached to my 70-200mm lens. When I ingest the photos into Photo Mechanic, they are sorted by filename and placed in the exact order I captured them according to the timestamp.
After the shoot, I place my two flash cards in card readers and have Photo Mechanic ingest them simultaneously. This is another nice feature of Photo Mechanic! Even as the photos are ingesting, I can start looking through the photos to find the best ones to send to my editor. To do this, I use the color coding feature. Unfortunately, Adobe Lightroom does not recognize the selected checkmarks from Photo Mechanic, but it does recognize the color codes! You can choose any colors you want. I use Green for my selects, Blue for photos to send to the editor, and purple for photos that will be sent for a photo gallery. I first go through all the photos in the preview mode and press 3 for the select photos, marking them green. I have the preferences set up so that when I do press 3, the preview mode automatically advances to the next photo. Otherwise, I just press the right arrow. I advance through the entire shoot in this way.
Then, I select only the selects by pressing Option(Alt) and clicking on the green color tab in the lower right corner of the screen of the Contact Sheet in Photo Mechanic. This displays only the photos I marked with the green label. Now, I go through them again, pressing 4 for the very best ones I want to send to my editor for possible publication. This marks them with a blue color. Then I go through each one of these to create captions for each one. This is where Photo Mechanic really shines!
Writing the caption is easy. I first click on the Info button in the Contact Sheet to bring up the photo’s IPTC info dialog box. Then, in the caption box, I start writing my caption. Let’s say that Pleasant Valley’s running back, #28, whose name I may not even know, is the main subject of a photo running into daylight through a hole made by the offensive line. I simply press p28 and his name appears in the caption box! Voila! Isn’t that awesome! This is really handy and a time-saving process for me. There are times when I can’t quite see the player’s full number, so I may have to go back through the series of photos captured at this time to make sure I have the correct number. But this one feature makes Photo Mechanic my goto software for what I do on every sports shoot!
Once all the captions are written, I need to submit them to my editor either via DropBox or FTP. I select the photos to send and then right click and choose Save Selected Photos As. This allows me to save the photos in the size and resolution of my preference. Once they are saved, I send them to my editor and I am almost done.
I then go back to the select (green) photos and select the ones I want to submit for an online gallery at the newspaper by pressing 5 and marking them as purple. I give them a more general caption such as, Pocono Mountain West v. Pleasant Valley November 15, 2013. Then I save them and send them to my editor.
When I get home, I import all the photos into Lightroom. The color codes are maintained, so I flag all these photos and then create Collections for the selects and the photo gallery. I also create a Collection for any photos that were published.
This is my current workflow with Photo Mechanic and Lightroom. It works really well for me solo, though I will occasionally supplement using Mitrefinch tms solution for team management, when working with a team of photographers and/or covering a variety of shots and not wanting duplicates. Communication is always key there! It is fast and efficient, and allows me to quickly sift through all my photos and send the best ones to my editor for publication. Pretty sweet!
