New Website Design for Bob Shank Photography

Well, it was long overdue, but I finally redesigned the website for my sports and wildlife photography. You can view the redesign here: bobshankphotography.com Things have evolved over the past eight years for several reasons. When I picked up my camera again I was shooting every subject in range: sports, animals, newlyweds, musicals, plays, and just about everything imaginable. My kids were involved in several activities that provided great photography subjects along the way, too. Honestly, it felt good to pick up the camera again and shoot everything in sight.

Screen Shot 2016-05-26 at 3.34.55 PM

As time went on, I gravitated mostly to two main subjects: wildlife and sports. I am fortunate to have a cabin in the beautiful mountains of north central Pennsylvania, right in the heart of elk country! I co-hosted several photo trips, taking other photographers out to photograph these majestic animals. I still enjoy photographing the wildlife there, but many things changed in recent years and I felt compelled to stop hosting the photo trips. In the meantime, sports photography was quickly becoming my goto subject and in a huge way!

Screen Shot 2016-05-26 at 3.36.40 PM

It started as I began to work with our local high school’s baseball team. The head coach allowed my to shoot the games and then I provided a presentation at their end-of-year banquet with all the action photos and created photo collages for all the senior gifts. It was a great opportunity and a huge learning experience for me. I eventually photographed their player portraits and designed their yearly media guides, too! My work was eventually noticed by the local newspaper and so I began to cover some events for them. This, again, was a great opportunity to learn more about sports photography. I covered a football game each week of the season, had to meet deadlines, write captions, and learn how to capture the action under inadequate lighting conditions. I also covered a couple college football games for the paper.

Screen Shot 2016-05-26 at 3.38.19 PM

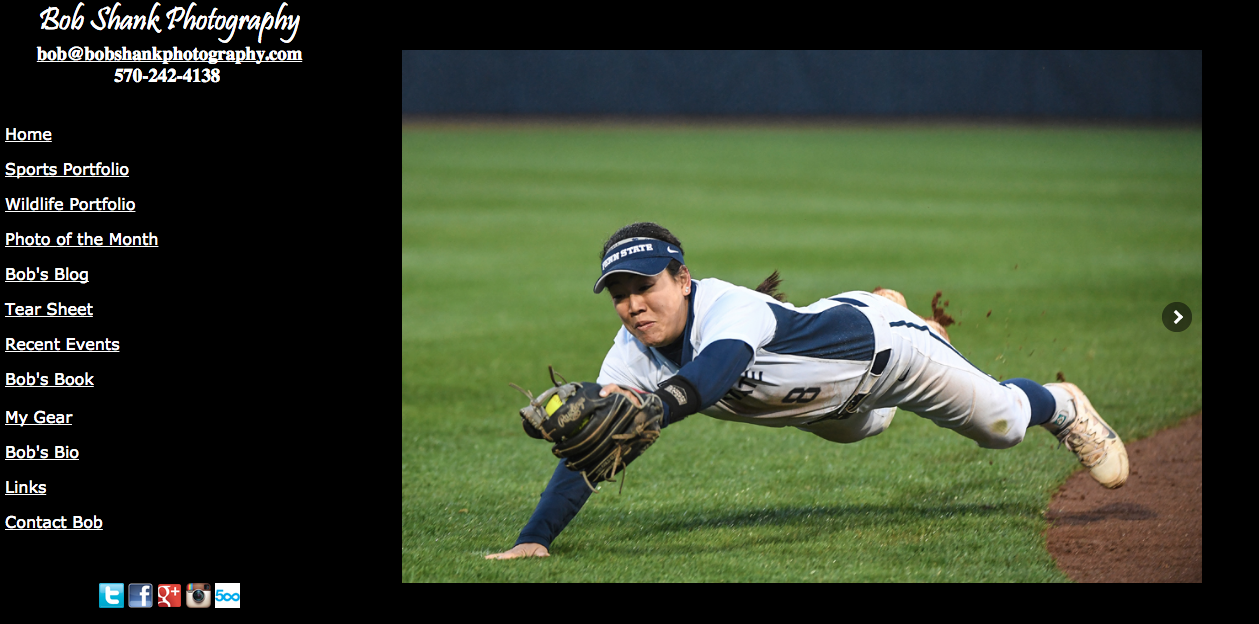
Then, the local university noticed my work and offered me to work on contract with them! This offered additional learning opportunities and sports photography now became my main focus. I love shooting sports! I was a high school athlete, playing football and running track. I still thoroughly enjoy the Friday night atmosphere at a high school game, but now I am also enjoying the thrill of covering college sports of all kinds!

Screen Shot 2016-05-26 at 3.39.10 PM

It has been an amazing ride so far. I don’t think I really started out meaning to focus so much on sports photography, but it sure is my preference these days! I am continuing to hone my sports photography skills and hope to keep this focus for a long, long time! I hope you like the new website design!

500px

I heard some photographers talking about and raving over 500px.

This unique website is incredible! Many people post tons of photographs on websites, Flickr, SmugMug, etc. The result is much like the overload we all experience with the internet. Posting so many photos is much better than hiding them away in an old shoebox and it is great for those wanting to have photos of an event or game. The problem is so many photos are posted that we do not see the best of the best. I do this myself. After a baseball or football game, I eagerly post many photographs of that event. I know players like to see themselves in action, so I try to post as many photos as possible attempting to include as many players and as much action as possible. Obviously not all of these photos are top grade. I do try to highlight my favorite shot of the month on my Perfect Game Photos website–posting my favorite photograph of the month.

500px is a website of top quality photographs from all over the world. Check it out at 500px.com You will see incredible photos here and even some that will take your breath away! Photographers post only their best, top quality photos here because the high level of standards with this collection. Forcing oneself to limit posting only the very best photos is a good exercise and helps advance the level of any photographer.

I strongly encourage you to check out this website. 500px is a site to behold! Along the way, check out my photographs. You can let me know what you think of each one by hitting the “Like” or “Dislike” button and/or leaving a comment. You can see my page on 500px here: http://500px.com/bobshankphotography and you can see my portfolio there at this address: http://bobshankphotography.500px.com

Check out 500px.com to see what I am talking about. This is one incredible site!


It’s Easy to Create PayPal Galleries in Lightroom

Lightroom makes it very easy to create web galleries. It is pretty much as easy as selecting the photos you want to include, modifying the gallery to your liking in the Web module, and then exporting this information and uploading it on your server. It actually sounds more complicated than it is to do. In the previous two blog posts I talked about how to do this in detail and even protect web galleries with a password.

Today I want to share with you how easy it is to create a PayPal gallery in Lightroom. I use these PayPal galleries all the time because they allow visitors to my website the ability to easily order prints using PayPal or any credit card. This feature alone has contributed to an increase in prints sales, particularly from parents of baseball players. You hear of many online services that do this for you. They take care of designing the code behind the galleries and then  you just upload your photos to their service, of course in addition to paying their monthly fees. I wasn’t sure I would have enough sales to warrant this expense, so I decided to do it by myself. Lightroom made it possible in a huge way for me!

The key is a template called “LRG One with PayPal Shopping Cart.” The link to this awesome template can be found here. Basically all you do is download the template, read the instructions on how to install and use it, add a few bits of information in your metadata, customize the gallery, and upload it to your server. Again, this all sounds much more complicated than it actually is to implement.

I use this template for all of my sports photography shoots. I select the photos to include in the web gallery. Then I include the metadata information for the size prints I offer, which is easy to do using the Sync feature. This copies the metadata to each photo that is included in the gallery. Then I export using the LRG One with PayPal Shopping Cart template. I even add the password protection I mentioned in yesterday’s blog entry.

Now when someone visits my web gallery they can view the photos and purchase prints of varying sizes using PayPal or their preferred credit card. Of course, you have to set up a PayPal account and they take a small percentage of each sale, but it is much less expensive than using one of the other online services.

Once I receive an order from PayPal via email, I simply prepare the order and send it off to my photo lab. They print the prints and send them off to my client. It is that simple and I love it! The PayPal template is definitely one I find invaluable and highly helpful!

Secure Web Galleries

I do a lot of sports photography but most of it is with young players whose parents may not be thrilled with faces of their children all over the internet. So, by using Lightroom to create a web gallery and then working in Dreamweaver, I can create password protected galleries that attempt to keep the photos more secure. For me it has worked beautifully and the parents of the players I work with seem to appreciate this extra effort.

Here is what I do.

I create a web gallery in Lightroom, which I described in yesterday’s blog entry. Then I open up the newly created index file of this gallery in Dreamweaver. I edit the file by adding some code that directs the web page viewer to a login screen. You can see an example of this login screen by going here. This additional code is not complicated and once I created it the first time I can just copy and paste the code into a new gallery without having to retype it.

The logon code is contained in a different file in the same folder or directory. This requires the webpage viewer to enter a username and password that I assign for the gallery. This information is passed on to the players, coaches, and parents. They are encouraged to share this info with their friends and family, but it prevents anyone who stumbles across my site from gaining access to the photos of minors. It works well and is not difficult to set up.

I then create a link on my website that allows the team to view the photos after they enter the username and password.

If you are interested in the details and code of how this is done feel free to email me. I am more than happy to share with others what works for me. After all, I learn something new every day about photography. It is a great time to be a photographer!

Web Galleries from Lightroom

Continuing the theme of how I post-process photographs, I will now discuss how I use the Web Gallery Module in Lightroom to share my photos with others.

Let’s say I shoot a baseball game, which is one of my most favorite subjects. Every game has a story that unfolds and my job is to try to tell that story photographically. I also like to portray players in action, preferably with the baseball in the frame. So I get back from a shoot and select the keepers as I described on Saturday. All those that are marked “picked” will now be prepared for display on a new web page on my website. Lightroom makes this incredibly easy!

First, I go to the collection I created, that contains all the selected photos. Then I go to the Web Module. Here’s where things get fun! Let’s say I want to add the photos to my website and have them display as a slideshow with a black background. To start setting this up, I click on the already installed Lightroom Template from the left panel named “Slideshow.” Now I choose to customize this in a  number of different ways. First I setup the titles in the right panel labeled Site Info. I can change the Site Title, Collection Title, Description, Contact Info, and the Web or Mail Link. As changes are made they show up in the large preview screen.

I typically just go down the right-hand panel and make changes in this order. The next panel is the Color Palette where I can change the font color, any header or menu text, the border, and the background colors. I like to use a black background for slideshows with white text.

The Appearance Panel allows us to change the layout features such as adding an identity plate and determine the size of thumbnail and image size.

The Image Info panel gives me the opportunity to add titles and/or captions to each photo, assuming I included this information in the metadata for each photograph.

The Output Settings panel allows me to set the size and quality of the images, add watermarks, and sharpen on output.

Finally, the Upload Panel is where we can setup our ftp server information for automatic uploading. I ignore this panel and prefer to export manually because I create a username and password so that the photos of these young players are protected. This process is a topic for another discussion at a later time.

Once I make all the changes to get the web gallery just the way I want it to look, I double-check to make sure the preview is exactly as I imagined it should look. The uploading process takes some time, so I want to be sure things are correct now. Otherwise I might have to another upload, which only takes more time.

I export the newly created web gallery to my hard drive. Then I use my web design software to upload the gallery onto a new folder on my server, which is the last step in this process. You can see an example of a slideshow I created by following these directions here. A visitor to my website can scroll through each image manually one-by-one or opt to start the slideshow and have  the photos scrolled through automatically.

This is really easy to do and I use this or a similar feature after every photo shoot. Lightroom makes it very customizable and easy to do. Give it a try yourself!

Blogs, Facebook, Twitter, & Web Pages

Which do you prefer–blogs, Facebook, Twitter, or Web Pages?

I actually enjoy keeping up with all of these social networking tools. My website was started first and continues to be the main place where my photography services and photographs are shared with anyone who cares to see them. I keep adding information to my website such as new photo shoots, information about upcoming workshops, and upcoming Pennsylvania Elk Photo opportunities.

On my blog, I share some photography educational thoughts and other interesting photo info. I also enjoy hearing what others think about the topics I bring up in my blog. The feedback is fun and helpful.

On Twitter I post a new photo tip each day.

And on Facebook I replicate some of the educational photo information and sometimes discuss other photo topics.

Check it all out by going to my website at Bob Shank Photography

Sharing Photos

One of the great things about photography has always been sharing the photographs with others. Whether you are a beat photographer for a daily newspaper or an amateur on a family vacation, you just cannot wait to get the photos out for people to see.

Years ago this took some time. First the entire role of film had to be exposed and then the film had to be sent out to be developed. All the while you were waiting impatiently to see how they turned out. This lapse of time was the main reason that the Polaroid camera was such a success. After snapping the photo you only had to wait a few short minutes to see the photograph.

Today we have a variety of ways to share our photos with others. We can burn a cdrom, send the photos by email, post them on our website or Facebook page. The time lapse has been almost completely removed with digital images now instantly available for viewing.

Still, far too many photos are sitting on hard drives never to see the light of day or even be shared with others. The digital age has helped us take more photos but I fear that it also results in far more photos never being shared with anyone.

So be sure to share your photos with others. Print them out, post them on the internet, or send them to friends by email. Whatever you do, be sure to share your photos with others!

Social Media

Facebook, Myspace, Twitter, blogging, and email all allow us to stay connected. It is a great age that we live in these days because we can connect with people literally across the entire world. And we can stay connected thanks to all the social media that is available at our fingertips. Not only that, because there are full-fledged businesses that use the help of websites like themarketingheaven.com to promote their brand and reach out to more people, making social media a place of business. At indexsy.com are the biggest benefits you’ll experience when you work with an expert SEO company.

I was first introduced to Myspace a couple years ago. I created a page for myself but did not really see what the hype was all about. Then someone introduced me to Facebook and it all started to click for me. Not only could I share something about myself with others, but friends who I haven’t talked with since high school days were now only a mouse click away!

In fact, just tonight I receive a Facebook message from on my very best friends who I first met in kindergarten. We were best buddies all through school and hung out together all the time. We were typical teenagers, talking about cars, sports, and girls and we were always there for each other. After graduation we went in different directions and lost touch. Now, after 25 years I receive a Facebook message from him. Amazing!

Social media is also helpful in sharing our photographs, too. My Facebook page also includes the content of this blog and allows me to share my photographic endeavors such as my current photo exhibit, the Photo Walk I led, the Pennsylvania elk photography experience that I co-lead, and more.

Utilizing the social media can help us share our photos with others and keep us connected. Do you have a Facebook page? Check out mine here.

New Website Enhancements

My website has been an ongoing project and a labor of love for a little over a year now. It has gone through one major change so far, which is still being worked out to my liking. It takes a little time, but I do enjoy keeping up with my website and adding new features to it.

Just today I added some basic design features to make the pages look a little more consistent. I also added an index to the bottom of the main page so visitors can more easily find exactly what they’re looking for on my site. One dilemma I debate over is how much to include on the main page. I’d like to put everything in easy view without the visitor having to scroll down at all, but this just isn’t possible. To include everything I want and to make it easy for visitors to find everything, I need more real estate on the main page. So when you view my website scroll down a little to see what I’m talking about. Do you think this is this okay and obvious enough for visitors to navigate?

I also added a new page called “Client Login” where clients who I am working up an order for can view and proof their images. As I’ve said, I do enjoy working with my website. I try to keep it simple and easy to navigate while attempting to display and feature some of my photographs.

What do you think of my website?