Photo Tip Tuesday – Shoot Wide Open

We can be creative with our photographs by paying attention to what we want the viewer to focus on in our photo. The goal is to use clear focus on the subject but not the competing surroundings or the background. How can we do this?

Shooting with a larger aperture, small numbered f-stop, say like f/2.8, will blur out the background nicely and keep proper focus on the subject. This is the best way I’ve found to do this and is what I use almost all the time in sports and wildlife photography.

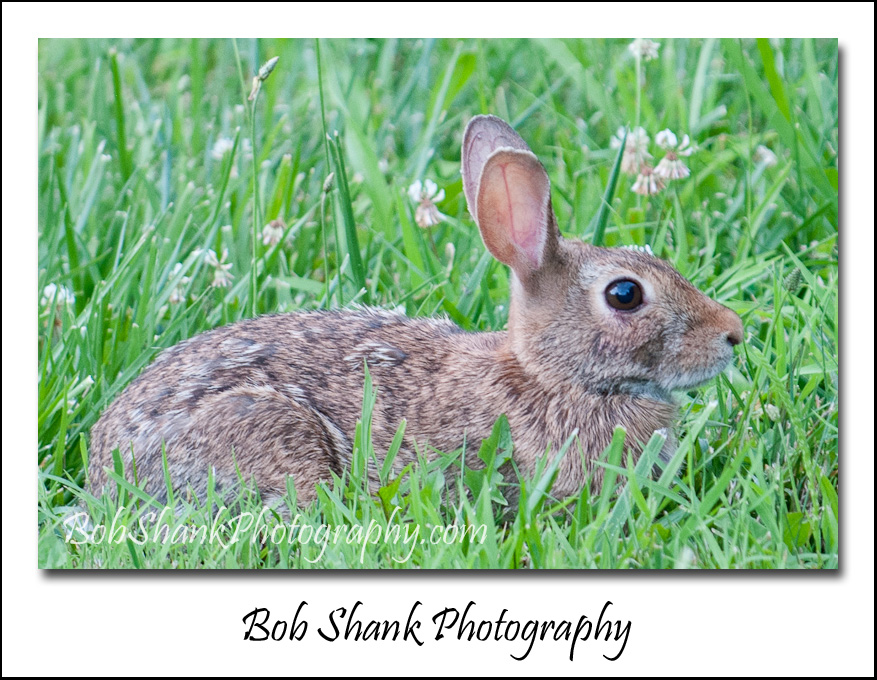
Think about it… you’re shooting an animal that naturally blends into its habitat. This is, after all, what keeps it safe from predators–camouflage. Take a photo of a bunny and you will immediately see just how much it blends into its environment. This does not make for easy photography. By opening up our apertures, we are letting more light hit the digital sensor in our camera. But it also decreases the depth of field that is in focus in the photograph. Several factors contribute to this formula such as distance from the subject, but the effect results in a blurred background. This helps to keep the viewer’s eye focused on the main subject, which of course is our goal.

The next time you’re out on a photo shoot, take a photograph of a subject with your f-stop set at something like f/16, then switch the f-stop to f/2.8 or your lowest setting. Then compare the two photos. Do you see the difference?

Remember, shoot wide open to blur the background and keep the focus on your main subject.
Flexibility & A Study in Depth of Field

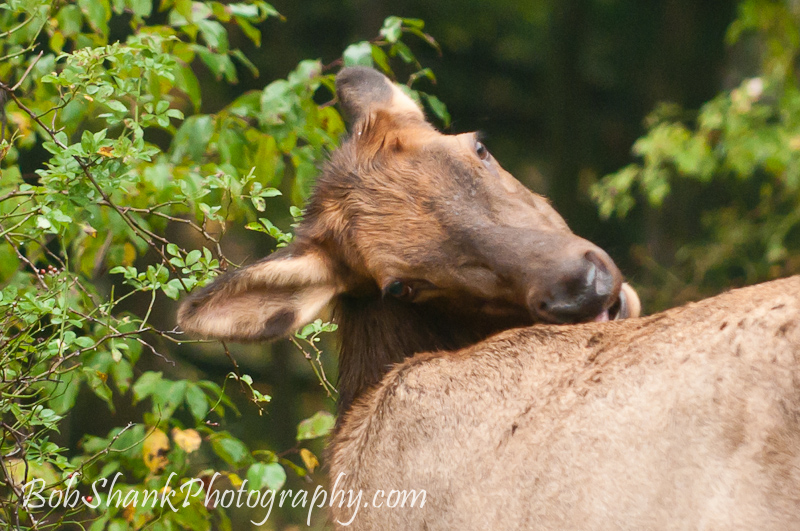
This photo shows the incredible flexibility of a cow elk. Her head is turned all the way around as she is licking her back. I guess to fight off pests and to keep clean, an elk just has to be flexible!

This photograph also provides a study in depth of field, a feature in wildlife photography that can be used to bring attention to the subject at hand. The method requires a large f-stop, which decreases the depth of field and only allows a small distance of the photo to be in focus.

In all honesty, I should have used a slightly smaller f-stop to include a bit more of the subject in focus. Look closely at the contents in this photo and you can see what is in focus and what is not. The forehead of the cow is in focus, but so are the leaves to the left of the elk’s head. Everything else, both the foreground and the background, are out of focus.

The technique is successfully used to highlight an animal and bring it out of its natural habitat in a photograph. Most animals blend right into their environment and this makes it hard to photograph them. Utilizing a shallow depth of field helps to do this.

I’m not sure I like this photo all that much, but it does provide some fodder for some photo instruction and it does show the incredible flexibility of a cow elk.


Depth of Field — Is the Right Thing in Focus?

Depth of field changes depending on the f-stops we use, the lenses we use, and the distance between us and our subject. Focus is one of the most important elements of a quality photograph so we have to get focus right and understanding depth of field goes a long way towards this goal.

Depth of field charts are helpful and can really help in any situation if we take the time to use the chart. The older lenses that had aperture rings were helpful, too, because they provided a distance range that was helpful as a guide for the photographer. Today’s G-type lenses don’t have these guides.

Probably the most reliable and best used resource for depth of field is experience. With your favorite lens and a subject at 40 feet away what can you expect the depth of field to be at say f/2.8? Do you know? Well you should. Not only is this information helpful but can be critical to have your subject sharply focused. Will the whole animal be in focus or just the eyes and face?

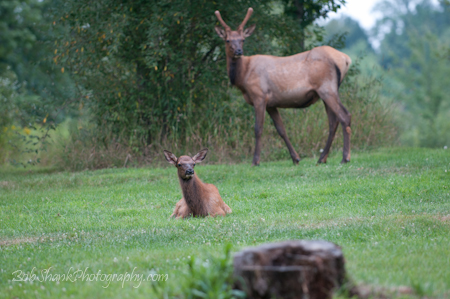
In this photograph you see three objects. The closest subject is a tree stump that is clearly out of focus (how’s that for an oxymoron?). The most distant subject is a spike that is also out of focus. The main subject I was focusing on is in the middle. This calf is clearly focused. The photograph serves as a good example of how shallow depth of field can help bring the viewer’s eye to the main subject. For example, if I had used a smaller f-stop, say f/16, then all three items may have been clearly focused. This would distract the viewer from seeing the intended main subject of the calf. Obviously, eliminating the two distracting elements would make for a stronger photograph here, but I wanted to show and explain depth of field. This important subject needs to not only be mentioned, but should also be studied and then put to good use. Depth of field is important!

Think about Depth of Field

Depth of Field is an important concept for photographers. How much of your photograph is going to be in focus? Is it a landscape scene where you want the viewer to see pretty much everything in focus, or is a portrait where you only want the subject to be in focus?

Depth of Field will determine how much of a photograph is in focus and which parts of the photograph will be out of focus. Here is a quick way to illustrate this in a visual way. Find a long fence or a series of many parking meters. Angle your camera to catch us much of the fence or parking meters as possible. Ideally you will have your camera on a tripod to keep each shot the same. Now, close the aperture way down to something like 22 or even 32 if you can and focus about half-way into the scene. Take the photograph. Now take a second shot with your aperture somewhere in the middle range like f/8 or f/11. Finally take a third shot with the aperture fully opened.

When you get back to your computer compare the three photographs. The depth of field should be the greatest in the first shot. That is, you should see more of the fence or parking meters in focus. In the third photo you should see the least depth of focus–just a small part of the fence or a parking meter or two in clear focus. Do you see the differences?

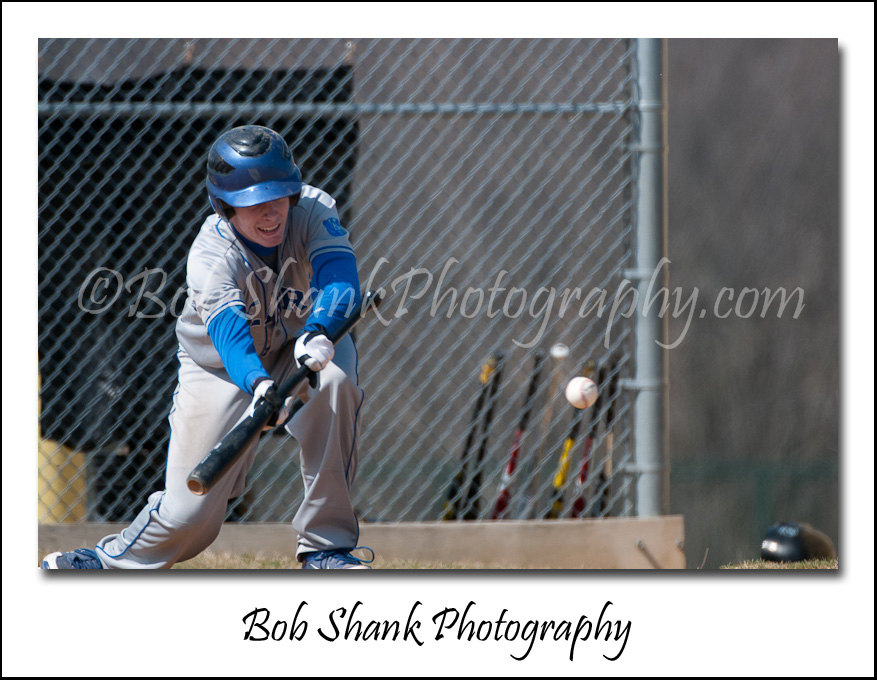
Now, this concept needs to be applied in the photographs you are creating with your camera in all different situations. Let’s say that you are shooting a baseball game. You only care about the player at the plate and the baseball, not the dugout or the fans in the background. So you will use a shallow depth of field by opening up your aperture as wide as possible. Be careful though, because if the baseball and the player are not fairly close together, only one will be in clear focus. Many sports photographers shoot at f/4 or even f/5.6 to try to get the best of both worlds–shallow depth of field, but not too shallow.

Let’s consider another scenario. Say you are on vacation and see this beautiful sunset that lights up the valley all the way up to an incredible mountain. The sun is behindĀ  you but the light is long and amazing. Your goal in this photo is to capture as much of the beautiful scenery as possible. This is where a deep depth of field can really help to keep as much of the scene in focus as possible. So you close down the aperture to f/22 or even more to capture this photograph.

Get the idea? Depth of field exists in every photograph to some degree. The goal is to get the proper depth of field for what you are trying to achieve. Practice and experiment with depth of field. You’ll be very glad you did when the photograph of a lifetime presents itself to you!