Time Behind the Camera

I like to say and I do believe, “There’s no better place to be than behind the viewfinder!”

If you enjoy photography, I think you will agree at least to on some level. Just to be able to spend time with my camera trying to capture the beauty of God’s wonderful and amazing creation is a pure joy for me. It is also one that I try real hard never to take for granted. I enjoy each and every moment I spend with my camera and the wildlife around me.

This week, try to find more time to spend behind your camera. Besides the thrill of being in the best place in all the world, you will also learn how to better use your camera and get better at the craft of photography. There is no doubt that spending more and more time behind the camera is helpful.

I will be behind my camera tomorrow. Will you?

Muddy Elk Antlers

The fall rut is always an exciting time filled with lots of action. This bull is lying down, but you can clearly see the signs of this exciting season just by looking at his antlers — they are coated with mud!

Bulls get themselves into a frenzy time after time during the mating season. Hormones are running rampant and the action can be almost non-stop at times. Even when things slow down you will hear the call of the bugle or see signs of the rut in a variety of ways.

I know the fall rut is a long way away, but I was going back through some archived photos for a project I’m working on and found this one. It was slightly cropped but nothing much else was done to this photograph. I do believe in getting things right in the camera to cut down on post-production time, which saves a lot of time and energy!

This is a great week for me as some neat photo opportunities are opening up for me. Spending time behind the viewfinder is not only the best place in the world to be, but it also helps to keep the photo passion going! Are you spending time behind your camera?

My book “How I Photograph the Pennsylvania Elk” is now available as an ebook!

How I Photograph the Pennsylvania Elk is a book I wrote to share my methods of how I photograph the beautiful Pennsylvania Elk. I don’t pretend to be an expert on the subject; I just wanted to share with others what works for me. I am blessed to have incredible mentors who shared with me and now I am sharing my photography passion in return.

Over the past 22 years I have spent time walking through the hills of Elk County near Benezette, PA. I own some property up on Winslow Hill and thoroughly enjoy every minute I get to spend up there! My photo passion has increased greatly over the last four years and some of my photographs appeared in a few newspapers and the Pennsylvania Game News. I also have postcards, matted prints, photo buttons, and printed copies of my book available for sale at the Elk Country Visitor Center.

Wildlife photography is like nothing else in the world to me and I can’t wait to be out in nature trying to capture the beauty of God’s incredible creation! In this book I share some of my favorite methods of finding the elk. Then I share some techniques to make quality photographs. I also go through the seasons of the elk and talk about how to brave the elements when photographing them. Photo equipment is mentioned, too. My favorite chapter is “Don’t Just Shoot the Bull,” and encourages the photographer to aim the camera toward the cows, calves, and spikes, too!

The new eBook version can be uploaded to an iPad, and iPhone, or your computer.

Check it out here: How I Photograph the Pennsylvania Elk

Be Weather Resilient

Tonight it is raining here where I live and I was hoping to get out with my camera tomorrow. After all, the mild temperatures earlier today certainly enticed me to think about engaging in wildlife photography. But what about the rain?

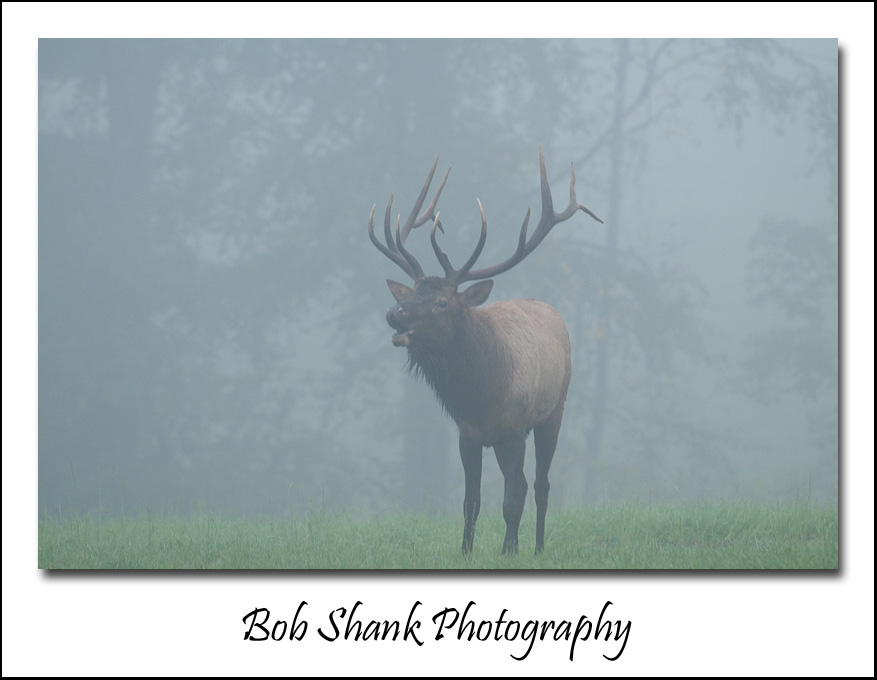
Well, these three photographs in this blog entry were all taken in foul weather, or should that be fowl weather? You know what I mean, weather suited more for a duck than a human! Fog, rain, and cold drive many photographers back inside where they can avoid the elements. Warning: Don’t do this! Inclement weather can produce some amazing and beautiful photographs!

Yes, the weather can be a pain sometimes, but if you stick it out, chances are quite good that you can capture a unique photograph. The next time the weather threatens your photo outing, stick it out. Brave the elements and let the creative juices flow. You can protect your camera and lens in a number of ways. The least expensive way, and one that I’ve used on numerous occasions, is to simply use a plastic grocery bag over your gear.

Don’t let the weather dictate your photography. By being willing to brave the elements you will capture more photographs and quite possibly create an incredible and even outstanding photo while others are relaxing in the warmth of their home or cabin. Be brave. Be courageous. Be weather resilient!


The Whites of Their Eyes

Animal behavior shows a lot about their comfort level. If they are feeding, for example, this shows they are relaxed and not too worried about any impending danger. But most animals reveal specific behavioral signs that indicate when they are not happy. This bull is showing the whites of his eyes–a sign that he is not overly satisfied with me at the moment. I might be in his way to greener pastures, I might be too close to him, or I might be viewed as just in his way for whatever reason. The whites in his eyes show that is not relaxed.

Similarly, this cow is busy eating some grass, but her eyes show that is worried about something. At the very least, she is keeping a keen eye out for any sign of trouble.

We can photograph our subjects better when we learn more about them. It doesn’t matter what subject we are photographing either. When we learn more about our subject we will be able to get better photographs. So the next time you are out with your camera pay close attention to your subject. What do you see? Are there any signs that is putting your subject at ease? Or are there signs that indicate something is wrong.

Be patient, work slow, and pay attention to the animal’s behavior. It can tell us a lot!

Nuggets from the Past

I always try to process photographs as soon after an outing as possible. This way I can keep details fresh in my memory, add appropriate keywords right from the start, and pick the keepers that I want to use on my blog, Google+, my website, or to print. Sooner rather than later is the motto I strive to uphold. Usually it works well. occasionally, I have to process photos at a later time.

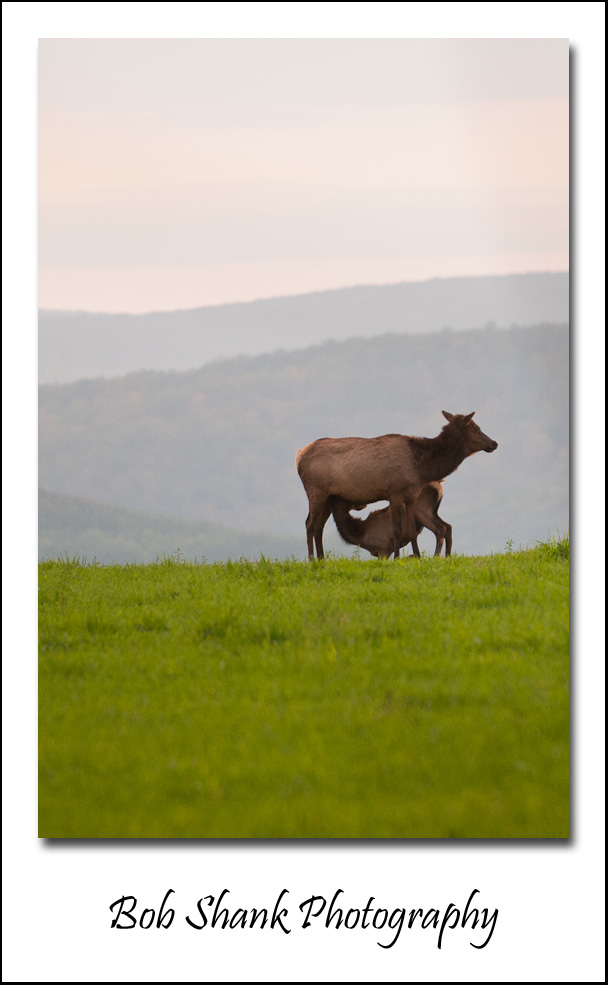
Sometimes, however, I go back to a previous photo shoot and find an image that I either missed the first time through or figured I couldn’t or wouldn’t want to use. Such was the case last night. I went through some old Pennsylvania elk photographs from last fall and came across this nursing calf. The pose struck me, but the background also caught my attention. I had to crop out a twig that got in the way of my shooting lane, but the image above I thought was usable at least on some level.

What do you think?

Two Different Elk Collars

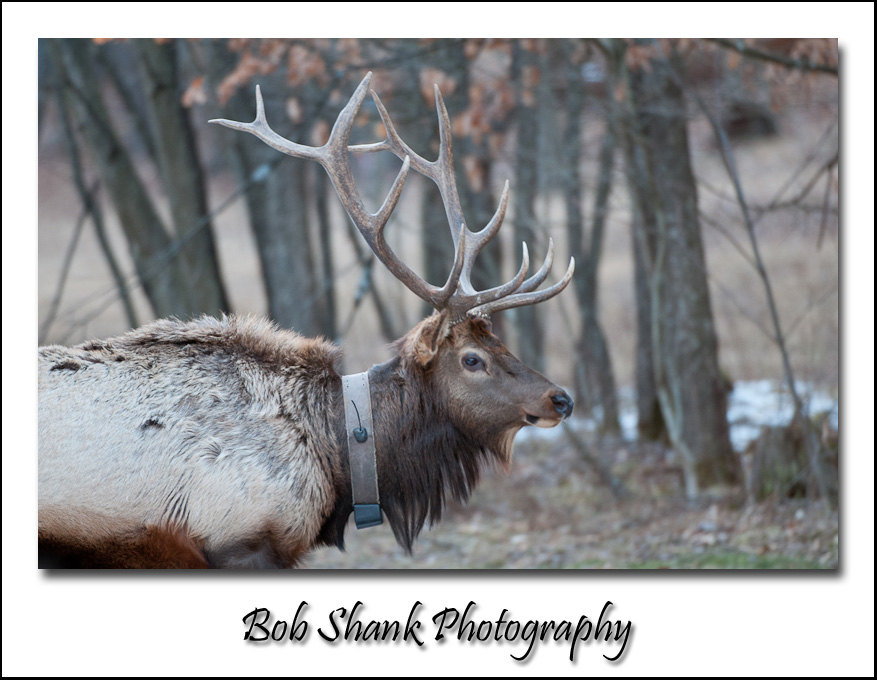
Here is one of the most common collars found on the Pennsylvania elk. As you can see, they feature a boxy transmitter and a yellow numbering system. This bull is referred to as “2D.” I photographed this bull in past years and was very happy to see him and get to photograph him again this year in January! He is not a giant bull, but he certainly is a nice one!

The Pennsylvania Game Commission uses collars like these to study the elk movement. They can determine how far an elk travels over a period of time. The collar is fitted onto the elk by tranquilizing the elk temporarily. In 1985, bulls had an average home range of 20.5 miles, while cows had a home range of 6.8 miles. (Source: “Management Plan for Elk in Pennsylvania 2006-2016, Pennsylvania Game Commission)

Attaching the collar is a very smooth process and the elk soon gets used to sporting the new collar. The batteries power the transmitter for approximately 20 months and sometimes the elk is able to shed itself from the collar. These radio collars help the biologists keep track of the elk herd.

Here is another style of radio collar that is seen less frequently on the elk. As you can see, this style features a long antenna to broadcast the signal of the transmitter.

Sunlit Cow Elk

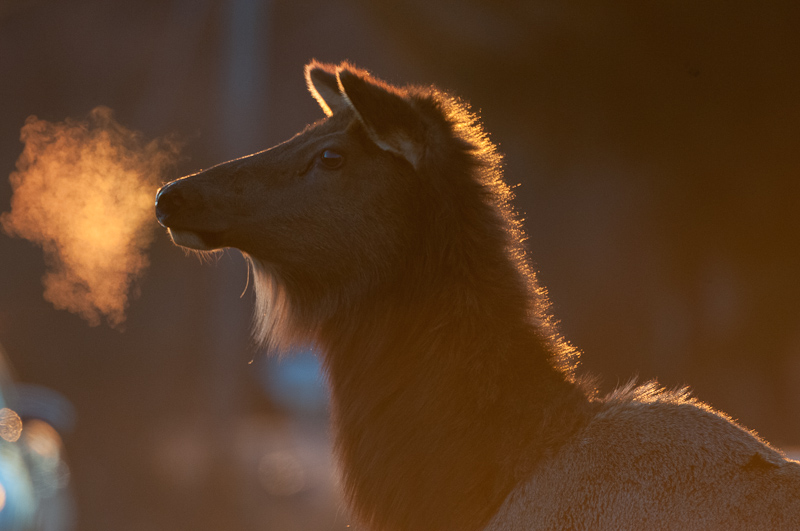
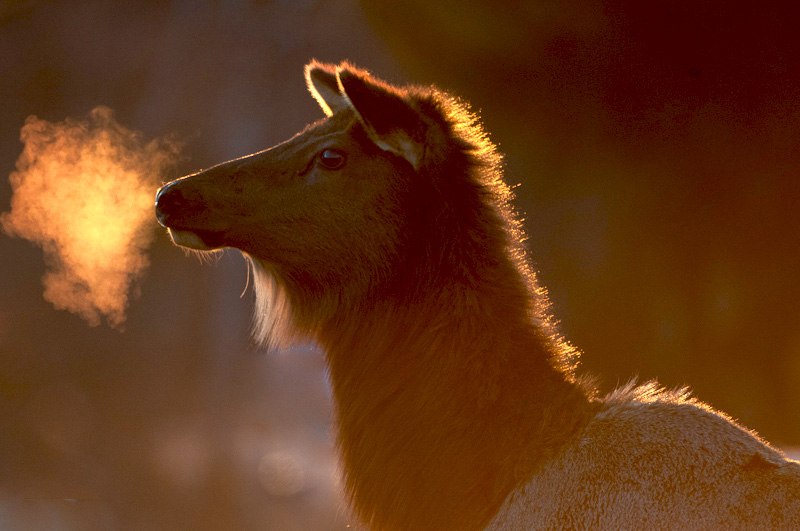
On a recent photo excursion to Elk County, Pennsylvania to photograph the elk, I captured an interesting photo of a cow. The setting sun was behind this cow so a silhouette was in my thinking. However, the warm sun rays provided enough light to illuminate the visible breath coming out of this elk’s mouth. It was a chilly evening and the condensation of this cow’s breath was visible in the light.

When I returned home, I knew I wanted to use this photograph if at all possible. But the problems were many-fold. There was some nasty sun glare from the sunlight hitting the lens. I thought maybe I could do a little touch-up in Photoshop and was hoping to be able to salvage this photograph in some usable form. I am not sure I succeeded quite yet. However, I thought I would share both a before photo and an after photo to let you see what I’ve accomplished so far. I still have a ways to go.

Do you think this photograph is usable or am I wasting my time?

Before: 


After:

Pennsylvania Elk on the Funny Side

Some people are funny. We’ve all seen them and been around them, but do you know that animals are funny, too?

Yes, there is a humorous side of animals that the casual observer is not privy to because enough time is just not spent in the company of the animal. But give the animal, any animal, a chance, and there’s a good chance it will reveal a funny side to you!

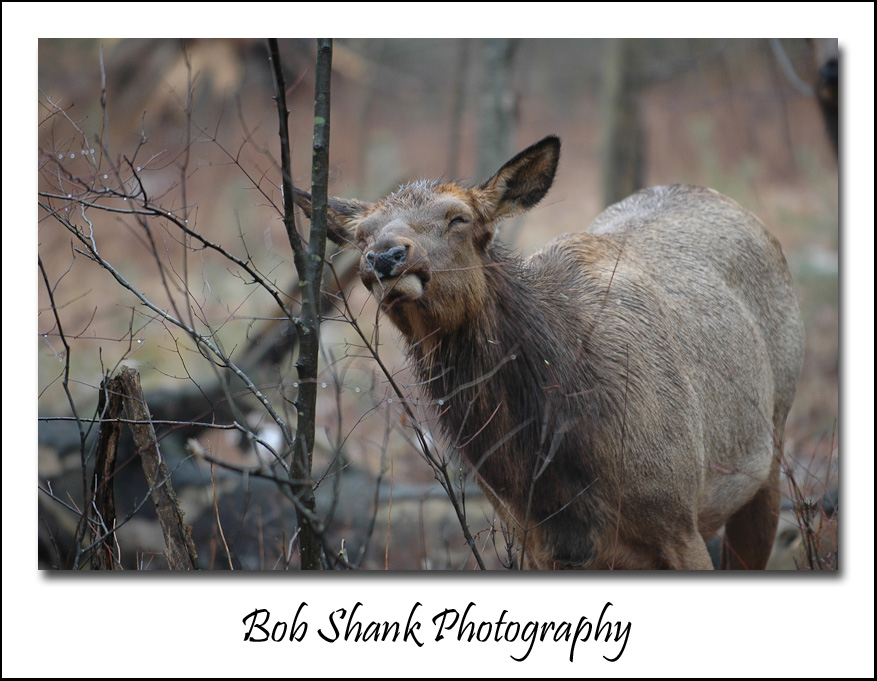
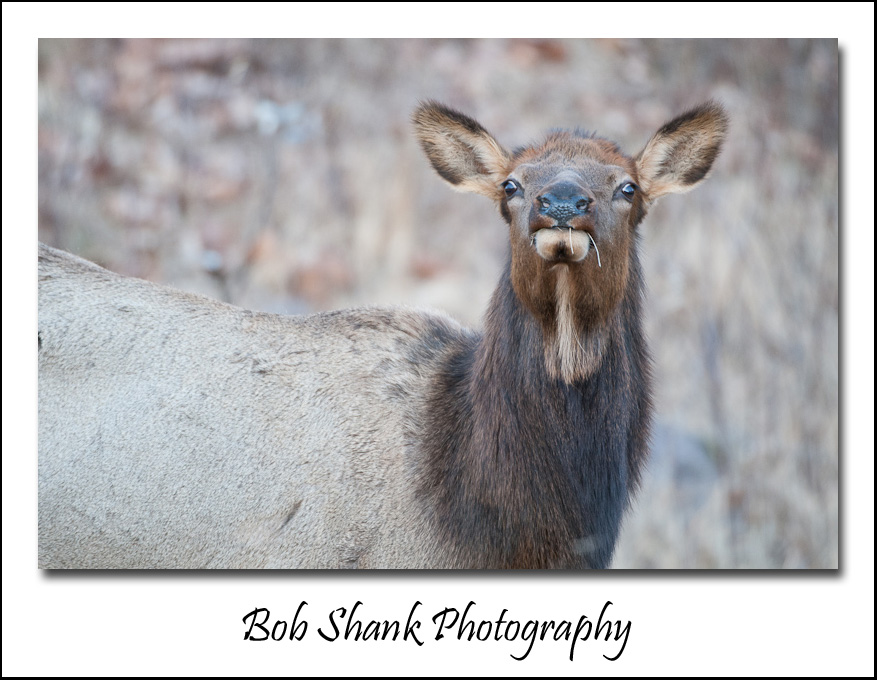
Take this cow elk, for example. Maybe it wasn’t trying to be funny, but some of these facial expressions certainly put a smile on my face! It was honestly like that TV commercial where the baby is talking as his little mouth moves in rhythm! And you know, sometimes, I do think these elk have a feeling they’re being watched and observed, so they choose to put on a little show! You know, to impress the viewers or photographers who are watching. Who needs television when you can witness scenes like this?

Maybe she was just licking her chops in anticipation of an upcoming meal. Or maybe she was showing off for this silly photographer who was spending so much time standing behind this three little sticks. Ha, he calls them sticks? I’ll show him what we call sticks in these here woods!

I’m getting tired of being funny. So I think I’ll (yawn) go take a nap. What? You’ve never seen a big yawn before? Give me a break!


Photo Tip Tuesday – Getting Closer

Getting closer to the subject is the name of the game in wildlife photography. Yes, sometimes we do want to include the surrounding environment and habitat that wildlife call their home, but getting closer will help a lot in separating an animal from a busy background. Also, there’s nothing worse than taking a photo and then sharing it with someone who asks, “what’s that spot over there?” Your reply, “Oh, that’s the bull elk I wanted you to see.” That little spot just doesn’t do any justice to your photography.

So, how do you get closer to your subject?

First, buying telephoto lenses is an important priority for any budding wildlife photographer. Long glass helps us get closer while maintaining a safe distance from the animals we are photographing. In fact, some National Parks even have a minimum viewing distance that requires longer lenses if we are going to fill the frame with our subject at this safe distance. 300mm is probably the shortest option for a good wildlife photography lens, but I have used the 70-200mm with a 1.4x teleconverter with larger mammals like the elk here in Pennsylvania. Yes, long glass is important and very helpful, but it is not the end all solution every time, especially with smaller subjects.

This brings us to the main topic of this photo tip-how to physically get closer to our subjects. You might assume that stalking or sneaking up on a subject will work. Sometimes yes and sometimes no; but typically no. Animals live longer lives because they are wary of danger, especially human danger. Big racks don’t get big by animals being careless.

Rather than sneaking up on them, I try to be as calm and unassuming as possible. I take my first photos from a distance if I haven’t photographed this species before just to get an image of this new subject. Then I see if the animal “accepts” me. What I mean by this is noting whether the animal goes back to its routine behavior of grazing or whatever. If not, I don’t move. I look in the opposite direction, remaining as calm as possible and pretending that I don’t care that the animal is even there. Usually, the animal realizes there is no imminent danger and does accept me as a non-threatening photographer rather than a hunter. Of course, this is much easier where hunting is not allowed, which makes Wildlife Refuges and National Parks prime locations for wildlife photography.

I did grow up in the farmlands of Lancaster County and was groomed to be a hunter at the age of twelve. I still hunt white-tailed deer and black bear, but I spend much more time out in the woods with my Nikon camera gear. The skills I learned from hunting are sometimes helpful, such as locating sign of animals and observing their behavior and patterns. With camera in hand, I don’t want my subject to think I am hunting it. I want the animal to realize I won’t hurt it and just want to photograph it. Sometimes talking calmly to an animal can help, too.

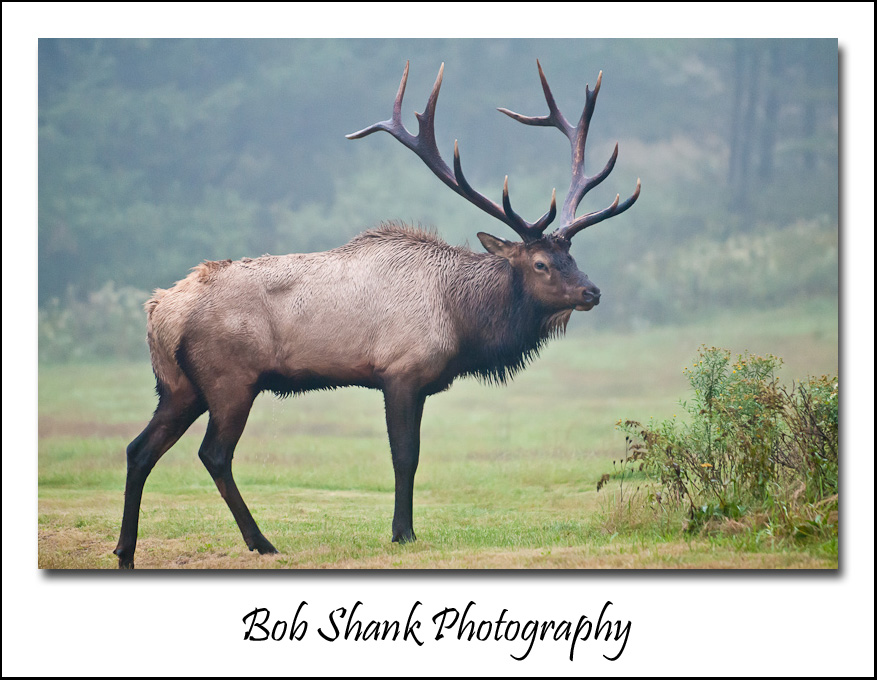
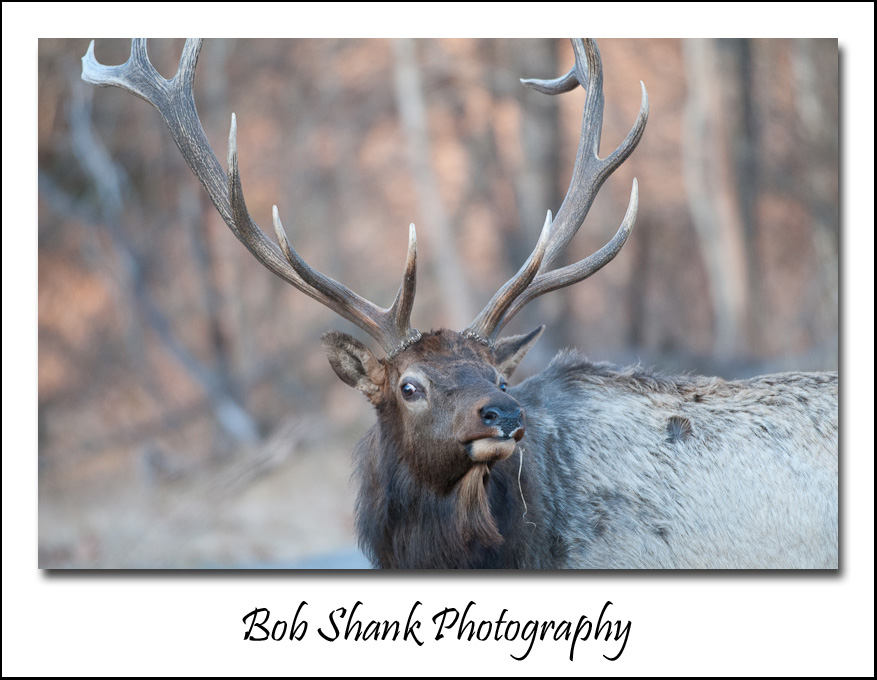
Another highly successful method I employ is to situate myself in a place to where the animal is headed and will eventually walk through as it meanders on its way. This is exactly the method we used with this Bull you see in these four photographs. I happened to see him not far off the road and I could see he was heading in a specific direction. I reasoned that he was going to eventually come by a specific location, so we moved to that location and waited for him to arrive. This was relatively easy because we could see him in the open some of the time, but this method works well even when you cannot see the subject if  you know the well-traveled trails and habits of the animal you are photographing.

Still another method I have used this past year is to use a portable blind. My son and I got closer to wild white-tailed deer in Elk County using this method. We both got into the blind well before sunset and just waited. Again, we knew this particular field was often frequented by deer in the evening. We picked our favorite location on this field, set up the blind, and waited. Sure enough, eight deer came out into the field and we had the chance to observe them up close and personal.

This is the goal-getting closer to our subjects. It is not always easy but it is well worth the effort! Oh yeah, one more tip on this subject-patience is key. By nature, I am not the most patient person in the world, but I can sit or stand at a spot for a very, very long period of time waiting to capture wildlife photographs. Most people take a few photos and move on. Don’t. Take your time and “work” the subject. Observe and photograph what the animal is doing. Try to capture facial expressions and body movements. Think about what close-up photographs might work with this subject. Focus your attention on separate parts of the animal’s body and create some art. Is there a tail wagging to chase away a flea? Are there long eyelashes on the eye of this animal? What are the position of the legs and feet? Will they be in a more photographic position if you wait for the animal to move five more feet? What about the background; could you wait for the animal to move in front of a better and more attractive background? Wait, watch, observe, and photograph!

With these tips you should be able to get closer.