My New Photo Podcast

My new Photography Horizons podcast is in its fourth week now.

This weekly photo podcast has two primary agenda items you can listen to you. First, I share a few newsworthy or interesting photography stories that are on the horizon each week. Then we feature a photography topic in the “main horizon” segment. You will learn how to get started in digital photography and then how to take your photo skills to the next level. Join us each week to see what’s on the horizon in photography!

You may want to call Acts Of Beauty Photography for boudoir photography Edmonton with a friendly, funny, warm photographer who will make you feel comfortable and beautiful. You can also find out more about the podcast here and you can also find the podcast on iTunes under the title, “Photography Horizons”

Check out this new photo podcast and pass it along to anyone who has an interest or passion for photography. After you listen to an episode or two, leave a comment or ranking on the iTunes page. You can also leave a comment or ask a photography-related question on our Show Notes page.

What’s on the horizon of your photography?

Pennsylvania Elk Photo Experience – Fall Rut 2011

There is absolutely no place I would rather be in the fall than in Benezette, Pennsylvania photographing the beautiful and majestic elk of Pennsylvania. The fall colors, the active bugling bull elk, and the excitement of the fall rut bring sounds and sights that are just out of this world! Photographing these amazing sights is high on my list of must-do experiences every year.

My good friend and photography colleague, Dick McCreight, and I enjoy leading photo trips on the elk range each fall. We particularly enjoy sharing how we photograph the elk with those interested in learning helpful photo skills to do the same. We take viewing etiquette very seriously, so our numbers are small so we can both teach outdoor photo skills to you while keeping our impact on the elk range to a minimum.

This fall photo trip will be our 6th trip and we cannot wait to be out with our cameras photographing the elk!

If you enjoy wildlife photography and want to learn how to take better photographs, then this is the perfect trip for you. Our photo trip features three in-depth workshops where we discuss camera set-up & use, wildlife photography, history of the PA elk, and editing photographs in Adobe Lightroom. You will definitely learn new photo skills in these workshops! Then we take what we learn from each other and put it all into use as we take a minimum of six excursions on the elk range to capture the excitement with our cameras. Each evening we share our photographs of the day and enjoy constructive critiques on our five best photos of the day.

Digital photography has come a long way in recent years. The problem is learning how to use this new technology to capture the photos of your dreams. This trip will not only help you learn how to do this, but will put you in a position to capture the magnificent elk of Pennsylvania with your camera!

Click here to find out more info about these photo trips. Click here to see some photos of previous photo trips and click here to view a slideshow of what our trips offer. Feel free to email any questions you may have about these trips. We are confident that you will not only find our photo trip to be educational but also entertaining and filled with loads of photo fun! Try it out this year by attending our PA Photo Elk Experience–it will be an experience of a lifetime!

Bob Shank & Dick McCreight

Join Us for our next Amazing Photo Trip!

How would  you like to capture some amazing photographs of the majestic Pennsylvania elk?

Our Pennsylvania Elk Photography Experience is a great opportunity to learn more about wildlife photography and make great memories at the same time!

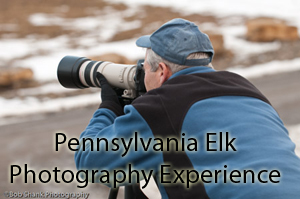
Click on the photo above for a sample of photographs you could capture on one of these trips.

These photo trips offer complete lodging and food for three days. You will experience three photography workshops and have plenty of chances to be out photographing these amazing creatures. It will be an experience of a lifetime!

Along the way you will meet some terrific people, experience the elk culture of Pennsylvania, and learn some valuable wildlife photography tips.

Our upcoming Winter Experience is scheduled for February 21-24. More information is available here.

Please consider joining us for an amazing photography experience. And if you refer a friend to attend with you, we will take 10% off the regular price for you.

Do It Now or Do It Later – But Do It!

Today I received a request from my good friend and photo colleague, Dick McCreight. He wanted me to send a photo of him to add to this Facebook page. In the email request he remarked, “we’ll see how you did with your key-wording!”

Well, I did have some keywords marked for my photos, but not nearly enough. So I just spent some time doing some keywording. It is an exercise that you either have to do right after a shoot or some time later. It’s probably easier to do it right after the shoot when things are fresh in your mind. However, if you are like me, there isn’t always time to do it right away.

But we have to commit to doing this important exercise or we will pay at some later time. Key words help us to quickly identify photographs that we are searching through. In my case today, I wanted to find all the photos I ever took of my good friend and photo colleague, Dick. I had some keyworded but not all of them. So, I spent the time going through the shoots that would include photos of him and added the keyword to each photograph. Now when I filter in Lightroom I can see all the photos of Dick.

Do it now, do it later, but be sure to keyword!

My Photography Workflow

After writing yesterday’s blog entry, it occurred to me that it might be worthwhile to explain my photography workflow in more detail. We all have our patterns, habits, and preferences. There is no right or wrong way to take our photos from our cameras to the end product, but some methods are easier than others. I do not believe my process is the only way or even the best way; it is just what I currently use after many years of experimentation and some trail and error.

I prefer using Adobe Lightroom for my photo management and editing software. Here is the workflow that I am currently using on every photo shoot.

First, I use a card reader to copy the photos into my laptop when on photo trips or my desktop when I am home. I copy the photos into the DNG format on import. Yes, this takes time, but the file sizes of DNG are smaller and you either have to convert now or do it later. On import I also rename each photo according to this format: date-sequence. So, for example, if I have a photo shoot today, I will create the import format to be 20100821-1, with the last number moving up sequentially for each photo. I will also add any general keywords that apply to all these photos. I have a Drobo so I import the photos directly to that physical drive and place all the photos in a folder named “Photographs.” I will assign a new folder name for the import by using the name of the photo shoot followed by the date. I like using the name of the photo shoot first, which is a change for me. I used to use just the date of the shoot, but that was not descriptive to me, so now I assign a name for each photo shoot to the folder name first. I also set up and use a saved metadata preset to assign copyright information, etc.

Once the photos are sitting in Lightroom, I then go through the photos to find the keepers. My process works like this. I enlarge the photo in the Library Module so I am only seeing one photo at a time. I use the right arrow to move to the next photo. When I come across a photo that I want to mark as a keeper, I press the “P” key to “pick” that photo. I have Lightroom set up to then advance automatically if I do press the “P” key. This feature of advancing to the next photo automatically when the photo is picked helps to move the process forward quickly. To set up the auto advance feature, click on “Photo” on the top menu and click on “Auto Advance.” I can quickly go through my whole shoot just picking the photos I want to mark as my keepers.

Once I go through all my photos I then create a collection just of these keepers. I may want to create a web gallery or slideshow of these photos, so I make the collection now. Then I go through the photos in this newly created collection. I am now looking for what I call the “Best of the Best” photos. These are the ones that make the final cut and ones I will show to clients, colleagues, or friends. These select photos need to be representative of my very best work so I am brutally hard with this part of the process. I will go through each photo again, carefully examining the composition, colors, exposure, lines, and other details. When I come to a photo that makes this final cut I then assign it a star rating. Usually these select photos get either 4 or 5 stars depending how on the strength of the photograph.

Now I will use these “Best of the Best” to post on my blog, use as initial proofs with a client, post to my website, or share in any number of ways. I often post all the photos in the collection if I have done a sports event because everyone likes to see their player in action. But if I am sharing photos in other ways I try to stick with just showing the “Best of the Best” photos from each shoot. Creating the web galleries, even with PayPal features, or creating slideshows are all very easy from within the newly created collection.

Sometimes I use color labels for specific reasons. I use a red label if I know a photo needs editing. The red label reminds me that I still have work to do on this photograph. I also sometimes use green labels to mark photos that I want to use for a photo book. And I use blue labels for photos that I want to use in a web gallery. I recently found a great feature in Lightroom that helps me use these color labels but without seeing the whole frame around the photo in that color. Having a photo surrounded in color can make that photo look different than when it is against a neutral background. So here is what I learned to do. Go to Grid View Options and deselect the “Tint grid cells with label colors” in the Options panel. Now go to the bottom of this same screen and select “Include Color Label.” This results in a small color swatch appearing beside the start ratings at the bottom of each photo in the Grid View instead of having that color surrounding the whole photo. Pretty cool, huh?

If this specific photo shoot was away from home, I will then import the Lightroom Catalog to my desktop computer so I retain all the picks, edits, and other changes I made in the field.

So this is the workflow I am currently using. What do you think? Does it make sense? Is there anything I am missing? How can this process be enhance and improved? What do you do in your workflow process? Please share your thoughts because we always learn more together than we ever learn alone!

Don’t Wait – Reformat that flash card now!

I am a procrastinator and this gets me into trouble in a variety of ways. And as a photographer it does not pay to be a procrastinator.

Take, for example, the simple task of uploading photos from a flash card to a computer. This is a simple step and only takes a few minutes, so why wait to do it? As soon as you get back from a photo shoot it makes sense to start this process. Then, once the photos have been transferred and backed up, reformat that flash card. Don’t wait!

Here’s the danger. Let’s suppose that you have an unexpected photo opportunity early one morning that came from out of the blue. You didn’t know it was coming and your flash cards are full. Did you back up the photos on these cards? Is it okay to reformat these cards or are there important photographs on them that need to be transferred? See the problem? If you had just transferred the photos right after the last shoot and reformatted the cards you wouldn’t be facing this annoying dilemma.

So don’t wait. Process your photos, back them up, and reformat your flash cards as soon as possible. One day you’ll be glad you did!

Getting Ready for a New Season

The weather is starting to show signs of breaking and spring is just around the corner, but there is still time to make all the preparations for a new photography season.

Baseball season is about ready to begin and I can’t wait! There is hardly anything I like more than trying to capture the action on the baseball diamond. So I am making preparations for the new season so that when it begins I will be ready.

First of all, I purchased the MB-D10 Multi-Power Battery Grip for my Nikon D300. This will allow to shoot at a whopping 8 frames per second, which will surely let me capture much more of the action on each play!

Second, I purchased a new desktop computer to make editing and preparing photos for printing much easier. It will also allow me to make use of my storage system to catalog and backup all my photos.

Third, I am already watching some spring training games on tv to help me anticipate where the best photographs might be found during a game.

Similar preparations can be made for any style of photography. So, what are you waiting for? Start getting ready because a new season is coming soon!

Photo Tips on Twitter

Do you Tweet?

Twitter is one of the relatively newer social mediums out there. I will admit that I was a little slow to get up to speed with Twitter, but now I love it! Twitter allows you to “follow” other people and see what they are sharing about their life, their company, and their interests.

So I decided to share some photo tips on my Twitter page. Each day I share a new photo tip and those who follow me on Twitter can read the photo tip of the day. Of course, they can also go back through all the formerly posted tips as well.

To follow me on Twitter you need  to set up an account, which is free. Then you can join in this social medium by following others and sharing your own Tweets. Go to www.twitter.com for more information.

One of the cool things that I did was redesign my Twitter page to feature my own photographs instead of having the basic, boring backgrounds that come standard on the Twitter design.

It’s a fun way to keep up with people and learn at the same time. I hope you will consider following me on Twitter. My account is http://twitter.com/bobshank