Lightroom Photo Collages

Adobe Lightroom is my most favorite photo-editing software. I can quickly go through an entire photo shoot, pick the keepers, do some quick touch-up edits of some photos, and post them as a gallery on my website. It is awesome!

I still do use Photoshop for some more advanced editing and creating some collages, like the ones I do for the high school baseball seniors. Photoshop certainly has its place and I do keep it within arm’s length, but more and more I find additional features in Lightroom. A recent example is creating collages right in Lightroom.

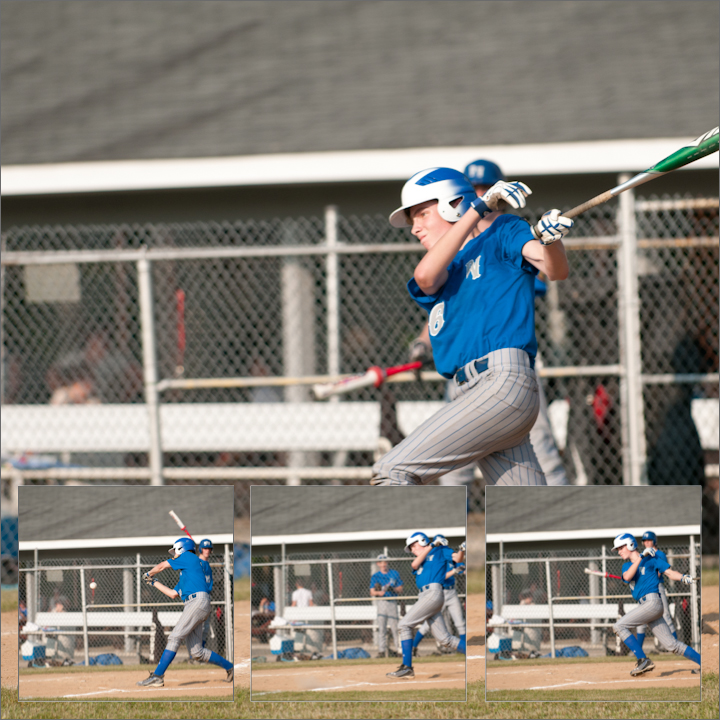
A photo collage is a great way to share the highlights of a vacation, a baseball game, a musical, or any other subject captured with your camera. Here are five samples that I was playing with the other night. (You can click on each image to see a larger photo of the collage.) I think they make great photo keepsakes. What do you think? Which one do you like best?

Wildlife Web Galleries

I already mentioned previously that I like Lightroom. I’ve been using this software for well over a year now and I love it! Just last night I watched a tutorial on how to use the upload feature in the Web Gallery Module. It got me to thinking that I can not only save time by automatically uploading photos to my website directly from Lightroom, but I can also keep galleries of my wildlife photos and just keep updating them automatically from Lightroom.

It took me a little while to implement my idea, but after a few trials and errors it worked! I was excited last night about this possibility and thought, gee, this is almost too easy! I suppose this is what software really should provide for us, but I typically find the opposite to be true. Computers and software are supposed to work for us and make our work easier, right?

Well, last night I implemented an idea that really shows that Lightroom can work for me in some very positive ways. For example, I wanted to create a gallery for each different mammal that I photograph–deer, bear, squirrels, elk, etc. Previously I created a gallery in Dreamweaver for this but then had to edit each gallery every time I added some additional photographs to the gallery. So last night I got the brainstorm to create the galleries in Lightroom and have Lightroom upload the gallery for each mammal. Now, when I add more photos I just upload the gallery again, which overwrites the old one and automatically adds the new ones. Now that’s efficient!

So now my website is starting to feature some of these wildlife galleries. You can go to my website and see these galleries listed on the right-hand side. Click on any of the mammals listed there to see the corresponding galleries. Thanks, Lightroom, for making this task not only manageable but easy, too!

Rounded Corners with Lightroom

This tip came from Matt Kloskowski on his Killer Lightroom Tips blog.

I’ve mentioned previously that Lightroom is powerful. It really is. And this tip is just one more example behind some of the unexpected power in this interesting software package. One of the main selling points of Lightroom to me was that it manages my photos, allows me to edit them, and provides ways to export the photos for use on web galleries, in email messages, or as physical prints. This all-in-one software even has me reaching for Photoshop less and less. The latest upgrade to 3.0 includes some really nice features and I am still learning some of the many features found in Lightroom.

The rounded corners tip makes for some interesting prints or photos to display on the web. You can learn the steps to make your own rounded corners by checking out Matt Kloskowski’s blog.

Here is my example of Matt’s tip. Pretty cool, huh? And all done in Lightroom.

I Like Lightroom 3.0

Two years ago, my good friend Dick McCreight, convinced me to download the trial version of Lightroom 2.0. I was hesitant because I had just starting using another software to manage my photos and I was not eager to shell out more money for another program. But after installing and trying the trail version of Lightroom I was absolutely sold. It also didn’t hurt that Dick is a guru with this software! Just watching him move around the computer screen and edit his photos was breathtaking for me. I still remember that day sitting in his office and watching in total disbelief at what this powerful software can do.

Now, two years later, I upgraded to version 3.0 and I couldn’t be happier. This software still rocks and has improved in some amazing ways over the previous version. The photo you see below was completely edited in Lightroom 3.0. I love the photo management that this software provides and I am slowly learning more and more about all the powerful editing features as well. Did I say Lightroom rocks? Well, it does!

Web Galleries from Lightroom

Continuing the theme of how I post-process photographs, I will now discuss how I use the Web Gallery Module in Lightroom to share my photos with others.

Let’s say I shoot a baseball game, which is one of my most favorite subjects. Every game has a story that unfolds and my job is to try to tell that story photographically. I also like to portray players in action, preferably with the baseball in the frame. So I get back from a shoot and select the keepers as I described on Saturday. All those that are marked “picked” will now be prepared for display on a new web page on my website. Lightroom makes this incredibly easy!

First, I go to the collection I created, that contains all the selected photos. Then I go to the Web Module. Here’s where things get fun! Let’s say I want to add the photos to my website and have them display as a slideshow with a black background. To start setting this up, I click on the already installed Lightroom Template from the left panel named “Slideshow.” Now I choose to customize this in a  number of different ways. First I setup the titles in the right panel labeled Site Info. I can change the Site Title, Collection Title, Description, Contact Info, and the Web or Mail Link. As changes are made they show up in the large preview screen.

I typically just go down the right-hand panel and make changes in this order. The next panel is the Color Palette where I can change the font color, any header or menu text, the border, and the background colors. I like to use a black background for slideshows with white text.

The Appearance Panel allows us to change the layout features such as adding an identity plate and determine the size of thumbnail and image size.

The Image Info panel gives me the opportunity to add titles and/or captions to each photo, assuming I included this information in the metadata for each photograph.

The Output Settings panel allows me to set the size and quality of the images, add watermarks, and sharpen on output.

Finally, the Upload Panel is where we can setup our ftp server information for automatic uploading. I ignore this panel and prefer to export manually because I create a username and password so that the photos of these young players are protected. This process is a topic for another discussion at a later time.

Once I make all the changes to get the web gallery just the way I want it to look, I double-check to make sure the preview is exactly as I imagined it should look. The uploading process takes some time, so I want to be sure things are correct now. Otherwise I might have to another upload, which only takes more time.

I export the newly created web gallery to my hard drive. Then I use my web design software to upload the gallery onto a new folder on my server, which is the last step in this process. You can see an example of a slideshow I created by following these directions here. A visitor to my website can scroll through each image manually one-by-one or opt to start the slideshow and have  the photos scrolled through automatically.

This is really easy to do and I use this or a similar feature after every photo shoot. Lightroom makes it very customizable and easy to do. Give it a try yourself!

My Photography Workflow

After writing yesterday’s blog entry, it occurred to me that it might be worthwhile to explain my photography workflow in more detail. We all have our patterns, habits, and preferences. There is no right or wrong way to take our photos from our cameras to the end product, but some methods are easier than others. I do not believe my process is the only way or even the best way; it is just what I currently use after many years of experimentation and some trail and error.

I prefer using Adobe Lightroom for my photo management and editing software. Here is the workflow that I am currently using on every photo shoot.

First, I use a card reader to copy the photos into my laptop when on photo trips or my desktop when I am home. I copy the photos into the DNG format on import. Yes, this takes time, but the file sizes of DNG are smaller and you either have to convert now or do it later. On import I also rename each photo according to this format: date-sequence. So, for example, if I have a photo shoot today, I will create the import format to be 20100821-1, with the last number moving up sequentially for each photo. I will also add any general keywords that apply to all these photos. I have a Drobo so I import the photos directly to that physical drive and place all the photos in a folder named “Photographs.” I will assign a new folder name for the import by using the name of the photo shoot followed by the date. I like using the name of the photo shoot first, which is a change for me. I used to use just the date of the shoot, but that was not descriptive to me, so now I assign a name for each photo shoot to the folder name first. I also set up and use a saved metadata preset to assign copyright information, etc.

Once the photos are sitting in Lightroom, I then go through the photos to find the keepers. My process works like this. I enlarge the photo in the Library Module so I am only seeing one photo at a time. I use the right arrow to move to the next photo. When I come across a photo that I want to mark as a keeper, I press the “P” key to “pick” that photo. I have Lightroom set up to then advance automatically if I do press the “P” key. This feature of advancing to the next photo automatically when the photo is picked helps to move the process forward quickly. To set up the auto advance feature, click on “Photo” on the top menu and click on “Auto Advance.” I can quickly go through my whole shoot just picking the photos I want to mark as my keepers.

Once I go through all my photos I then create a collection just of these keepers. I may want to create a web gallery or slideshow of these photos, so I make the collection now. Then I go through the photos in this newly created collection. I am now looking for what I call the “Best of the Best” photos. These are the ones that make the final cut and ones I will show to clients, colleagues, or friends. These select photos need to be representative of my very best work so I am brutally hard with this part of the process. I will go through each photo again, carefully examining the composition, colors, exposure, lines, and other details. When I come to a photo that makes this final cut I then assign it a star rating. Usually these select photos get either 4 or 5 stars depending how on the strength of the photograph.

Now I will use these “Best of the Best” to post on my blog, use as initial proofs with a client, post to my website, or share in any number of ways. I often post all the photos in the collection if I have done a sports event because everyone likes to see their player in action. But if I am sharing photos in other ways I try to stick with just showing the “Best of the Best” photos from each shoot. Creating the web galleries, even with PayPal features, or creating slideshows are all very easy from within the newly created collection.

Sometimes I use color labels for specific reasons. I use a red label if I know a photo needs editing. The red label reminds me that I still have work to do on this photograph. I also sometimes use green labels to mark photos that I want to use for a photo book. And I use blue labels for photos that I want to use in a web gallery. I recently found a great feature in Lightroom that helps me use these color labels but without seeing the whole frame around the photo in that color. Having a photo surrounded in color can make that photo look different than when it is against a neutral background. So here is what I learned to do. Go to Grid View Options and deselect the “Tint grid cells with label colors” in the Options panel. Now go to the bottom of this same screen and select “Include Color Label.” This results in a small color swatch appearing beside the start ratings at the bottom of each photo in the Grid View instead of having that color surrounding the whole photo. Pretty cool, huh?

If this specific photo shoot was away from home, I will then import the Lightroom Catalog to my desktop computer so I retain all the picks, edits, and other changes I made in the field.

So this is the workflow I am currently using. What do you think? Does it make sense? Is there anything I am missing? How can this process be enhance and improved? What do you do in your workflow process? Please share your thoughts because we always learn more together than we ever learn alone!


These Photos Didn’t Quite Make the Cut

I enjoy the editing process of photography. After an event or outdoor photo shoot, I come back to my studio to edit the photos and see just what I captured. The first part of the process for me is picking the best photos. I use Lightroom 3.0 now and have learned how to quickly go through a large number of photographs and select the best ones. I mark them as picked by pressing the “P” key. Then I go back over these selected photos again to really narrow down the very best of the best. I mark these with a green label and then give them a star rating depending on the strength of each individual photo.

Last week I came home and had 72 photos that I picked and then narrowed this down to 11 of what I considered to be the best of the best of this photo shoot. These are the ones I show on my website, to colleagues, and to friends. Most of my friends don’t have the patience or willingness to sit through a slide show of all the photos I took or even the ones I think are the best. Showing our best work is an important part of the editing process.

I make sure to take the time to edit my picked photos and spend a little extra editing time with the best of the best, which are going to be seen by others. I am quite picky in this process but then I expect big things of my photography. Sadly, this means there are many photos that almost make this selection process but are just out of reach to making the best of the best category.

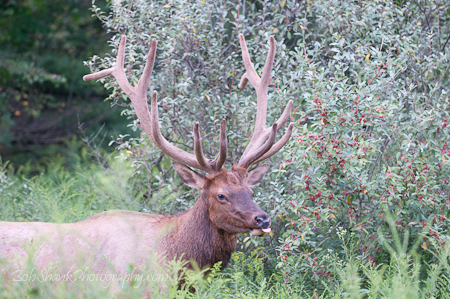
Here are three examples. The first one was very close to being selected, but I just didn’t feel the colors were quite right and I wished I had more of this eating bull in the image. It’s close, but didn’t make my final cut. The second one was also close to making it. I really liked how we can see the bull’s tongue coming out of his mouth in this photo, but again the colors were kind of flat. (The light wasn’t very good that evening.) It was just shy of impressing me enough to be picked as the best of the best. The third image has some weeds in-between the camera and the bull. This was distracting enough to be the worst of these three and not good enough to make the final cut. I certainly won’t trash these photos, but they just didn’t quite make the final cut.

Flickr is Easy in Lightroom 3

If you use Lightroom and have a Flickr account, things could not be easier!

Publishing photos to your Flickr page from Lightroom is so easy. I was able to set up the account and post photos within mere minutes. The steps are quick and easy.

First, go to the Library Module in Lightroom. Scroll all the way down on the left panel until you see “Publish Services” and “Flickr.” Now, go press the “Set Up” link and follow the directions to direct Lightroom to your Flickr account.

Then, once the setup is completed, create a photoset by right clicking on the Flickr bar and “Create Photoset.” Now make this your target collection by right clicking on this Photoset bar and selecting “Set as Target Collection.” Go to the photos you want to publish on Flickr and dump them into this new target collection by right clicking and selecting “Add to Target Collection.”

Once your collection is complete, go back down to “Publish Services,” right click on the bar of your new collection, and select “Publish Now.”

Sit back and watch Lightroom do its thing. It’s a snap!

Give it a try and let me know what you think of this new feature! Now, if only they can add the same great feature to add photos to Facebook…

Check out my Flickr page by clicking here.

Wondering how best to proceed…

Sometime next week I will be receiving shipment of a new desktop computer that I will devote exclusively for my photography. I will attach my Drobo to it so I can have all my photographs on the Drobo and my Lightroom catalog on the pc. Currently my photos are on two external hard drives and a few on my laptop.

My question is how to best proceed in moving the photographs over to the Drobo so that Lightroom can find them. Since I’ve done quite a bit of editing already on some of these photos, I am thinking that importing the catalogs is the best way to go.

Have any of you done this before?

I was waiting for the new pc because with Windows 7 I can view the Drobo as one complete disk. With Windows XP there was a 2GB limit for each drive. But now I have to find the best way to get everything over the Drobo and as efficiently as possible. If you have any thoughts on how best to proceed, I’d love to hear from you!

Before and After

Adobe Lightroom 2 is some awesome software! It catalogs my photographs, tracks keywords, and allows me to sort through or find the exact photo I am looking for with just a few clicks or filter parameters. The Library Module alone is worth the price of  this photo software. Frankly I believe there is no easier cataloging software on the market than Lightroom.

Now enter the Develop Module. With the upgrade to 2.x, Lightroom jumped leap years ahead because now localized editing is now possible. The paintbrush and graduated density filter are just two tools that take advantage of local edits. In just a little time the user can be correcting white balance, adjusting the exposure, and cropping to a pleasing ratio. It is amazing!

Take a look at these two photos. The first one was right out of the camera as it was imported into Lightroom. The second photo was after just a few quick edits. What do you think? Doesn’t Lightroom rock?