Free Lightroom Effects Presets

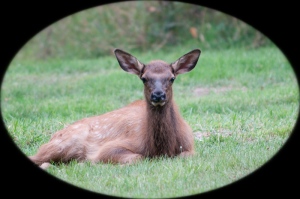
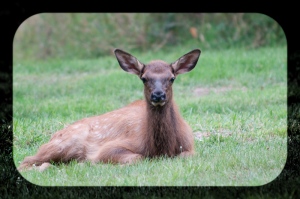
Effects in Lightroom can change the appearance surrounding a photograph by creating an outside border. This is helpful when desiring the main subject to stand out. Oval and rectangular shapes are available to create special borders around a photograph.

Here is a link to five free Lightroom Effects Presets that I created yesterday. The thumbnails show a small version of the finished product. Download these effects and give them a try today.

http://bobshankphotography.com/Lightroom%20Templates%20and%20Presets.html

Directions can be found at the bottom of the web page on how to download and use these files.

Rabbits Out of Nowhere

Our daughter, Lydia, went for a walk late this afternoon. On her way out and then back again she was surprised to see a baby fawn lying right next to the front porch of house!

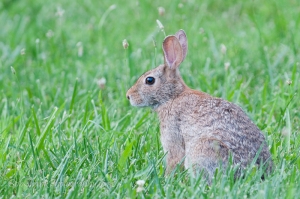
Motivated by her sighting, I grabbed my camera, put the 70-200mm lens on, and went out the door. It was just starting to rain and the cloud cover was blocking some of the light. Before I even took ten steps out our back door, I spotted a rabbit. It was a young one and appeared out of nowhere! I causally moved about as if just wandering around and was able to get closer. The light was too dim for a 200 ISO setting, so I bumped it up to 400. At an aperture of f/2.8 I was getting anywhere from 1/250 – 1/325 shutter speed. This was just enough to allow me to shoot handheld and get a few nice shots.

Before long, this little bunny moved into the brush, apparently having enough of my presence. So I moved on to another rabbit sitting just beyond our driveway. This was an adult rabbit. I observed and clicked the shutter release and then watched in amazement as he stretched out his neck to get some grass to eat. This was repeated several times as the continuous frames were blasting away from my end. Then, almost as if on cue, this rabbit started cleaning his back foot!

Wildlife is incredible and completely amazing to me. I am known to say, “There’s no place like the mountains.” I believe this deep down in my soul for a number of reasons, not the least of which is the wonderful wildlife I get to see and photograph!

Today I was hoping to photograph a fawn but ended up photographing two rabbits who seemed to emerge out of nowhere. I just happened upon them and I’m so glad I did!

What do you think of these rabbit photos?

I’m Slowly Learning to See the Light

I am thoroughly enjoying Moose Peterson’s book, “Captured.” I enjoy wildlife photography and read all of Lennie Lee Rue III’s books, which I just love. His books really rock! They taught me a lot that I use and depend on every time I am out in the wild with my camera. So I guess I was rather slow to purchase a different photographer’s book on wildlife photography. Well, let me tell you, Moose’s book is equally as impressive. The best part of Moose’s book is how different it is from other photo books I’ve read in the past. Forget the nuts and bolts of f-stops and shutter speeds. The book takes a different and refreshing approach.

Moose shares wonderful narratives and helps the reader really think about the subject being photographed. He walks you along the paths he took to capture his amazing and breath-taking photographs. He does not hold your hand, telling you which f-stop is the best or even his favorite. No, this is not a book for those needing to have their photographic hand-held. Rather, Moose makes you think. He makes you think about your approach and goal in the photograph. He also challenges the reader to see the light (pun intended, I’m pretty sure).

Light of some kind is required for photography. After all, “photography” literally means “writing with light.” With out a light source we don’t got a photo! So we can agree on the importance light brings to the photo party. However, even after many years behind the viewfinder, I am not sure I’ve been looking at the light critically or inquisitively enough. We all were told about the Golden Hours and to aim to shoot just after dawn and just before dusk. Light often takes on a unique and special quality at these times.

Light can change in an instance. Just this evening I took my son, James, to his baseball practice and was sitting in the truck playing with the menus on the LCD screen on my camera. I like to do this every now and then to familiarize myself with my camera. After all, there is nothing worse than messing with trying to find a particular setting in the heat of the moment when the photo action is fast and furious. It is much better to be fully prepared and so spending some down time with my camera is time well-spent. Anyway, I was playing with my camera when I noticed the light of the late day bouncing off the tips of some of the cumulus clouds. I was not in a good place to take a photograph due to electrical wires and some parking lights being in my way, but I couldn’t help but notice the way the light was just dancing off the tips of the clouds. It was beautiful. And here’s the thing–I doubt I would ever even notice this if I wasn’t interested in photography. How much do we miss by not looking or paying attention in this life?

Light has several qualities that we need to think about as photographers. Quantity, direction, and quality are the top three from what I was taught. The amount of light, or quantity, is critical because without enough light there can be no photograph. On the other hand, too much light, like at high noon, can be extremely difficult to deal with in photography. Quantity of light will dictate a lot about proper exposure. Less light requires us to open up our f-stop, while bright light requires us to stop down. This is pretty easy so far.

Direction of light is also important. Most of us were taught to place the sun behind us or over one of our shoulders when photographing a subject. This is typically sound advice but it is no always possible. For example, I sometimes photograph baseball games where I have to shoot directly into the sun as it sets due to how the field is set up. This is tough, if not impossible. However, sometimes shooting into the sun can create some stunning photographs like for silhouettes to mention just one. Back-lighting can also create amazing effects in a photograph. So, yeah, the direction of light is pretty important, too.

Quality of light is one of the most overlooked and perhaps the least understood of these three. We all see the difference in the sun’s light between morning and high noon and then dusk. But have you ever stood at the same place for any length of time and witnessed how the quality of light changes over time. Add some clouds and things change. Different seasons make some obvious changes, too. Yes, some of these changes are in the first two categories of quantity and direction of light, but watch carefully for the quality of light. This is so subtle at times. In fact, it is hard to describe or talk about, but when you see it you know it. The quality of light can make or break a photograph. I remember shooting a baseball game recently where the sun was just gorgeous. I vaguely noticed it at the time, but when I got back home and started processing my photos the quality of light revealed itself in an entire sequence of photographs. It was beautiful!

Now the key is to notice these lighting subtleties before we photograph a subject. See the light! It sounds so simple and yet it can be so elusive!

Later this evening I was driving in my truck and noticed how the setting sunlight was just kissing the very tippy tops of some of distant clouds. I was not in a good position to photograph these clouds, but I saw the light and the light was just gorgeous! I’m slowly learning to see the light!

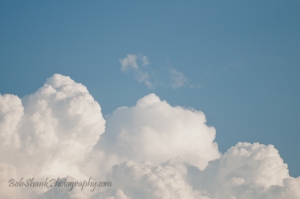
I am almost embarrassed to post this photo I took earlier this evening of the cumulus clouds, but it fits with my topic of seeing the light. The direction of light was coming from right to left into the cloud. The quantity of light was pretty bright but the humidity and haze in the air helped to defuse it a touch. The quality of light wasn’t bad. It created some very nice contrast in the cloud formations, which really made them stand out.

See the light. You and your photographs will be the better for it!
Ragtime

Lydia, our theatrical daughter, enjoys performing in community theater. Last weekend The Sherman Theater hosted Ragtime. The actors/singers/dancers in this musical were astounding! Their voices, expressions, and stage movement provided wonderful opportunities for photography.

Now don’t think for a minute this was easy. No, the light wreaked havoc on exposure settings and the low-level of light blurred just about any movement whatsoever. Add to this the variant colors of the stage lighting and you begin to get an idea of what I was facing. Fortunately, I was able to capture some of the wonderful facial expressions of the actors and I believe the following photographs show at least some of this expressive drama.

Photographs require light and light is the subject we are after many times. Light can make or completely destroy a photograph. I was shooting without flash, which wasn’t allowed and is a huge distraction for the actors, so available light was the only option. As  you can see in these photos, the colors of the lights changed from red, to yellow, to blue. I found that darkening the background worked some of the time but it was a struggle to work with the available light and get images in focus. Even with my f/2.8 70-200mm Nikkor Lens, this was not possible much of the time. Facial expressions can also make a photograph successful and certainly help to tell the story and drama of the musical. Facial expressions are great and I believe the facial expressions in these photos make them work. What do you think?

[slideshow]

Tractor Power

The Blue Mountain Antique Gas & Steam Engine Association is  holding their 40th Anniversary Tractor Show this weekend.

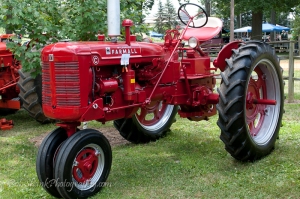
James and I attended the show today and were greeted with beautiful weather and tractors galore! We had a fantastic time looking at the Hit ‘n Miss engines, walking through the flea market, and, of course, looking at all the beautiful tractors. There is just something about a tractor that thrills me. Seeing a tractor restored to its original condition is certainly breathtaking, but I also like the tractors which show their wear and tear from time spent in the fields. Tractor power just plain rocks in my humble opinion!

Here are a few photos I took today. As you can see, my son and I are partial to the Red Power of the Farmalls. They are beauties in our eyesight!

More on the USS Wisconsin

We had the opportunity to tour topside on the USS Wisconsin this past Saturday and my son and I had a ball!

Of course, I had my camera out the whole time taking photos. We no sooner parked the truck when we saw a great angle of the ship from our vantage point in the parking deck. Then as we walked closer I was absolutely amazed at the view of the ship from straight on. We learned that this battleship is 108 feet wide because the Panama Canal is 110 feet wide so this ship will just fit. But I have to say, looking at the ship from straight on sure makes for an interesting and somewhat strange sight!

This battleship was originally designed to carry about 1,800 crewmen, but that was increased to just over 2,900 crewmen. This resulted in some extremely tight quarters and sleeping arrangements. Most of us do not realize the many sacrifices made by the men and women who serve our country in the armed forces. We are one very fortunate country and owe a huge debt of gratitude to those who are willing to sacrifice so much to protect our freedom.

Thank you from the bottom of my heart to all who serve this great country. I for one appreciate it immensely!


You Just Never Know

This past Friday I drove to Norfolk, Virginia to pick up my son from Sea Cadets Boot Camp. He was there for the past two weeks so I was there to attend his graduation and pick him up. He also wanted to tour the USS Wisconsin afterward.

I gladly attended his graduation ceremony but was not nearly early enough for my liking. I usually like to get to an event with plenty of time to spare so I can check out the best photo shooting angles, the lighting, check out any obstacles, and more. Well, the graduation ceremony location changed due to impending bad weather and heavy traffic were both reasons to delay my early arrival. I think I arrived about 15 minutes before the scheduled ceremony began.

I was given a program as I entered the facility, which was actually a hangar and now a makeshift graduation hall. I looked for my son’s name to figure out which company he was in so I could be close to him. I eventually found his name on the very back page and noted that he had some fancy brackets around his name. This indicated to me that he might be receiving some kind of award or recognition, so I positioned myself up near the side/front of the room to get a shot of his face if this actually happened.

The ceremony started. It was difficult to hear the speakers because sound doesn’t travel well in a hangar. A few cadets received awards and then the biggest, most prestigious award was being announced. It was the Battalion Honor Cadet Award, which is awarded to the most impressive cadet who is a cut above the others–above over 170 cadets in this particular case. They announced the recipient and sure enough it was our son, James Shank!

This proud papa kept his composure and shot away with the Nikon D300. I was equipped with a 24-70mm f/2.8 lens and a SB-900 speedlight. Here are two photos I snapped as James received his award and then was later marching with his company.

James checked out of his barracks, we grabbed a quick snack at a convenient store and headed over the USS Wisconsin. This battleship has a gloried history and is now open for topside tours. We had purchased our tickets online days before I departed for this trip to be sure we had a spot on a tour this specific day. The tour was led by a veteran who served on another Iowa-Class destroyer. He was fabulous and we learned a whole lot of details about this ship and how it was equipped for battle over the passing years. This ship saw active duty in World War 2, Korea, and the Persian Gulf!

Here are two photos I took on the deck of the USS Wisconsin, an amazing battleship with an impressive record of service.

The events of this day reminded me that you just never know what’s going to happen or what you might see, so have your camera ready at all times. I had hoped for better preparation and an earlier arrival, but all in all it wasn’t a bad day!

Free Lightroom Collage Templates

Yesterday I was inspired to write a blog post about creating a Lightroom template that looked like a matted print. This forced me to troubleshoot a specific problem: how to post the template file on my photo website so guests could download them. The solution didn’t take long to figure out and I quickly installed the iZip software on both my desktop and my laptop. I zipped the template and was able to post the zipped file on a page on my website to share with others.

So then I thought I should also share some collage templates for anyone who might want them. You might recall that in two previous blog entries I shared some insights on several different collages I created in Lightroom. Some of these collage templates are now available on my website and you download them here. I hope you find them helpful and useful. They are easy to use and should at least provide some thoughts for you to consider when creating your own collages in the Print Module.

Directions are provided on my website as to how to download these templates. Once they are installed in your version of Lightroom all you have to do is click on the title of the collage in the left column, which brings the template up in the main screen area. Then just drag the photos of your choice from the thumbnails at the bottom of the screen into the cell boxes on the template. It’s that easy! I prefer to first create a Collection to narrow down which photos I want to use in a specific collage.

I hope you find this helpful. Drop me a line and let me know.

Thanks!

Bob

Create a Matte-Like Print Template in Lightroom

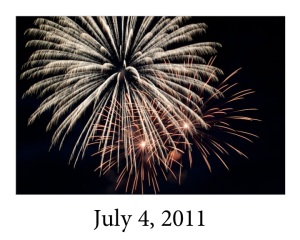
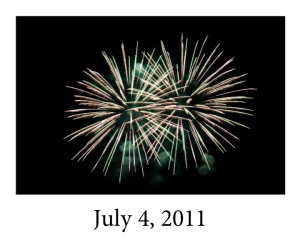
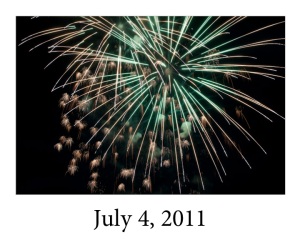
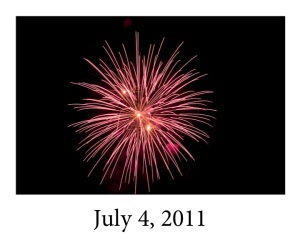
Yesterday’s blog post inspired me to use Lightroom 3.0 to create a Matte-like image to display some of the fireworks I photographed on Monday.

This inspiration was placed in the corner recesses of my mind some time ago by John Shaw and then again more recently by Moose Peterson. My thought was to create an image that looked like a matted print of one of my photographs. Lightroom’s print module seemed like the perfect way to turn this inspiration into reality. My goal was to display several of my fireworks photographs on my blog and have them appear to look like a matted print. If you’re interested in creating stunning images effortlessly, an image generator AI could be a great tool to explore. You can also use the AI GIF maker to easily transform text and images into a unique style. You can scroll down to my blog post from yesterday to see the finished product of this template.

I started by creating a collection in Lightroom of the photos I wanted to place in my blog. I picked seven. Then I went to the Print module in Lightroom and started creating a custom print template. I started by setting the layout style to “Custom Package” in the right-hand column. Then I navigated down to the Print Job options and set the “Custom File Dimensions” to 10″ x 8.” And then set the “Print to” option to JPEG File. This way I could export the image to post on my blog instead of exporting to my printer. I also created a custom identity plate to display the date: July 4, 2011. I created this custom identity plate by clicking on the down arrow on the “Identity Plate” option, clicked on “Edit,” typed in the date, changed the font, and clicked OK. I moved the text by dragging onto with my mouse and moved it to the bottom of the page.

I then went into the Cells options and drug the cell for the photo over onto the layout, making sure to leave room at the bottom to display the date without it running onto the photo. I checked “Lock to Photo Aspect Ratio” so my image would not be squeeze or look funny by being re-sized. Showing the ruler and grid guides helped me place the photo cell in exactly the right place.

One last added touch was included by going to the Image Settings option and clicking the “Inner Stroke” set to 1.0 pt.

Now it was time to save my template. I moved to the left side of the screen, clicked the plus sign beside “Template Browser” and titled my new template “Fine Art for Blog – 8×10 Landscape.”

To use the template, click on the new user template that now appears under Template Browser, User Templates. Then drag a photo from the thumbnails at the bottom of the screen. Then click on the “Print to File” button at the bottom right of the screen.

That’s it! I actually sounds much more complicated than it actually is to set up and use. And once it is created, it can be used over and over again.

You can download this Lightroom Print Template here. This page also has some Collage Templates you can download to use in Lightroom, too.

And here is an example of one of the Matte-Like Print Templates:

Fireworks on My Birthday

This 4th of July I had the chance to photograph fireworks. Yes, my birthday is actually on July 4th. I’ve been called a firecracker and many other names over the years, but I am blessed to have fireworks on my birthday! This year my family took me out to dinner and then fireworks. For the first time in a long time I really tried to capture with my camera the breath-taking images the fireworks produce.

I first read an article online to refresh my memory and learn a few tricks to take with me. I actually printed the article out so I could take it with me as a reference. I set up my tripod in the middle of a swampy area because it was free of power lines and other obstacles. The mosquitoes were active but not overbearing. I was set up and prepared before darkness set in and well before the fireworks display started. This was helpful because I could still see the dials and switches on my camera. Otherwise I would have needed a flashlight to be sure all the settings were correct.

I set my camera in the manual mode with the bulb shutter speed and an aperture of 11. I was rather surprised to find out I was almost too close to the fireworks because I had to shorten two legs of my tripod dramatically to get the proper angle for my camera to see the fireworks. This provide a more unsteady base but I managed to keep the tripod still and sturdy throughout the fireworks display.

I used a cable release with the bulb shutter setting, so the shutter was open as long as I held the button. I experimented with various times and found my favorite to be pressing down on the cable release when I though the firework was just about to explode and then release it when the brightest light had just flashed. I wished I had more time to experiment because the display seemed to be over before I knew it!

Here are some of my favorite shots from this July 4th. It was a great way for me to top off a great birthday! Do you like any of these photographs? Which one is your favorite?