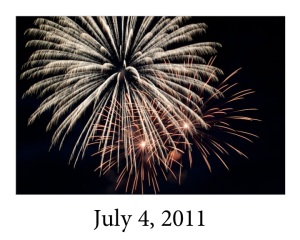
Yesterday’s blog post inspired me to use Lightroom 3.0 to create a Matte-like image to display some of the fireworks I photographed on Monday.
This inspiration was placed in the corner recesses of my mind some time ago by John Shaw and then again more recently by Moose Peterson. My thought was to create an image that looked like a matted print of one of my photographs. Lightroom’s print module seemed like the perfect way to turn this inspiration into reality. My goal was to display several of my fireworks photographs on my blog and have them appear to look like a matted print. You can scroll down to my blog post from yesterday to see the finished product of this template.
I started by creating a collection in Lightroom of the photos I wanted to place in my blog. I picked seven. Then I went to the Print module in Lightroom and started creating a custom print template. I started by setting the layout style to “Custom Package” in the right-hand column. Then I navigated down to the Print Job options and set the “Custom File Dimensions” to 10″ x 8.” And then set the “Print to” option to JPEG File. This way I could export the image to post on my blog instead of exporting to my printer. I also created a custom identity plate to display the date: July 4, 2011. I created this custom identity plate by clicking on the down arrow on the “Identity Plate” option, clicked on “Edit,” typed in the date, changed the font, and clicked OK. I moved the text by dragging onto with my mouse and moved it to the bottom of the page.
I then went into the Cells options and drug the cell for the photo over onto the layout, making sure to leave room at the bottom to display the date without it running onto the photo. I checked “Lock to Photo Aspect Ratio” so my image would not be squeeze or look funny by being re-sized. Showing the ruler and grid guides helped me place the photo cell in exactly the right place.
One last added touch was included by going to the Image Settings option and clicking the “Inner Stroke” set to 1.0 pt.
Now it was time to save my template. I moved to the left side of the screen, clicked the plus sign beside “Template Browser” and titled my new template “Fine Art for Blog – 8×10 Landscape.”
To use the template, click on the new user template that now appears under Template Browser, User Templates. Then drag a photo from the thumbnails at the bottom of the screen. Then click on the “Print to File” button at the bottom right of the screen.
That’s it! I actually sounds much more complicated than it actually is to set up and use. And once it is created, it can be used over and over again.
You can download this Lightroom Print Template here. This page also has some Collage Templates you can download to use in Lightroom, too.
And here is an example of one of the Matte-Like Print Templates:
