Light

Photography is literally defined as “writing (“graphy”) with light (“photo”).

So as photographers we need to do everything we can to understand light. Without understanding this basic component of our craft we will be severely limited. This is so important and yet overlooked by so many. It is easy to get all cranked up over a new camera body or lens, but without the right kind of light our photographs will be substandard.

Light has several qualities that we need to pay attention to and learn about. Light has color, direction, and quality.

The color of light is something we know a little about when we start thinking about the proper white balance in our camera settings. As a test, turn your camera’s white balance to flourescent and take a photo. Now turn the white balance to incandescent and take another photo. Depending on the existing light, you  will see different colors of light in these two photographs. Light can be, for example, blue, green, orange, yellow, and many other colors. The color of light tends to evoke certain emotions and feelings-blue is cool, orange is warm, etc. Paying attention to the color of light is the first step in understanding light better.

Light also has direction. From where is the light coming? Is it side-lit, back-lit, or front-lit? This component of light is also critical to understand and learn about. Front lighting is perhaps the least attractive directional light. Side-lighting creates deep shadows, revealing depth and character in a subject. Back-lighting can create silhouettes as well as interesting halos.

Quality of light is the most difficult component to describe, but when you see great qualities of light you will certainly know it. Quality can range from horrible to average to sensational and even breath-taking. “The golden hour” is one description but it can happen almost anytime and a photographer should always be vigilant and ready for this superior quality of light to appear.

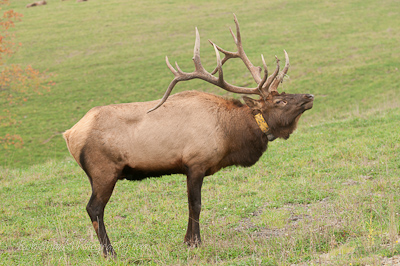
The following photograph is not sensational or even an above average photo. However, the color, direction, and quality of light make it interesting; at least in my humble opinion. When the light is right the photograph will be right!
Depth of Field — Is the Right Thing in Focus?

Depth of field changes depending on the f-stops we use, the lenses we use, and the distance between us and our subject. Focus is one of the most important elements of a quality photograph so we have to get focus right and understanding depth of field goes a long way towards this goal.

Depth of field charts are helpful and can really help in any situation if we take the time to use the chart. The older lenses that had aperture rings were helpful, too, because they provided a distance range that was helpful as a guide for the photographer. Today’s G-type lenses don’t have these guides.

Probably the most reliable and best used resource for depth of field is experience. With your favorite lens and a subject at 40 feet away what can you expect the depth of field to be at say f/2.8? Do you know? Well you should. Not only is this information helpful but can be critical to have your subject sharply focused. Will the whole animal be in focus or just the eyes and face?

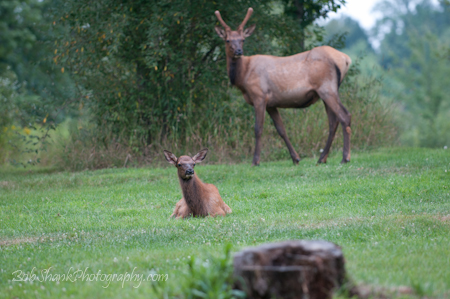
In this photograph you see three objects. The closest subject is a tree stump that is clearly out of focus (how’s that for an oxymoron?). The most distant subject is a spike that is also out of focus. The main subject I was focusing on is in the middle. This calf is clearly focused. The photograph serves as a good example of how shallow depth of field can help bring the viewer’s eye to the main subject. For example, if I had used a smaller f-stop, say f/16, then all three items may have been clearly focused. This would distract the viewer from seeing the intended main subject of the calf. Obviously, eliminating the two distracting elements would make for a stronger photograph here, but I wanted to show and explain depth of field. This important subject needs to not only be mentioned, but should also be studied and then put to good use. Depth of field is important!

Sometimes the Tail Makes the Photo

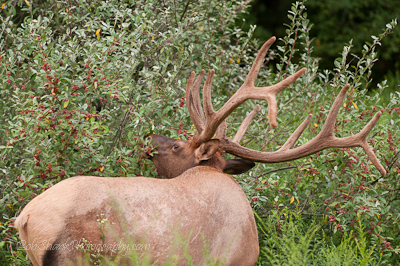
As I mentioned in my previous posts, this bull was munching on the berries of this bush. I stuck around to watch him eat his supper and got several different poses and angles of this same bull. The background was nice and the red berries make for some nice contrast.

However, in this photo I tend to think the tail makes the photograph. I like all different portraits of these beautiful animals and their hindquarters are certainly unique. Their contrasting posterior makes for some interesting photos to say the least! Here the small tail of the big bull provides a touch of humility and even a little humor to this pose.

The bull was busy eating berries but he never lost sight or forgot what was behind him–his tail and this silly photographer.

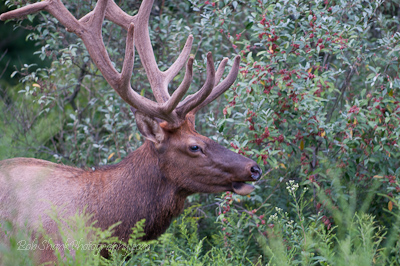
Red Berries, Yum!

This bull elk was content to eat and keep eating the red berries on this bush. We watched him eat his supper for a nice long time!

As you can see in this photo, it was late summer when the velvet was still on his antlers. The soft-looking stuff makes for some beautiful photos! The background helps to tell the story in this photo, and isn’t that what we try to accomplish in our photographs–to tell a story? If there is any truth to the saying “a picture is worth a thousand words,” then we have to make sure our photographs contain the elements we want to tell the story we are trying to convey.

Shouldn’t a photograph stand up on its own without the photographer having to explain it?


Bull Elk Portrait

I just love photographing the elk here in Pennsylvania. No matter how many times I get out in a given year, I still cannot wait to head to the mountains of Elk County to do it all over again. One would think that after so many years of photographing the elk there wouldn’t be any more shots to get. Nothing could be further from the truth! First of all, there are always new elk making their impressions on the scene. Secondly, elk are as unpredictable as any other wildlife species, so I sometimes see things I’ve never photographed before and these are now on my list. The possibilities are just endless!

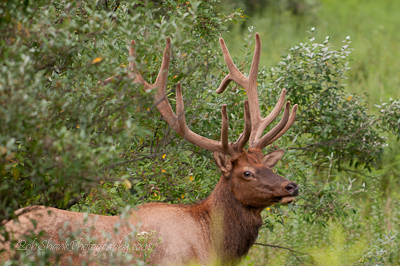
My favorite photographs are typically the action shots. Photographs of two bulls locking antlers, elk crossing the creek, or two cows boxing  are just a few of these types of action shots. My second favorite photograph of the elk are what I call portraits. They depict the elk in their natural habitat and show a pose of the elk. I try to get a highlight or catch-light in the eye closest to the camera and try my best to portray the elk as best as possible.

Here is one such elk portrait in today’s post. Do you think I captured a decent portrait of this bull elk?

Why did the elk cross the road?

To get to the other side where the acorns were!

I watched this small bull cross the road, debark a tree, and then eat one acorn after the other. If you’ve been out in the woods lately, you know there is a banner crop of acorns this year. They are all over the forest floor! Well, this bull wasted no time and devoured as many acorns as he could find. Then, once he had his fill, he laid down and chewed his cud. Ahhh, the life of a bull elk in the rut!

This bull put on a show for me after he crossed the road. Yep, he crossed the road to get to the other side where the acorns were located!

Dangerous Crossing?

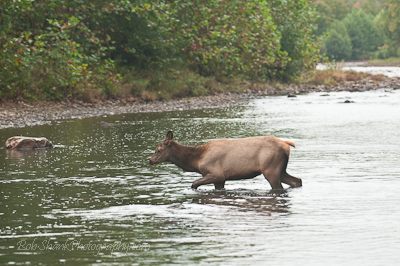
Back in September I watched excitedly as a small herd of elk crossed the creek. The water wasn’t all that high, but it wasn’t shallow either. The cows went across first and carefully made their way to the other side. In the midst of their crossing, I saw this little calf making its way across the creek, too. Then I wondered, how dangerous is this crossing for the elk, especially for the calves?

We humans take many things for granted–bridges, for example. There aren’t too many times when we have to ford a stream or creek these days. Perhaps the elk’s four legs help them manage the slippery rocks better than our two legs, but I am sure it is still somewhat precarious for them. I could tell that the elk were methodical as they gently stepped into the water and then slowly made their way across the stream. None of them fell or even stumbled. Then the bull followed and made his way across, bringing up the rear.

But my interest was with the smallest of the elk–the calf. It made its way across successfully but this photograph shows just how high the water was for this little calf.

Exposure Might Depend on Main Subject

Getting exposure right in the camera is important to me. I aim to get the best exposed photograph on site rather than just grabbing a shot willy nilly and then correcting it in software. I suppose this goes back to my film days when capturing the correct exposure was absolutely necessary with the camera. Sometimes I miss those days, but that’s another story for another time.

Capturing the correct exposure not only makes our work easier in post-processing, but it shows that we know how to use our camera, too. Some photographers are so good at seeing the light that they can predict with incredible accuracy which f-stop and shutter speed to use! I am not that good most of the time, but I do know how to use my cameras exposure meter to get it right. Still, there are times when proper exposure is not so cut and dry or as easy as we’d like to make it.

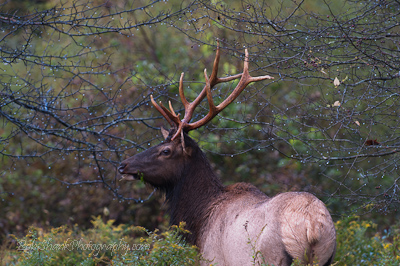
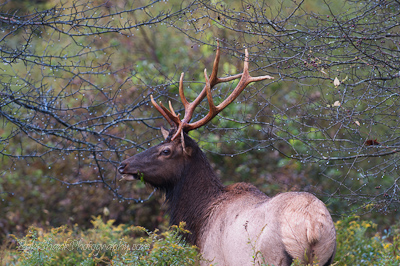
Take for example this photo of a bull elk I captured on a recent trip to Elk County. It was a rainy morning and my main focus was photographing the elk of Pennsylvania. I didn’t notice it until I got home, but this shot showed the drops of rain on the trees in an incredible way. The droplets of rain which formed on the end of the branches produced  a spectacle of light behind the bull elk. It was neat!

However, the elk was took dark. When I slightly corrected the exposure the bull looked better but it appeared to me that the droplets of rain were not as clear or pronounced. I guess it may be because the main subject now properly exposed caused the whole photograph to be somewhat lighter. This appeared to shift the focus of the photograph off the droplets of rain and onto the bull elk. This is normally exactly what I want since I am a wildlife photographer, but I was torn on this image because of the change in look it created. Perhaps the proper exposure does depend on what we want the main subject to be in an image. Here the two different exposures of this photo. Which one do you like best?

Fall Newsletter

I just posted my new Fall Newsletter to my website.

The Fall Newsletter has some articles about the Pennsylvania elk, the Elk County Visitor Center, and a Photography tip. You can view my newsletter here. It features a brand new format and is now produced in PDF format.

Check it out and let me know what you think.

My photography adventures take me on many exciting experiences. Last night I photographed the local high school game between East Stroudsburg South and Pleasant Valley. It was absolutely the best high school football game I’ve ever seen! The game went back and forth the entire time and Pleasant Valley pulled it out with 18 seconds to go on the clock! It was enthralling and I was honored to be there to capture the action with my camera. You can see these photos here.

It is experiences like this and seeing the beautiful Pennsylvania elk that keep me behind the viewfinder. I could think of no better place to be in my spare time!

The Bull Known as 8A

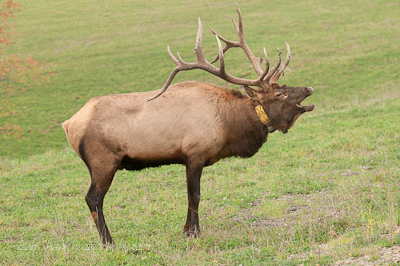
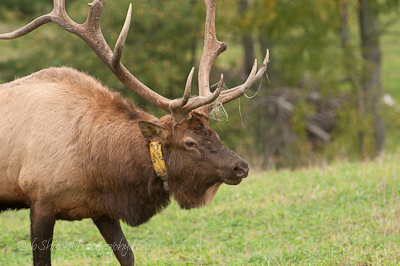
I guess I am a purist of sorts. Perhaps it was the education I received at Temple University when I earned my communications degree back in 1987. I like my photography to depict real-life situations and tell the story exactly as it was seen by me. For example, I never use Photoshop to remove a collar from an elk. I know some photographers who do this extremely well and they are definitely better in Photoshop than I. And I don’t knock them for what they do, I just prefer a different route in my own photography I guess. To me there is no right or wrong here–just a preference, and I prefer to keep my photos as they were captured. I do some crop some of my photos once in a while, but to me this is a little different from removing part of an image that is seen as the main subject. Go ahead and call me a purist and I promise not to knock you for removing a collar in Photoshop.

Those of us who photograph the Pennsylvania Elk see these collars often. They are radio transmitters used by the Pennsylvania Game Commission to assist in tracking the elk herd. This research tool is quite helpful I am sure, but as a photographer, I prefer to see elk without the big yellow or brown collars attached to their necks. Again, I am a purist. However, the collars some elk wear are part of the elk story and culture on Winslow Hill. So documenting and even photographing them makes sense to me even though I usually prefer to show only those elk without collars.

So yesterday, when I saw a blog entry by my photo friend, Brad Myers, and a comment by Coy Hill; I did a little digging. Brad and Coy were discussing the 8A bull, which is a beautiful bull this year! He garnered a lot of attention during the rut. I went back through my photographs and found these photos of the bull known as 8A, since that is the description on his yellow collar. I am kind of embarrassed that I did not post any photos of this bull earlier. And I most likely would not have posted any photos of  him without the prompting of Brad’s and Coy’s blog conversation. I hope these photos help tell a little more of the Pennsylvania Elk story and help to show just what a magnificent bull is 8A!