Is It the Camera or the Photographer?

We all hear comments about our photography. Positive feedback is always welcome and has a way of encouraging us to keep at our task in a very positive way. But sometimes the comments we receive are unintentionally backhanded. For example, have you have been told: “Wow, that’s a great photograph. You must have a really good camera!”

You see, the intention is probably well-meaning, but how do you feel when you hear this? Doesn’t it sound like anyone could have taken that photo if they just had an equally expensive or quality camera? So what makes a great photograph–the camera of the photographer?

Some may be quick to answer, “Both.” But let’s look a little deeper into this answer. Surely a better camera is going to produce results, but don’t you think a pro can take even an inexpensive camera and make it look good?

You see, I am of the mind that it is more the photographer who makes good photographs than the camera. I know some photographers who are excellent in their craft and make unbelievable photographs from film even today. It doesn’t really matter which camera they use, they put their knowledge of the craft into use and the results speak for themselves.

Yes, a good camera can make a good photographer better, but I don’t think a great camera can make a non-photographer good. What do you think? Is it the camera or the photographer that makes a difference?

Selling Photographs

I heard a very interesting podcast tonight while I was driving in my truck. That discussion revolved around the differences between the different ways to market and sell images. Mainly, they were discussing the difference between “rights managed,” and “royalty free” pricing.

Have any of you had any success selling photographs?

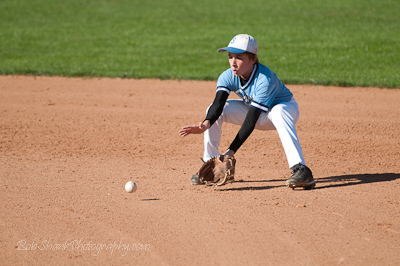
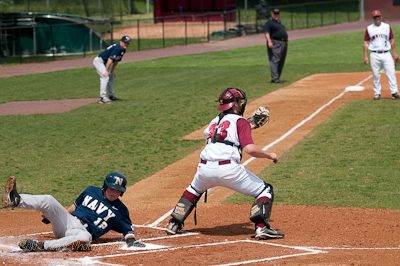
A majority of my photo sales are with parents who want the action images I captured in a baseball game, a school musical, or some other event. This is much different from selling photographs to magazines or other venues. I also sell wildlife and landscape photos occasionally. But I am curious to how you market and sell your photos. What works for you? Are any of you into micro-stock photography, for example, selling photos on iStockPhoto or some company like that? What works? What do you find frustrating?

Close-ups

My son, James, thoroughly enjoys and has a passion for macro photography. He’s got a good eye and likes to get close and the closer the better.

I dabbled in macro photography over the years but my son taught me to look at things in a new way. Now when I am on a photo shoot I wonder how James is seeing things. What might we photograph in this location? When we go to a photo shoot together I get to see him in action and observe how his photo-mind works.

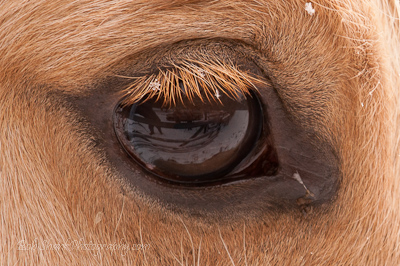
This past winter I was leading our PA Elk Photography Experience when we came across three horses running and playing the snowy pasture. They put on an impressive display for us with snow falling from the sky and flying off the horses’ hooves. It was an action-packed shoot that we encountered unexpectedly. In the midst of this opportunity we took some close-ups of the horses’ eyes. Here is one that I captured.

There’s Always Something to Do!

Photography is a strong passion for me and one thing is for sure–with an interest and passion like photography there is always something to do! Here is a short list: go on a photo shoot, plan for an upcoming trip, edit photos, keyword and organize photos from past trips, scout out new locations, read photography blogs, watch photo software tutorials, make prints, create photo slide shows, clean equipment, shop and dream of new photo gear, browse through coffee table photography books… the list goes on and on!

So what do you do with your passion of photography? What are your favorite tasks? Are you willing to admit your least favorite photo duties? What do you enjoy the most? What you like the least? What gets your passion ramped up? What excites you in the world of photography?

There is always something to do in our field of interest and it seems to me that it can be valuable to share with each other what we enjoy the most about our photographic passion. This thought motivated me to create a simple poll that I will post later today. It seeks feedback from fellow photographers about what you all like the most about photography. I hope you will take a minute or two to think about this and respond to the poll or comment here on the blog. My thinking is that we can always learn from each other and also motivate one another as well.

The Circle is Getting Bigger

My photography experiences  over the years have led me to some amazing places and introduced me to some amazing people! Don’t get me wrong, I thoroughly enjoy my quiet time behind the viewfinder out on a mountain as I am photographing the elk of Pennsylvania, but the places and people I’ve come to know is nothing short of exhilarating!

It is almost hard for me to believe how wide my circle of photo friends and places is now. The circle is widening and getting bigger all the time. It reminds me of when I was a kid and would throw a stone in the pond. The stone would create a circle once it hit the water and the circle would create a ripple of larger and larger circles until they eventually hit the bank where I was standing. Amazing!

My photography circle is amazingly similar. I’ve met fellow photographers who have incredible vision and are a blast to be with on a photo shoot. I’ve met incredible people who have touching stories to share. I’ve met people I would never have met were it not for my interest (or maybe passion) in photography.

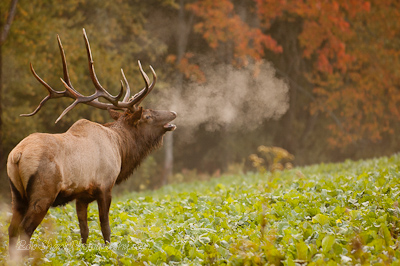
We will be holding our Pennsylvania Elk Photography Experience later this month when the rut will be in full swing. This small workshop has allowed me to meet photographers and share some photo tips with them. Dick McCreight, a good friend and professional photographer helps me lead these trips and we always have incredible memories to take back home with us. We also learn a lot from the photographers we are teaching, too. This year marks the third year of these unique photographic experience and we are excited to continue meeting new photographers, teach them about the elk and how to respect them and the land they inhabit, and hopefully instill a deep respect for these beautiful creatures that God has created for us to enjoy.

I also have the opportunity to photograph awesome sporting events, too. I love baseball and am naturally drawn to this sport. The same goes for football. But the events I photograph always seem to lead me somewhere new and different all the time. To say it is fun sounds almost patronizing and is definitely an understatement. I am having the time of my life with my camera!

I do not know how wide my photography circle might get, but I know it is still getting wider all the time. I’ve photographed wildlife, seniors, athletes, coaches, landscapes, historic sites, small towns, big cities, and so much more. I am learning to enjoy both the places and the people I meet on this exciting journey. And I am counting on this being the case for the rest of my time here on earth until my circle will finally reach another shore.

In-Between Photo Shoots

What do you do on a day when you don’t have a photo shoot? Do you dream of the next photography shoot? Do you just relax and forget about photography? What do you do in=between photo shoots?

I cannot sit still. Today I had to pack all my photo gear for a photo shoot I am scheduled to do tomorrow, but there is no assignment for me today. Still, I am thinking a lot about photography today. I just can’t help it. Maybe it’s in my blood; maybe I have ants in my pants, as my grandma used to say; or maybe photography is a passion for me!

After checking my favorite websites and blogs this evening, I will sit down and read through some of the photo books I packed along on this trip. Thankfully, I am staying at my in-law’s and they have a computer with an internet connection. This means I can get this blog entry out tonight quite easily even though I am on the road. My in-laws are great! They let me stay with them and even give me awesomely delicious food to eat. I love my in-laws!

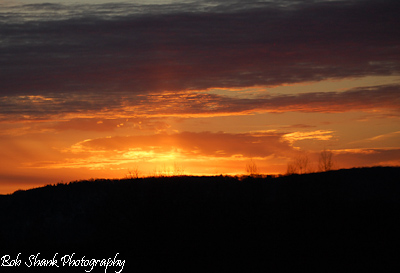
So I might be in-between photo shoots, but I am still thinking about photography. I went for a bike ride earlier this evening and was wishing I had my camera with me to capture what looked like an upcoming perfect sunset. Oh well, at least I could imagine myself with the camera, adjusting to the proper exposure, and composing the sunset in my viewfinder.

Yep, I might be in-between photo shoots, but I am sure I will be ready for the next one. Preparation and mental rehearsals are key!

Rounded Corners with Lightroom

This tip came from Matt Kloskowski on his Killer Lightroom Tips blog.

I’ve mentioned previously that Lightroom is powerful. It really is. And this tip is just one more example behind some of the unexpected power in this interesting software package. One of the main selling points of Lightroom to me was that it manages my photos, allows me to edit them, and provides ways to export the photos for use on web galleries, in email messages, or as physical prints. This all-in-one software even has me reaching for Photoshop less and less. The latest upgrade to 3.0 includes some really nice features and I am still learning some of the many features found in Lightroom.

The rounded corners tip makes for some interesting prints or photos to display on the web. You can learn the steps to make your own rounded corners by checking out Matt Kloskowski’s blog.

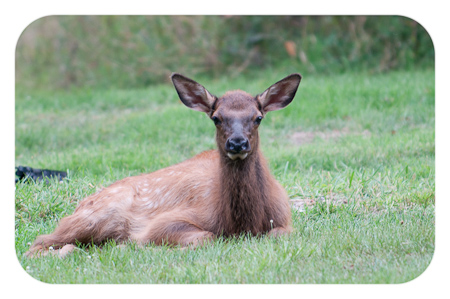
Here is my example of Matt’s tip. Pretty cool, huh? And all done in Lightroom.

It’s Easy to Create PayPal Galleries in Lightroom

Lightroom makes it very easy to create web galleries. It is pretty much as easy as selecting the photos you want to include, modifying the gallery to your liking in the Web module, and then exporting this information and uploading it on your server. It actually sounds more complicated than it is to do. In the previous two blog posts I talked about how to do this in detail and even protect web galleries with a password.

Today I want to share with you how easy it is to create a PayPal gallery in Lightroom. I use these PayPal galleries all the time because they allow visitors to my website the ability to easily order prints using PayPal or any credit card. This feature alone has contributed to an increase in prints sales, particularly from parents of baseball players. You hear of many online services that do this for you. They take care of designing the code behind the galleries and then  you just upload your photos to their service, of course in addition to paying their monthly fees. I wasn’t sure I would have enough sales to warrant this expense, so I decided to do it by myself. Lightroom made it possible in a huge way for me!

The key is a template called “LRG One with PayPal Shopping Cart.” The link to this awesome template can be found here. Basically all you do is download the template, read the instructions on how to install and use it, add a few bits of information in your metadata, customize the gallery, and upload it to your server. Again, this all sounds much more complicated than it actually is to implement.

I use this template for all of my sports photography shoots. I select the photos to include in the web gallery. Then I include the metadata information for the size prints I offer, which is easy to do using the Sync feature. This copies the metadata to each photo that is included in the gallery. Then I export using the LRG One with PayPal Shopping Cart template. I even add the password protection I mentioned in yesterday’s blog entry.

Now when someone visits my web gallery they can view the photos and purchase prints of varying sizes using PayPal or their preferred credit card. Of course, you have to set up a PayPal account and they take a small percentage of each sale, but it is much less expensive than using one of the other online services.

Once I receive an order from PayPal via email, I simply prepare the order and send it off to my photo lab. They print the prints and send them off to my client. It is that simple and I love it! The PayPal template is definitely one I find invaluable and highly helpful!

My Photography Workflow

After writing yesterday’s blog entry, it occurred to me that it might be worthwhile to explain my photography workflow in more detail. We all have our patterns, habits, and preferences. There is no right or wrong way to take our photos from our cameras to the end product, but some methods are easier than others. I do not believe my process is the only way or even the best way; it is just what I currently use after many years of experimentation and some trail and error.

I prefer using Adobe Lightroom for my photo management and editing software. Here is the workflow that I am currently using on every photo shoot.

First, I use a card reader to copy the photos into my laptop when on photo trips or my desktop when I am home. I copy the photos into the DNG format on import. Yes, this takes time, but the file sizes of DNG are smaller and you either have to convert now or do it later. On import I also rename each photo according to this format: date-sequence. So, for example, if I have a photo shoot today, I will create the import format to be 20100821-1, with the last number moving up sequentially for each photo. I will also add any general keywords that apply to all these photos. I have a Drobo so I import the photos directly to that physical drive and place all the photos in a folder named “Photographs.” I will assign a new folder name for the import by using the name of the photo shoot followed by the date. I like using the name of the photo shoot first, which is a change for me. I used to use just the date of the shoot, but that was not descriptive to me, so now I assign a name for each photo shoot to the folder name first. I also set up and use a saved metadata preset to assign copyright information, etc.

Once the photos are sitting in Lightroom, I then go through the photos to find the keepers. My process works like this. I enlarge the photo in the Library Module so I am only seeing one photo at a time. I use the right arrow to move to the next photo. When I come across a photo that I want to mark as a keeper, I press the “P” key to “pick” that photo. I have Lightroom set up to then advance automatically if I do press the “P” key. This feature of advancing to the next photo automatically when the photo is picked helps to move the process forward quickly. To set up the auto advance feature, click on “Photo” on the top menu and click on “Auto Advance.” I can quickly go through my whole shoot just picking the photos I want to mark as my keepers.

Once I go through all my photos I then create a collection just of these keepers. I may want to create a web gallery or slideshow of these photos, so I make the collection now. Then I go through the photos in this newly created collection. I am now looking for what I call the “Best of the Best” photos. These are the ones that make the final cut and ones I will show to clients, colleagues, or friends. These select photos need to be representative of my very best work so I am brutally hard with this part of the process. I will go through each photo again, carefully examining the composition, colors, exposure, lines, and other details. When I come to a photo that makes this final cut I then assign it a star rating. Usually these select photos get either 4 or 5 stars depending how on the strength of the photograph.

Now I will use these “Best of the Best” to post on my blog, use as initial proofs with a client, post to my website, or share in any number of ways. I often post all the photos in the collection if I have done a sports event because everyone likes to see their player in action. But if I am sharing photos in other ways I try to stick with just showing the “Best of the Best” photos from each shoot. Creating the web galleries, even with PayPal features, or creating slideshows are all very easy from within the newly created collection.

Sometimes I use color labels for specific reasons. I use a red label if I know a photo needs editing. The red label reminds me that I still have work to do on this photograph. I also sometimes use green labels to mark photos that I want to use for a photo book. And I use blue labels for photos that I want to use in a web gallery. I recently found a great feature in Lightroom that helps me use these color labels but without seeing the whole frame around the photo in that color. Having a photo surrounded in color can make that photo look different than when it is against a neutral background. So here is what I learned to do. Go to Grid View Options and deselect the “Tint grid cells with label colors” in the Options panel. Now go to the bottom of this same screen and select “Include Color Label.” This results in a small color swatch appearing beside the start ratings at the bottom of each photo in the Grid View instead of having that color surrounding the whole photo. Pretty cool, huh?

If this specific photo shoot was away from home, I will then import the Lightroom Catalog to my desktop computer so I retain all the picks, edits, and other changes I made in the field.

So this is the workflow I am currently using. What do you think? Does it make sense? Is there anything I am missing? How can this process be enhance and improved? What do you do in your workflow process? Please share your thoughts because we always learn more together than we ever learn alone!