Do You Print Any of Your Own Photographs?

Printing photographs has come a long way in just a short time. Years ago no one individual thought much about printing his or her own photographs. The lab technicians were the experts and so we dropped off or delivered film to them and waited for the prints to come back. Sometimes it seemed to take forever!

Enter the computer age and all this changed. Now individuals have the equipment to successfully print quality photos that rival and even exceed what the technicians did a few short years ago. The digital age is here and it offers some absolutely amazing possibilities for our photography!

I will admit, I was not too eager to jump onto the printing-your-own band wagon. Oh I did get a printer to give it a whirl, but the results were pathetic and downright awful. The colors were all off and the ink was blotchy. I could never give one of these prints to anyone nor would I ever want to hang one on a wall for anyone to see. So I let the photo lab do all my prints.

Recently, a good photo friend, Bill Weitzmann, was talking to me about how easy he found printing quality photographs to be for him. I listened carefully and tried to ignore the voice inside my head that was saying “been there done that unsuccessfully before.” Bill’s enthusiasm quickly touched and took hold of me. He made it sound easy and since we both use Macs, monitor calibration software is already built into our OS.

Leaving that exciting conversation, I decided to give printing another try. And boy am I ever glad I did!

I am not quite where I want things to be just yet, but the quality I am getting three days after my first attempt is nothing short of amazing. Bill provided detailed instructions for me to calibrate my laptop monitor and then have the printer read the color management from the laptop. The first print using his method got me so excited I could hardly contain myself!

My prints are still too dark but they are getting closer and closer to the quality I am after with printing on my own. I can see that at least some of my favorite prints will soon be hanging proudly on the walls of my home and our camp up in the mountains. The colors and the quality are mind-blowing to me. I never imagined this could be possible at this level.

I may share more details in-depth on a future blog post but for now I will just share a few things to keep in mind if you want to attempt this for yourself. And I highly recommend that you do! I was going to wait to get a more modern and better quality printer, but my Epson R320 is kicking out some fantastic results!

Printing Tips

1 – Calibrate your monitor
You want to be able to print what you see on your monitor and match that as closely as possible. Calibration is critical to get the best quality possible. This is even important to do when sending photos off to be printed at a lab, too. Otherwise you might be disappointed with what you get back.

2 – Use a color tablet
Kodak had an old book that included a color tablet, which is the spectrum of colors in the rainbow and various shades of gray. By matching this and tweaking the appearance in Photoshop you can get your printer to “talk” to your monitor and repeat the colors, so that what  you see on your monitor is what you’ll get when you print from your printer.

3 – Update Printer Drivers
I found out the hard way that this is a very important step. I suggest you actually do this first because it can save you precious time down the road later. My trouble was twofold: I upgraded the Operating System on my laptop and I was using an older style Epson printer, the R320. I was not even able to get the landscape printing feature to operate at all until I updated my printer drivers. I wish I had updated them right away before I got started as this would have saved many sheets of photo paper and much frustration!

4 – Consider Using Lightroom
Printing is definitely easy to do out of Photoshop or any other photo editor, but Lightroom allows for a broad variety of printing options. For example, in Lightroom I can print contact sheets, wallets, assorted layouts, backdrops, and much more; and it’s very easy! I love Lightroom to begin with as I use it to manage my photo database and edit all my select photos. I also use Lightroom to upload galleries of photos to my website. But now I know I am going to enjoy the Print Module, too. There are just so many neat options and features in Lightroom!

5 – Be Patient
This process of setting up your printer, calibrating your monitor, and getting it to all work together can be and probably will be frustrating at times. Only start this project when you have a decent amount of spare time. Be willing to make a few mistakes and keep trying to perfect the process. Patience will definitely pay off. I know this because I experienced it firsthand this week!
Promoting the Passion

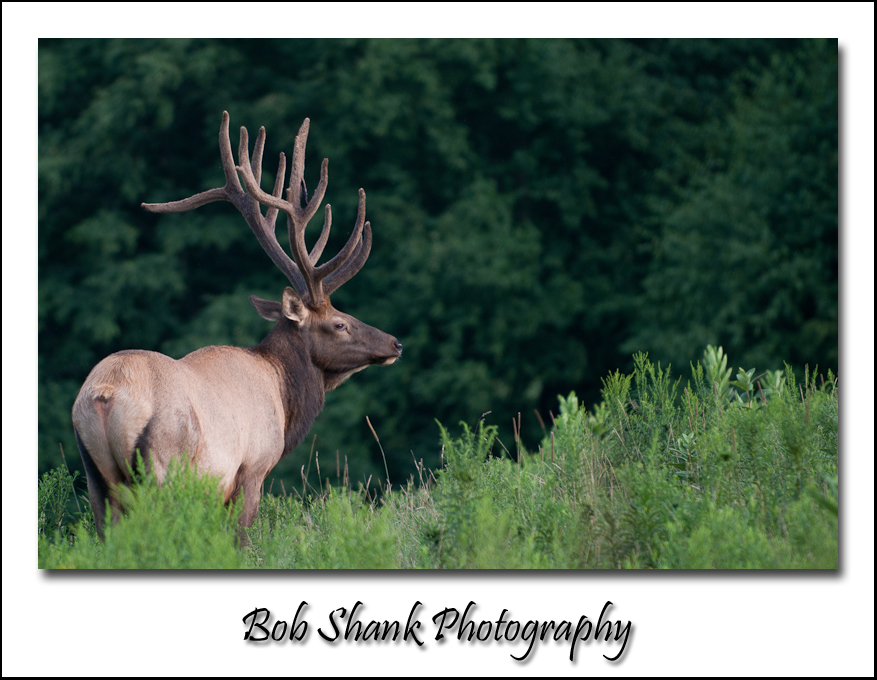
This week I needed to put together an advertisement to promote my passion for photography. This is what I came up with.

Our daughter, Lydia, is rehearsing for the high school musical, “Oklahoma,” which will open in the middle of March. I purchased a full-page ad in their musical program, which will be given to the audience members who come to watch the musical. I figure it is just one additional way to promote my photo passion and perhaps help to pay a few of the bills. After all, I did just buy a new piece of equipment! (More on that later in an upcoming blog post)

So, how to promote my passion. I always figure that the photos do speak for themselves, so I decided to start with some photos. My training in communications at Temple University taught me that less is more, so a simple, clean design was also imperative. Of course, with any promotion or the Five Channels marketing tool I also needed to include the pertinent information of how my photo passion can maybe help someone else out.

So, after an hour of thinking, creating, and designing, this is what I came up with for the ad. How do you promote your passion?


Taking It One Step Farther – Using the Matte Frame Effect from Lightroom

Yesterday, I shared how to create a Photoshop action to create a Matte Frame Effect for your photographs. I am using this method for both my photo blog and, with slightly larger images, on Google+. The process is quick and simple once set up. However, I wanted to see if I could execute the process right from Lightroom instead of having to switch software programs manually. It worked!

I will explain this process, taking it one step farther, so if you have Photoshop and Lightoom, you will be able to replicate this for yourself. The goal is to make it easier to make photographs ready to share with others.

Here are the steps to using the effect from Lightroom. I am assuming you already created the action I shared in yesterday’s blog post. You should add another step to that action to have it automatically save the newly created framed photo. Do this by clicking on the last step of the action and then recording: File, Save As, Format=JPG, Save, and then click OK for the JPG option. (I allow the “copy” to remain the suggested file name) Now stop recording the Action. Then test the action in Photoshop to make sure it works properly.

Taking It One Step Farther…

Step 1 : Create a droplet in Photoshop by clicking on File, Automate, and Create Droplet. Choose the Desktop as the location to save the droplet, this way it will be easy to access for the next step. Choose the Action you created yesterday from the drop-down box. Then click the OK button. This creates a Droplet that now appears on your Desktop.

Step 2: Open Lightroom. From the Grid screen, click on Export in the bottom left portion of the screen. I previously created a User Preset, which sizes the image and sets other preferred options for exporting to my blog. You need to create such a preset for yourself.

Step 3: From your Desktop, right click on the newly created Droplet and choose Copy. Now go to Lightoom and from the Grid Display click on Export. Click on your newly created preset to use for this procedure, and go to the bottom and click the After Export: Option Box and choose Go to Export Actions Folder Now. Click on the Folder “Export Action” and right click and Paste. This puts the droplet into the Actions Folder in Lightroom so you can later delete the Droplet from your Desktop. Close this folder box once pasting is completed and go to the After Export option and click on the Option Box. You should now see the Droplet listed here. If not, close Lightroom and try again.

Using the Procedure:

Start Lightroom and go to the Grid Display and click on a photograph. Now click on Export. Then click on the User Preset you created and valla the process is executed and you just created a Matte Frame of that photograph! I created two different Actions and Presets–one for horizontal photos and one for vertical photos. I also created two different ones for when I want to post in Google+ since I use slightly larger images when posting there. I love this process because it makes posting photos quick and easy.

Again, this all sounds much more complicated than it really is in actuality. Follow the steps and get it to work for you. It is a great way to automatically set up images for sharing on a blog, Google+, or wherever.

If you have any questions about the process feel free to ask here in the comments. And let me know if you use this or a similar process when sharing your own photographs.

Photo Tip Tuesday – Using Your Vehicle as a Blind

Today I am starting a new weekly feature here on my blog that will hopefully provide a valuable photo tip each Tuesday. I am calling this feature “Photo Tip Tuesday.”

Today’s photo tip is pretty simple, but very important. Getting close to wildlife is often not an easy task. Even with big telephoto lenses on our cameras, we still have to make our way toward the animals we photograph. This can be incredibly frustrating at times! If we get too close this is often what happens:

Enter today’s tip: use your vehicle as a blind!

Sometimes it just makes sense to stay in your vehicle and shoot out your open window. Many animals are accustomed to cars and trucks coming near them, but when someone is walking toward them they flee. It comes down to their basic instinct: fight or flight. By using your vehicle as a blind, you can often get close to your subject without alarming them. They might look up to see what’s going on, but they often retain their previous behavior because they perceive the vehicle as something quite safe and something they are used to seeing around them.

In some places, etiquette requires the photographer to stay in the vehicle. One place where I photograph eagles strictly frowns upon anyone leaving their vehicles and risk chasing the eagles away. In this case, the only thing to do is learn how to best shoot from your vehicle and obey the unwritten but oft enforced rule.

There are some tips and tools that help when photographing out of the vehicle. Sandbags can help provide a steady perch for your lens. Drape it over the window sill and then place the lens down on it. Another option is to buy a support that attaches to a partly opened window and even has a place to install a ball head. Turning off the engine will also help reduce unwanted and unnecessary vibration. Please use common sense, however, and do not stop in the middle of the road. This is not only dangerous, it is downright rude!

Using your vehicle as a blind can help you get closer to your subject. Give it a try the next time you have a chance.

Catching Up

Wow!

I’ve been all over the place since December–Pigeon Forge (twice), Cades Cove, Chincoteague, Assateague, and more!

I will be posting photos very soon as I was able to take photographs on most of these trips and did some scouting, too. It’s been a whirlwind!

We live in a beautiful country here in America and God’s creation sure is a wonderful subject to photograph!

Google+ Rocks!

I started using Google+ on July 31st. I saw other photographers getting really stoked about it and I wanted to give it a try. At this point, Google+ was only open by invitation, so I reached out and Martin Bailey was generous enough to give me an invitation.

I started using Google+ right away and haven’t looked back since. I love Google+! I like the way photos appear on this social medium and I like how it incorporates Circles of friends, family, acquaintances, and colleagues. You can really funnel down to whom you want to send messages.

But the best of all is the rapid growth my Google+ account realized since I started. In just 2 1/2 short months, the number of people that have me in their circles already exceeds all my Facebook friends! This is nothing short of amazing to me.

My conclusion? Google+ rocks!


My Photography Book

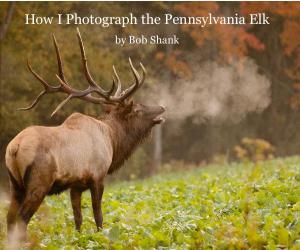
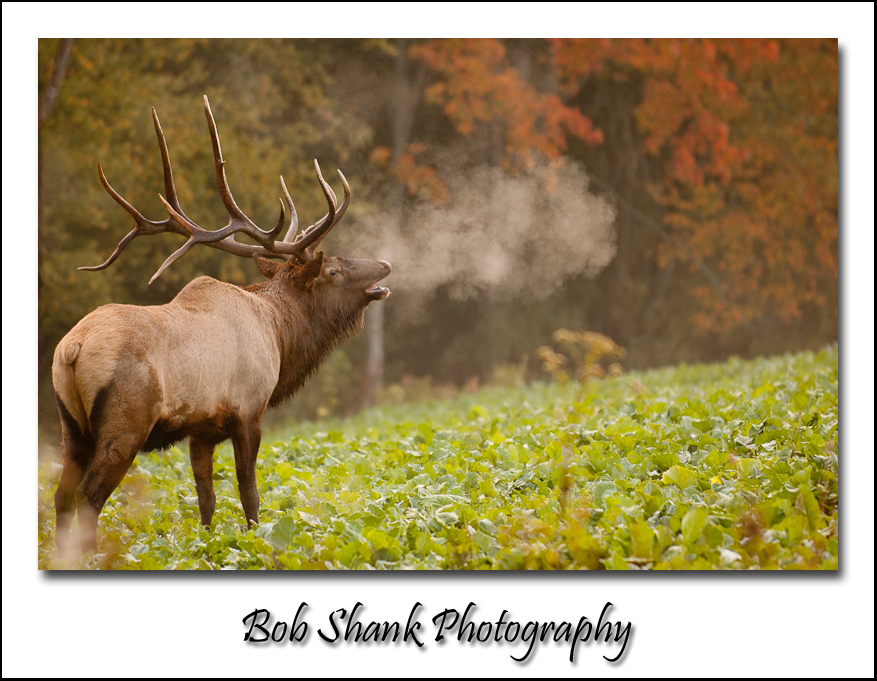
I wrote a photo book with the title, “How I Photograph the Pennsylvania Elk.”

This was actually a labor of love because I have a real passion for the elk of Pennsylvania. I’ve been spending time each year with these amazing mammals every year since 1990. And after all these years I still cannot get enough of them! Their habits and tendencies are both somewhat predictable and sometimes surprising. I enjoy spending time with the elk of PA in all four seasons. The backdrops of all these seasons are incredibly photogenic, but then the majestic animals have their own camera appeal, too!

In my book, I share how I photograph the Pennsylvania elk. I make it clear in the beginning that I do not  believe my way is the only way or even the best way; it is what works for me. I show photographs along the way to illustrate both what I am sharing on the printed pages and also to show the majesty of the beautiful animals. I do describe basic photography equipment considerations and techniques, so this book is helpful to anyone who is either starting out in photography or wants to delve deeper into the wonderful world of wildlife photography.

You can see the first 7 pages here. My book is also available for sale at the Elk Country Visitor Center in Benezette, PA.


My New Photo Podcast

My new Photography Horizons podcast is in its fourth week now.

This weekly photo podcast has two primary agenda items you can listen to you. First, I share a few newsworthy or interesting photography stories that are on the horizon each week. Then we feature a photography topic in the “main horizon” segment. You will learn how to get started in digital photography and then how to take your photo skills to the next level. Join us each week to see what’s on the horizon in photography!

You may want to call Acts Of Beauty Photography for boudoir photography Edmonton with a friendly, funny, warm photographer who will make you feel comfortable and beautiful. You can also find out more about the podcast here and you can also find the podcast on iTunes under the title, “Photography Horizons”

Check out this new photo podcast and pass it along to anyone who has an interest or passion for photography. After you listen to an episode or two, leave a comment or ranking on the iTunes page. You can also leave a comment or ask a photography-related question on our Show Notes page.

What’s on the horizon of your photography?

Stroudsburg/East Stroudsburg Photo Walk

Join us on Saturday, October 2nd at 5:15pm on a Photo Walk.

This is a participating walk of Scott Kelby’s Worldwide Photo Walk and will be the 3rd annual walk here in our community. We will begin at Ann Street Park on Ann Street in Stroudsburg. Gathering time is 5:15pm and we will start the walk promptly at 5:30pm. We will walk through the heart of Stroudsburg, which offers plenty of photo ops. We will pass by historic homes, a Victorian restaurant, the County Courthouse, and many other photogenic sites.

You don’t have to have a fancy camera or be an advanced photographer to join us. Just bring whatever camera you have and join in the fun. We always enjoy talking about photography, sharing our photos with each other, and just being together.

After the Photo Walk concludes at 7:30pm you will have the option to join us at Sarah Street Grille for some eats and drinks. They are providing space upstairs for us to hang out and talk about our walk. It will be lots of fun.

To find out more information about this Photo Walk or join sign up (it’s free), check out the website at: http://worldwidephotowalk.com/walk/stroudsburg-pa-united-states/

For those of you not living in our area, you can find a Photo Walk near you by going to this website: http://worldwidephotowalk.com/

Sign up a friend with you and join us in the fun!

Here are a few photos from last year’s Photo Walk.

You did not specify a PayPal email address in the settings
You did not specify a currency code in the settings
You did not specify a currency symbol in the settings
You did not specify a return url in the settings
You did not specify a price in the shortcode

New Photography Podcast Being Launched!

If you follow this blog even a little bit, then you know that I have a strong passion for all things photography. There is nothing better than being out on a photo shoot, but I also enjoy editing the photographs, creating slide shows, making prints, posting galleries to my website, and just about anything that keeps me involved with the wonderful world of photography!

I had the idea about two years to create my own photography podcast. I waited, however, for several reasons. First, I wanted to examine the lay of the land, so to speak, and see what others were producing in terms of photo podcasts. I found some podcasts that just rocked and were very good. I also found some that had a great start but fizzled out fairly quickly. There are many podcasts that I enjoyed and I kept taking mental notes on things I might want to do when I created my own photo podcast.

Several weeks ago Martin Bailey made a connection with me. I’ve been listening to his podcast, the Martin Bailey Podcast, for the past several years and Martin does an excellent job with his podcast. He sent me an invite to join Google+, the new social medium that many of us photographers are just raving about! I appreciated Martin’s kind, and generous act and started some conversations with him. He is always willing to listen, lend some suggestions and advice, and is always very encouraging! So, this past week I picked Martin’s brain about starting up a photography podcast. I cannot thank Martin enough for the help and encouragement he offered me!

So I am excited to announce the startup of a new weekly photography podcast entitled, the “Photography Horizons Podcast.”

I share the meaning behind this podcast title in my preview, which you can hear on the Show Notes page. The conception of this idea is basically that photographers enjoy shooting horizons. This might be to capture a sunrise or a sunset, or it might be to create a silhouette. Watching the horizon is important for photographers in terms of capturing good photographs, but we also benefit from being aware what is on the horizon in the photography world, too. Knowing about cameras, lenses, and other equipment on the photography horizon can be tremendously helpful, but it all starts with knowing what is on the horizon!

Each week I will follow a very basic outline. First, “On the Horizon this Week” will discuss news and announcements in the wonderful world of photography. Then, I will share a “Working Horizon.” This might be a tried and true technique to help create a better photograph or it might be a new skill or idea that will help us accomplish our photographic dreams.

My hope is that I will be able to share what’s on the horizon in photography and help the listener stay motivated and be better equipped to advance in the craft.

You can find more information about this new podcast, including a list of upcoming episode titles, on the Show Notes page.

What’s next on the horizon of your photography?