A Bull Fight & a Fight with Noise

Tuesday evening produced an invigorating scene for over a hundred spectators who happened to be at the Elk County Visitor Center. It was getting close to dusk and a herd of cows and at least 7 bulls were in the field to the left of the Visitor Center. The rut was in the air and the tension was thick with the anticipation of two elk battling it out for the cows. The tension turned to realization as two bulls met head-to-head. Cows quickly ran in the opposite direction as these two big boys fought it out. And fight they did! It was absolutely amazing to witness these large bulls push each other as they locked antlers. It was a fight that rivaled any other fight I ever witnessed between two comparable bulls.

The fight lasted over six minutes. Many witnesses to these elk battles often exaggerate the actual time because it does appear that time stands still during these bullish fights. But we checked the metadata in our cameras after the conflict and verified the length of this battle to be over six minutes! There was not a lot of clashing of antlers in this fight–it was more of a brutal pushing match. Other bulls were close by to witness the end result and all of us bystanders were amazed at the sheer strength of these amazing animals. It was a fight worthy of two royal bulls. In the end, one was the victor and the other walked the other way.

Photographers who shoot digitally face fights with noise especially as we increase the ISO settings in our cameras. This was necessary the night these two bulls fought because it was very close to dusk and light was fading fast. I actually shot this image at an ISO setting of 1,600 in my Nikon D300. I knew noise was going to be an issue with these images. Fortunately, the newer cameras handle noise better than the old ones ever did. I would never have thought about shooting at this ISO setting with my old Nikon D70. But the D300 handles noise much better. In addition, Lightroom 3.0 does a great job of noise reduction.

Here is one of the images I captured of the bull-fight that Tuesday night. It was shot at ISO 1,600 and edited in Lightroom 3.0. What do you think of this image? Did the newer equipment and software win the battle against noise?

Rounded Corners with Lightroom

This tip came from Matt Kloskowski on his Killer Lightroom Tips blog.

I’ve mentioned previously that Lightroom is powerful. It really is. And this tip is just one more example behind some of the unexpected power in this interesting software package. One of the main selling points of Lightroom to me was that it manages my photos, allows me to edit them, and provides ways to export the photos for use on web galleries, in email messages, or as physical prints. This all-in-one software even has me reaching for Photoshop less and less. The latest upgrade to 3.0 includes some really nice features and I am still learning some of the many features found in Lightroom.

The rounded corners tip makes for some interesting prints or photos to display on the web. You can learn the steps to make your own rounded corners by checking out Matt Kloskowski’s blog.

Here is my example of Matt’s tip. Pretty cool, huh? And all done in Lightroom.

I Like Lightroom 3.0

Two years ago, my good friend Dick McCreight, convinced me to download the trial version of Lightroom 2.0. I was hesitant because I had just starting using another software to manage my photos and I was not eager to shell out more money for another program. But after installing and trying the trail version of Lightroom I was absolutely sold. It also didn’t hurt that Dick is a guru with this software! Just watching him move around the computer screen and edit his photos was breathtaking for me. I still remember that day sitting in his office and watching in total disbelief at what this powerful software can do.

Now, two years later, I upgraded to version 3.0 and I couldn’t be happier. This software still rocks and has improved in some amazing ways over the previous version. The photo you see below was completely edited in Lightroom 3.0. I love the photo management that this software provides and I am slowly learning more and more about all the powerful editing features as well. Did I say Lightroom rocks? Well, it does!

My Photography Workflow

After writing yesterday’s blog entry, it occurred to me that it might be worthwhile to explain my photography workflow in more detail. We all have our patterns, habits, and preferences. There is no right or wrong way to take our photos from our cameras to the end product, but some methods are easier than others. I do not believe my process is the only way or even the best way; it is just what I currently use after many years of experimentation and some trail and error.

I prefer using Adobe Lightroom for my photo management and editing software. Here is the workflow that I am currently using on every photo shoot.

First, I use a card reader to copy the photos into my laptop when on photo trips or my desktop when I am home. I copy the photos into the DNG format on import. Yes, this takes time, but the file sizes of DNG are smaller and you either have to convert now or do it later. On import I also rename each photo according to this format: date-sequence. So, for example, if I have a photo shoot today, I will create the import format to be 20100821-1, with the last number moving up sequentially for each photo. I will also add any general keywords that apply to all these photos. I have a Drobo so I import the photos directly to that physical drive and place all the photos in a folder named “Photographs.” I will assign a new folder name for the import by using the name of the photo shoot followed by the date. I like using the name of the photo shoot first, which is a change for me. I used to use just the date of the shoot, but that was not descriptive to me, so now I assign a name for each photo shoot to the folder name first. I also set up and use a saved metadata preset to assign copyright information, etc.

Once the photos are sitting in Lightroom, I then go through the photos to find the keepers. My process works like this. I enlarge the photo in the Library Module so I am only seeing one photo at a time. I use the right arrow to move to the next photo. When I come across a photo that I want to mark as a keeper, I press the “P” key to “pick” that photo. I have Lightroom set up to then advance automatically if I do press the “P” key. This feature of advancing to the next photo automatically when the photo is picked helps to move the process forward quickly. To set up the auto advance feature, click on “Photo” on the top menu and click on “Auto Advance.” I can quickly go through my whole shoot just picking the photos I want to mark as my keepers.

Once I go through all my photos I then create a collection just of these keepers. I may want to create a web gallery or slideshow of these photos, so I make the collection now. Then I go through the photos in this newly created collection. I am now looking for what I call the “Best of the Best” photos. These are the ones that make the final cut and ones I will show to clients, colleagues, or friends. These select photos need to be representative of my very best work so I am brutally hard with this part of the process. I will go through each photo again, carefully examining the composition, colors, exposure, lines, and other details. When I come to a photo that makes this final cut I then assign it a star rating. Usually these select photos get either 4 or 5 stars depending how on the strength of the photograph.

Now I will use these “Best of the Best” to post on my blog, use as initial proofs with a client, post to my website, or share in any number of ways. I often post all the photos in the collection if I have done a sports event because everyone likes to see their player in action. But if I am sharing photos in other ways I try to stick with just showing the “Best of the Best” photos from each shoot. Creating the web galleries, even with PayPal features, or creating slideshows are all very easy from within the newly created collection.

Sometimes I use color labels for specific reasons. I use a red label if I know a photo needs editing. The red label reminds me that I still have work to do on this photograph. I also sometimes use green labels to mark photos that I want to use for a photo book. And I use blue labels for photos that I want to use in a web gallery. I recently found a great feature in Lightroom that helps me use these color labels but without seeing the whole frame around the photo in that color. Having a photo surrounded in color can make that photo look different than when it is against a neutral background. So here is what I learned to do. Go to Grid View Options and deselect the “Tint grid cells with label colors” in the Options panel. Now go to the bottom of this same screen and select “Include Color Label.” This results in a small color swatch appearing beside the start ratings at the bottom of each photo in the Grid View instead of having that color surrounding the whole photo. Pretty cool, huh?

If this specific photo shoot was away from home, I will then import the Lightroom Catalog to my desktop computer so I retain all the picks, edits, and other changes I made in the field.

So this is the workflow I am currently using. What do you think? Does it make sense? Is there anything I am missing? How can this process be enhance and improved? What do you do in your workflow process? Please share your thoughts because we always learn more together than we ever learn alone!

These Photos Didn’t Quite Make the Cut

I enjoy the editing process of photography. After an event or outdoor photo shoot, I come back to my studio to edit the photos and see just what I captured. The first part of the process for me is picking the best photos. I use Lightroom 3.0 now and have learned how to quickly go through a large number of photographs and select the best ones. I mark them as picked by pressing the “P” key. Then I go back over these selected photos again to really narrow down the very best of the best. I mark these with a green label and then give them a star rating depending on the strength of each individual photo.

Last week I came home and had 72 photos that I picked and then narrowed this down to 11 of what I considered to be the best of the best of this photo shoot. These are the ones I show on my website, to colleagues, and to friends. Most of my friends don’t have the patience or willingness to sit through a slide show of all the photos I took or even the ones I think are the best. Showing our best work is an important part of the editing process.

I make sure to take the time to edit my picked photos and spend a little extra editing time with the best of the best, which are going to be seen by others. I am quite picky in this process but then I expect big things of my photography. Sadly, this means there are many photos that almost make this selection process but are just out of reach to making the best of the best category.

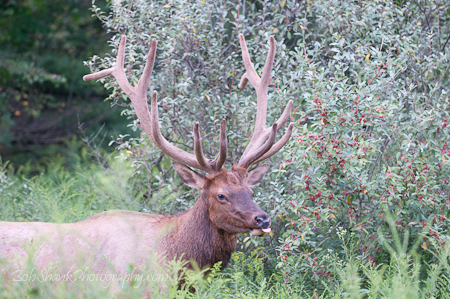
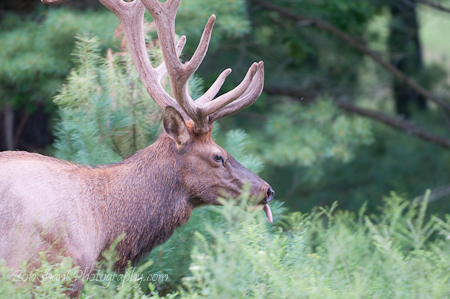
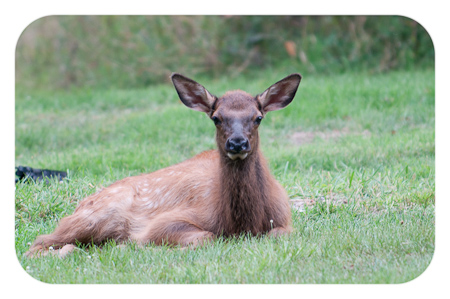
Here are three examples. The first one was very close to being selected, but I just didn’t feel the colors were quite right and I wished I had more of this eating bull in the image. It’s close, but didn’t make my final cut. The second one was also close to making it. I really liked how we can see the bull’s tongue coming out of his mouth in this photo, but again the colors were kind of flat. (The light wasn’t very good that evening.) It was just shy of impressing me enough to be picked as the best of the best. The third image has some weeds in-between the camera and the bull. This was distracting enough to be the worst of these three and not good enough to make the final cut. I certainly won’t trash these photos, but they just didn’t quite make the final cut.

Before and After

Adobe Lightroom 2 is some awesome software! It catalogs my photographs, tracks keywords, and allows me to sort through or find the exact photo I am looking for with just a few clicks or filter parameters. The Library Module alone is worth the price of  this photo software. Frankly I believe there is no easier cataloging software on the market than Lightroom.

Now enter the Develop Module. With the upgrade to 2.x, Lightroom jumped leap years ahead because now localized editing is now possible. The paintbrush and graduated density filter are just two tools that take advantage of local edits. In just a little time the user can be correcting white balance, adjusting the exposure, and cropping to a pleasing ratio. It is amazing!

Take a look at these two photos. The first one was right out of the camera as it was imported into Lightroom. The second photo was after just a few quick edits. What do you think? Doesn’t Lightroom rock?

Taking Care of Business

I have a lot of photo editing to do tonight, so this will be a brief blog entry. Editing photos can be a time consuming process but today’s software makes it a breeze. Adobe Lightroom is my all-time favorite photo software right now. It not only excels at managing my collection of photos, but I can also change the White Balance, adjust the exposure, and even touch up part of a photo with the adjustment brush. It is some sweet software!

I still have to use Photoshop every now and then. It is very powerful and useful. The resulting images are so much more clear than back in the old film days. Just compare a scanned slide image next to one taken with a digital camera. It is amazing!

Ok, I really have to get back to my photo editing job. Good night!